In today’s fast-paced digital environment, managing multiple open applications and windows can quickly lead to a cluttered and overwhelming desktop. This is where virtual desktops, also known as multiple desktops or Task View, become incredibly useful in Windows 11. They allow you to create separate, organized workspaces for different tasks or projects, effectively giving you more screen real estate without needing extra monitors.
The concept of virtual desktops isn’t new. It has been a staple feature in Linux environments for decades and a popular add-on utility for Windows users long before Microsoft integrated it natively. Microsoft first introduced its official Virtual Desktops feature in Windows 10 as part of its “Task View.” With Windows 11, this feature received a significant visual and functional overhaul, making it more intuitive, customizable, and visually appealing, aligning with Windows 11’s focus on productivity and a cleaner user interface.
Learning to effectively use virtual desktops can significantly boost your productivity, reduce clutter, and help you focus on one task at a time. This guide will walk you through everything you need to know about using virtual desktops in Windows 11.
Understanding Virtual Desktops
Imagine having multiple physical monitors, each dedicated to a different set of tasks, but all on your single screen. That’s essentially what virtual desktops offer. Each virtual desktop is an independent workspace where you can open specific applications. For example:
- Desktop 1: For work (e.g., email, word processor, spreadsheets).
- Desktop 2: For personal Browse (e.g., social media, news sites).
- Desktop 3: For creative projects (e.g., photo editor, design software).
Switching between these desktops is quick and seamless, allowing you to instantly move from one context to another without minimizing or maximizing countless windows.
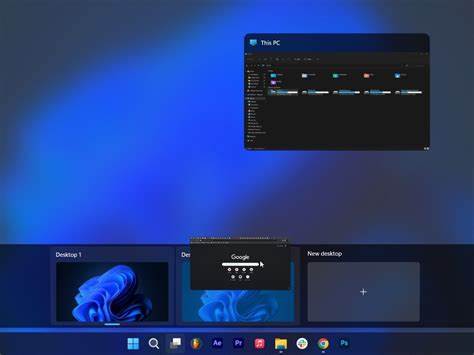
Accessing Task View (Virtual Desktops Hub)
The Task View button is your gateway to managing virtual desktops.
- Locate the Task View Icon:
- The Task View icon looks like two overlapping squares. It’s typically located on your Taskbar, usually to the right of the Start button and Search icon.
- If you don’t see it, right-click an empty space on the Taskbar, select “Taskbar settings,” and ensure “Task View” is toggled On.
- Click the Icon: Click the Task View icon on the Taskbar. This will open an overlay showing all your open windows and your current virtual desktops at the bottom.
Creating New Virtual Desktops
You can easily create as many virtual desktops as you need.
- Using the Task View Icon:
- Click the Task View icon on the Taskbar.
- At the bottom of the screen, you’ll see a row of your current desktops. Click “+ New desktop” (or the plus sign with a desktop icon).
- A new, empty virtual desktop will appear in the row.
- Using Keyboard Shortcut:
- Press Windows key + Ctrl + D.
- This immediately creates a new virtual desktop and switches you to it. This is a very quick way to get a clean slate for a new task.
Switching Between Virtual Desktops
Seamless navigation is key to productivity with virtual desktops.
- Using Task View:
- Click the Task View icon on the Taskbar.
- Click on the thumbnail of the virtual desktop you want to switch to in the row at the bottom.
- Using Keyboard Shortcuts:
- Press Windows key + Ctrl + Left Arrow to switch to the desktop on the left.
- Press Windows key + Ctrl + Right Arrow to switch to the desktop on the right.
- This is the fastest and most efficient way to navigate if you have multiple desktops.
Moving Applications Between Virtual Desktops
You’re not stuck with applications on the desktop where they were opened. You can move them easily.
- Using Task View:
- Click the Task View icon.
- Hover your mouse over the application window you want to move.
- Drag and Drop: Click and drag the application’s thumbnail directly onto the thumbnail of the target virtual desktop in the row at the bottom.
- Right-Click: Alternatively, right-click on the application’s thumbnail, select “Move to,” and then choose the target virtual desktop (e.g., “Desktop 2”) or “New desktop” to move it to a newly created one.
Customizing Virtual Desktops
Windows 11 introduced some welcome customization options for your virtual desktops.
- Rename a Desktop:
- Click the Task View icon.
- Hover your mouse over the virtual desktop’s thumbnail in the row at the bottom.
- Right-click on the thumbnail and select “Rename.”
- Type a new name (e.g., “Work,” “Personal,” “Gaming”) and press Enter. This makes organization much clearer.
- Change Desktop Background:
- Click the Task View icon.
- Hover your mouse over the virtual desktop’s thumbnail.
- Right-click on the thumbnail and select “Choose background.”
- This will open the Personalization settings specifically for that desktop’s background. You can choose a different picture, solid color, or slideshow. This visual distinction can help you quickly identify which desktop you’re on.
- Rearrange Desktops:
- Click the Task View icon.
- Click and drag a virtual desktop’s thumbnail in the bottom row to rearrange its order. This can be useful if you prefer a specific flow for your workspaces.
Closing Virtual Desktops
When you’re done with a virtual desktop, you can close it.
- Using Task View:
- Click the Task View icon.
- Hover your mouse over the virtual desktop’s thumbnail you want to close in the row at the bottom.
- Click the “X” icon that appears in the top-right corner of the thumbnail.
- Using Keyboard Shortcut:
- Switch to the virtual desktop you want to close.
- Press Windows key + Ctrl + F4.
- Important Note: When you close a virtual desktop, any open applications on that desktop will automatically move to the adjacent virtual desktop (usually the one on the left). They will not be closed.
Settings for Virtual Desktops
You can fine-tune how virtual desktops behave in Windows 11 settings.
- Open Settings: Press Windows key + I.
- Navigate to Multitasking: Go to System > Multitasking.
- Adjust Desktop Behaviors:
- “Desktops” section:
- “Show my open windows on the Taskbar”:
- “On all desktops”: This will show all open application icons on your taskbar, regardless of which desktop they are on. This can be useful if you often switch between apps on different desktops.
- “On the desktop I’m using”: This is the default. Only shows icons for apps open on your current desktop. This helps maintain a clean taskbar for each workspace.
- “Show all open windows when I press Alt + Tab”:
- “On all desktops”: Alt + Tab will show all open windows across all your virtual desktops.
- “On the desktop I’m using”: Alt + Tab will only show windows open on your current virtual desktop. This is often preferred for focus.
- “Show my open windows on the Taskbar”:
- “Desktops” section:
Experiment with these settings to find what works best for your workflow. For many users, keeping the default “On the desktop I’m using” for both is ideal for maintaining focus within each distinct workspace.
Tips for Maximizing Productivity with Virtual Desktops
- Organize by Task/Project: Dedicate separate desktops to different aspects of your life – one for work, one for personal Browse, one for a specific project, etc. This helps you mentally switch gears.
- Use Distinct Backgrounds: Assign unique backgrounds to each virtual desktop. This provides a quick visual cue as to which workspace you’re currently in.
- Master Keyboard Shortcuts: The Windows key + Ctrl + Left/Right Arrow shortcuts are game-changers. Practicing them will make switching between desktops incredibly fluid.
- Persistent Applications: If you have an application you need on every desktop (e.g., your chat app or email client), you can right-click its thumbnail in Task View and select “Show this window on all desktops.”
- Drag & Drop to Taskbar: In Task View, you can also drag an application’s thumbnail directly onto the Taskbar to pin it or rearrange it, just like you would on your main desktop.
By integrating virtual desktops into your daily workflow, you can transform a chaotic single screen into a highly organized and efficient multi-workspace environment, making your Windows 11 experience significantly more productive and enjoyable.
Frequently Asked Questions (FAQ)
Q1: How many virtual desktops can I create in Windows 11?
While there isn’t a strict hard limit, the practical limit is usually dictated by your system’s RAM and CPU. You can create many virtual desktops, but having too many open applications across them will still consume system resources and can slow down your PC, just as if they were all on a single desktop. Most users find 3-5 desktops sufficient for effective organization.
Q2: Do applications close when I close a virtual desktop?
No, when you close a virtual desktop in Windows 11, any open applications on that desktop will automatically move to the adjacent virtual desktop (usually the one to its left). The applications themselves are not closed or minimized.
Q3: Can I set a different wallpaper for each virtual desktop?
Yes, Windows 11 allows you to set a different background/wallpaper for each virtual desktop. This is a great way to visually differentiate your workspaces. You can do this by right-clicking the desktop’s thumbnail in Task View and selecting “Choose background.”
Q4: What’s the fastest way to switch between virtual desktops?
The fastest way to switch between virtual desktops is by using the keyboard shortcuts: Windows key + Ctrl + Left Arrow to go left and Windows key + Ctrl + Right Arrow to go right.
Q5: Can I move a specific application to a new virtual desktop directly?
Yes, when you’re in the Task View (by clicking the icon or pressing Windows key + Tab), you can drag an application’s window thumbnail directly onto the “+ New desktop” button at the bottom, or onto an existing virtual desktop’s thumbnail, to move it there. You can also right-click an application’s thumbnail and use the “Move to” option.