Author: Oliver

  • How to Change Folder Icon to Emoji in Windows

    How to Change Folder Icon to Emoji in Windows

    In the modern digital landscape, emojis have become a universal language, adding personality and clarity to our communications. While they are ubiquitous in messaging apps and social media, many users wish to extend their expressive power to their desktop environment. Specifically, the desire to change folder icons to emojis in Windows has grown, offering a unique way to personalize and visually organize your files.

    Standard folder icons in Windows, while functional, can often appear uniform and uninspiring, especially when you have many folders. Imagine having a folder for “Photos” with a emoji, or a “Work” folder with a , or a “Games” folder with a . This not only makes your desktop more visually appealing but also significantly improves at-a-glance recognition, helping you navigate your files faster.

    The concept of customizing icons in Windows has been around for a long time, evolving from simple .ico files to more dynamic options. While Windows doesn’t natively offer a direct “emoji” picker for folder icons, there’s a clever workaround that leverages the system’s ability to display emojis in text fields. This method involves creating a custom folder name that looks like an emoji icon by embedding the emoji directly into the folder’s name, then using a specific feature to make that name the primary visual.

    This guide will walk you through the precise steps to change folder icon to emoji in Windows, transforming your ordinary folders into visually distinctive and expressive elements of your operating system.

    Method 1: The Emoji Folder Name Workaround

    This is the most common and effective method to make a folder appear as an emoji icon. It relies on placing the emoji directly into the folder’s name and then making that name appear as the primary display.

    Step 1: Prepare Your Emoji

    First, you need to access the emoji you want to use.

    1. Open the Emoji Panel:
      • Press Windows key + . (period) or Windows key + ; (semicolon) simultaneously. This will open the Windows Emoji Panel.
    2. Select Your Emoji:
      • Browse through the categories or use the search bar to find the desired emoji (e.g., for Music, for Documents).
      • Click on the emoji to insert it into a text field. For this method, you can insert it into a Notepad document or directly into the folder name (as described below).
    3. Copy the Emoji: If you inserted it into Notepad, select the emoji and press Ctrl + C to copy it.

    Step 2: Rename Your Folder with the Emoji

    Now, apply the emoji to your folder’s name.

    1. Locate the Target Folder: Navigate to the folder you wish to change.
    2. Rename the Folder:
      • Right-click on the folder and select “Rename” (or press F2).
      • Delete the existing folder name.
      • Paste the copied emoji (Ctrl + V) into the name field.
      • You can add a space after the emoji, or even some text if you prefer (e.g., Music”). However, for the most “icon-like” appearance, just the emoji is best.
      • Press Enter to confirm the new name.

    You’ll now see the folder named with the emoji. However, the standard yellow folder icon is still present.

    Step 3: Change the Folder Icon to be Invisible

    This is the crucial step to make the default folder icon disappear, leaving only your emoji name visible.

    1. Open Folder Properties:
      • Right-click on the newly renamed folder (with the emoji name).
      • Select “Properties”.
    2. Navigate to Customize Tab:
      • In the Properties window, click on the “Customize” tab.
    3. Change Folder Icons:
      • Under the “Folder icons” section, click the “Change Icon…” button.
    4. Select an Invisible Icon:
      • In the “Change Icon for [Folder Name]” window, you will see a variety of default Windows icons.
      • Scroll horizontally until you find a series of blank/invisible icons. These usually appear as empty spaces among the visible icons. There are typically four such invisible icons grouped together.
      • Select one of these blank icons.
      • Click “OK”.
    5. Apply Changes:
      • Back in the folder’s Properties window, click “Apply” and then “OK”.

    Your folder’s visual representation should now be just the emoji you chose, making it look like the emoji itself is the icon!

    Method 2: Using Custom Icon Files for Emojis (More Robust)

    While Method 1 is clever, it relies on the emoji being part of the folder name, which might not be ideal for all scenarios (e.g., if you need a very specific icon and text name). For a more traditional icon change where the emoji is the icon, you’ll need to convert an emoji image into a compatible .ico file. This offers more flexibility in choosing the precise emoji rendition and maintaining a separate folder name.

    Step 1: Obtain Your Emoji Image

    1. Find a High-Quality Emoji: Search online for the emoji you want (e.g., “high quality emoji PNG”). Look for a clear, transparent background image. Websites like Emojipedia or various icon libraries can be good sources.
    2. Save the Image: Download the emoji image as a PNG file, ideally with a transparent background.

    Step 2: Convert the Emoji Image to an ICO File

    Windows folder icons require the .ico file format. You’ll need an online converter or a dedicated image editing tool.

    1. Use an Online ICO Converter:
      • Go to a reliable online image-to-ICO converter website (e.g., https://www.google.com/search?q=ICOConvert.com, Favicon.io, Convertio.co).
      • Upload your saved PNG emoji image.
      • Ensure you select appropriate sizes (e.g., 256×256, 48×48, 32×32, 16×16) to ensure the icon looks good at different view levels.
      • Download the generated .ico file.
    2. Save the ICO File: Save the .ico file to a permanent and safe location on your computer (e.g., C:\Icons or a dedicated folder in your Documents). Do not save it inside the folder you plan to apply the icon to, as moving or deleting it later will break the icon.

    Step 3: Apply the Custom ICO File to Your Folder

    1. Locate the Target Folder: Navigate to the folder whose icon you want to change.
    2. Open Folder Properties:
      • Right-click on the folder.
      • Select “Properties”.
    3. Navigate to Customize Tab:
      • In the Properties window, click on the “Customize” tab.
    4. Change Folder Icons:
      • Under the “Folder icons” section, click the “Change Icon…” button.
    5. Browse for Your ICO File:
      • In the “Change Icon for [Folder Name]” window, click “Browse…”.
      • Navigate to the location where you saved your custom .ico file.
      • Select the .ico file and click “Open”.
    6. Apply Changes:
      • Back in the “Change Icon for [Folder Name]” window, click “OK”.
      • In the folder’s Properties window, click “Apply” and then “OK”.

    Your folder will now display the emoji from your custom ICO file as its icon, while maintaining its original name.

    Important Considerations for Emoji Folder Icons

    • Visibility at Different Sizes: Emojis are designed for digital displays, and their appearance can vary. Ensure the emoji looks good when the folder icon is viewed at different sizes (e.g., large icons, medium icons, small icons) in File Explorer.
    • System Updates: Major Windows updates generally don’t revert custom folder icons, but it’s always good practice to keep your custom .ico files in a safe, unchanging location.
    • File Location: For Method 2, if you move or delete the .ico file after applying it, the folder icon will revert to its default. Keep your .ico files in a dedicated, static folder.
    • Dark Mode vs. Light Mode: Most emojis are designed with a consistent appearance across different themes. However, be aware of how your chosen emoji might contrast or blend with your selected Windows theme.
    • Accessibility: While emojis add visual flair, ensure that your folder organization remains clear and accessible, especially if multiple users interact with the system.

    Troubleshooting Tips

    • Icon Not Changing Immediately: Sometimes, the icon change doesn’t reflect immediately. Try pressing F5 to refresh File Explorer. If that doesn’t work, restart File Explorer (via Task Manager) or simply restart your computer.
    • Emoji Not Displaying Correctly (Method 1): Ensure your Windows installation has up-to-date emoji fonts. Windows 10 and 11 generally handle emojis well, but older or corrupted font caches could cause issues.
    • Invisible Icon Problem (Method 1): Double-check that you selected one of the truly blank icons in the system icons list. There are usually four adjacent blank spots.

    Conclusion

    Customizing your folder icons with emojis in Windows is a simple yet impactful way to inject personality and improve the visual organization of your digital workspace. Whether you prefer the clever emoji-as-name workaround or the more robust custom .ico file method, these steps empower you to transform your mundane folders into expressive and easily identifiable elements. By following this guide, you can confidently change folder icon to emoji in Windows, making your computing experience more visually engaging and efficient.

    Frequently Asked Questions (FAQ)

    Q1: Can I really use any emoji as a folder icon in Windows?

    Yes, almost any emoji available in the Windows Emoji Panel can be used. For Method 1 (emoji in the name), the emoji will appear as text. For Method 2 (custom .ico file), you’ll need an image of the emoji that can be converted to an .ico format.

    Q2: What’s the easiest way to get an emoji to use for my folder icon?

    The easiest way is to press Windows key + . (period) or Windows key + ; (semicolon) to open the Windows Emoji Panel. You can then search for and copy the emoji you want directly.

    Q3: My folder icon isn’t changing. What should I do?

    First, try refreshing File Explorer by pressing F5. If that doesn’t work, close and reopen File Explorer. In some cases, a full restart of your computer might be necessary for the changes to take effect, especially after making custom icon changes.

    Q4: Will using emojis as folder icons slow down my computer?

    No, changing folder icons to emojis (or any custom icon) has a negligible impact on system performance. It’s a purely visual customization.

    Q5: What happens if I move the .ico file I used for a custom emoji icon?

    If you move or delete the .ico file that you used for a custom folder icon, the folder’s icon will revert to the default yellow folder icon. It’s crucial to store your custom .ico files in a stable and permanent location on your drive.

    Q6: Can I use this method for system folders like “Documents” or “Downloads”?

    Yes, these methods work for most user-created folders and even default library folders (like Documents, Downloads, Pictures). Right-click the folder, go to “Properties,” and then the “Customize” tab.

    Q7: Is it possible to revert a folder icon back to its default?

    Yes. Right-click the folder, go to “Properties” > “Customize” > “Change Icon…”, and then click the “Restore Defaults” button. Click “OK” and “Apply” to revert the icon.

    Q8: Why does the “Change Icon” window show blank spaces?

    The blank spaces in the “Change Icon” window are actually hidden, transparent icons. These are what you select in Method 1 to make the default yellow folder icon invisible, allowing your emoji name to stand out as the primary visual element.

  • How to Disable Webcam in Windows Permanently

    How to Disable Webcam in Windows Permanently

    In today’s digital age, the webcam has become an indispensable tool for communication, from video calls with family to remote work meetings. However, the presence of a built-in camera also raises significant privacy concerns. Cases of webcam hacking (known as camfecting), where malicious software or unauthorized individuals gain control of your webcam without your knowledge, are a real threat. These compromises can lead to unauthorized surveillance, blackmail, or data theft.

    For users who prioritize privacy and only use an external webcam when absolutely necessary, or for those concerned about potential exploits, disabling the built-in webcam permanently offers peace of mind. While Windows provides granular controls over which applications can access your camera, completely disabling it at a system level or physically blocking it offers the strongest safeguards against unauthorized access.

    The concern over webcam privacy isn’t new. Early webcams, often external peripherals, could simply be unplugged. With the rise of integrated webcams in laptops, the debate shifted to software controls and physical covers. High-profile incidents involving compromised webcams have only heightened awareness, leading to features like activity indicator lights and stricter operating system permissions in Microsoft Windows to give users more control over their visual privacy.

    How to Disable Your Webcam in Windows Permanently

    Permanently disabling your webcam in Windows involves a combination of software and, for ultimate security, physical methods. We’ll explore the most effective ways to achieve this.

    Method 1: Disable in Device Manager (Software-Based Disabling)

    Disabling your webcam in Device Manager tells Windows to effectively “turn off” the hardware component. This is reversible.

    Step 1: Open Device Manager

    • Action:
      • Press Windows key + X to open the Quick Link menu.
      • Select Device Manager.
      • Alternatively, search for “Device Manager” in the Start menu and open it.

    Step 2: Locate Your Webcam

    • Action: In the Device Manager window, expand the category labeled “Cameras” or “Imaging devices.”
    • You should see your built-in webcam listed (e.g., “Integrated Webcam,” “HP Webcam,” “Lenovo EasyCamera,” “USB Camera”).
    • Action: If you have multiple devices listed, identify the correct one. If unsure, right-click and choose “Properties” to view details.

    Step 3: Disable the Webcam Device

    • Action: Right-click on your webcam device.
    • Select “Disable device.”
    • Action: A warning message will appear, stating that disabling the device will stop it from functioning. Click “Yes” to confirm.
    • Action: The webcam entry will now have a small down arrow icon next to it, indicating it’s disabled.
    • Action: Restart your PC to ensure the changes take full effect.

    How to Re-enable (if needed): Follow the same steps, but right-click on the disabled webcam and select “Enable device.”

    Method 2: Adjust Camera Privacy Settings (App-Specific Control)

    While not a full “permanent disable” of the hardware, these settings prevent applications from accessing your camera. This is an important layer of security, even if you’ve disabled the camera in Device Manager.

    Step 1: Access Camera Privacy Settings

    • Action:
      • Click the Start button (Windows icon).
      • Click on the Settings gear icon.
      • In the left-hand pane, click “Privacy & security.”
      • In the right-hand pane, scroll down to “App permissions” and click “Camera.”

    Step 2: Turn Off Camera Access

    • Action: At the top of the “Camera” privacy settings, you’ll see “Camera access.” Toggle this switch to “Off.” This immediately prevents all apps on your device from accessing the camera.
    • Optional: Granular Control (if Camera access is On): If you prefer to keep general camera access on but control individual apps:
      • Scroll down to Let apps access your camera” and toggle it off for specific applications.
      • Similarly, review “Desktop apps access your camera” and individually toggle off apps here.
    • Action: This provides a software-level block for camera access by applications.

    Method 3: Uninstall Webcam Drivers (More Persistent Software Disable)

    Uninstalling the drivers makes Windows unable to recognize or use the webcam until new drivers are installed or re-detected. This is more persistent than simply disabling the device.

    Step 1: Open Device Manager

    • Action: Follow Step 1 from Method 1 (Right-click Start > Device Manager).

    Step 2: Locate and Uninstall Webcam Driver

    • Action: Expand “Cameras” or “Imaging devices” and right-click on your webcam.
    • Select “Uninstall device.
    • Action: In the confirmation dialog, you might see a checkbox that says “Attempt to remove the driver for this device.” Check this box if you want to ensure the driver software is removed.
    • Click Uninstall.”
    • Action: Restart your PC. The webcam should no longer appear in Device Manager (or appear as an unknown device without a driver) and should be unusable.

    How to Re-enable (if needed):

    • If you did not check the “Attempt to remove the driver” box, restarting your PC might automatically reinstall the driver.
    • If you did check the box, you’ll need to manually install the driver. Go to Device Manager, click “Action” > “Scan for hardware changes.” If that doesn’t work, you’ll need to visit your laptop manufacturer’s website to download and install the specific webcam driver for your model.

    Method 4: Physical Webcam Cover or Disconnection (Most Permanent and Secure)

    For absolute peace of mind against digital intrusion, a physical barrier is the most foolproof method.

    • Option A: Physical Webcam Cover:
      • Action: Purchase a small, thin webcam cover that slides open and closed. These are inexpensive and widely available online.
      • Application: Adhere it directly over your laptop’s built-in webcam lens.
    • Option B: Disconnect Internal Cable (Advanced – Not Recommended for Average User):
      • Warning: This method requires opening your laptop and potentially voids your warranty. It should only be attempted by experienced users comfortable with hardware modifications. Incorrect disassembly can damage your laptop.
      • Action: If you are technically proficient, you can open your laptop and locate the webcam cable (usually a small, thin cable running from the display assembly to the motherboard). Carefully disconnect it.
    • Action: A physical cover is the simplest and safest “permanent” solution for most users.

    Recommendations for Permanence and Security:

    For the most robust protection:

    1. Start with Method 1 (Disable in Device Manager): This is the easiest and generally effective software method.
    2. Combine with Method 2 (Camera Privacy Settings): This adds an extra layer of software protection by controlling app access.
    3. For maximum peace of mind, add Method 4 (Physical Webcam Cover): This completely negates any software vulnerabilities or driver re-installations. Even if malware bypasses software controls, it cannot see through a physical cover.

    Frequently Asked Questions (FAQ)

    Q1: Is disabling my webcam in Device Manager truly permanent?

    Disabling in Device Manager is a software-based disable. It’s persistent across restarts. However, Windows updates or manual driver installations can sometimes re-enable it. For complete permanence without physical intervention, you’d need to uninstall the drivers and ensure Windows doesn’t automatically reinstall them (which is harder).

    Q2: Will uninstalling the webcam driver completely remove my webcam functionality?

    Yes, uninstalling the driver effectively removes the software that allows your webcam to function. Your operating system won’t know how to communicate with the hardware. However, Windows might automatically detect and reinstall the driver upon a reboot or update. To prevent this, you might need to use a dedicated driver uninstaller or block driver updates for that specific device (more complex).

    Q3: Can a hacker enable my webcam if I’ve disabled it in Device Manager?

    It’s significantly harder. Disabling in Device Manager is a strong deterrent. However, highly sophisticated malware or rootkits might theoretically attempt to re-enable devices or install their own drivers. This is why a physical webcam cover is often recommended for maximum security, as it provides an undeniable physical barrier.

    Q4: Is it safe to just put tape over my laptop’s webcam?

    Yes, placing opaque tape (like electrical tape) or a sticky note over your webcam lens is a simple, effective, and completely safe physical solution. Just ensure it doesn’t leave adhesive residue on the lens itself. Thin sliding webcam covers are a more elegant solution.

    Q5: What is “camfecting”?

    Camfecting is the act of hacking into a person’s webcam and controlling it remotely without their knowledge or consent. It’s a serious privacy invasion often used for surveillance or blackmail, typically achieved through malware (like Trojans or spyware).

    Q6: Does disabling the webcam impact other laptop functions?

    No. Disabling the webcam specifically affects only the camera functionality. Other laptop functions like the microphone, speakers, display, or general system performance will remain unaffected. If you use an external USB webcam, disabling the built-in one will not affect the external one.

  • How to Back up Files Using File History in Windows

    How to Back up Files Using File History in Windows

    Protecting your valuable digital assets is paramount. File History is a powerful, built-in Windows feature that provides an automatic way to back up personal files and their different versions to an external drive. This means if you accidentally delete a file, save over an important document, or your hard drive fails, you can easily restore previous versions or recover lost data.

    Understanding File History

    File History operates by periodically scanning specific folders (like your Libraries, Desktop, Contacts, Favorites) and backing up any changes to a designated external drive (USB drive, external hard drive, or network location). It saves multiple versions of your files, allowing you to go back to a specific point in time to retrieve an older iteration of a document or a file that was deleted. It’s not a full system image backup, but rather a robust solution for your personal data.

    Step 1: Connect an External Drive

    File History requires a dedicated external drive to store your backups. This can be:

    • A USB flash drive (for smaller backups, typically documents).
    • An external hard drive (recommended for comprehensive backups of photos, videos, and documents).
    • A network drive or shared folder (if available on your home network).
    1. Connect Drive: Plug your chosen external drive into your Windows PC’s USB port or ensure your network drive is accessible.
    2. Verify Recognition: Confirm that Windows recognizes the drive and it appears in File Explorer.

    Step 2: Access File History Settings

    The way to access File History settings varies slightly between Windows 10 and Windows 11.

    Method A: For Windows 11

    1. Open Settings: Click the Start button and then the gear icon for Settings, or press Windows key + I.
    2. Navigate to Storage: In the Settings window, go to “System” > “Storage.”
    3. Open Advanced Storage Settings: Scroll down and click on “Advanced storage settings.”
    4. Find Backup Options: Click on “Backup options.”
    5. Access File History: Under “Looking for an older backup?” (or similar), click “Go to Backup and Restore (Windows 7)” or look for a direct link to File History settings. Note: In Windows 11, Microsoft has moved File History to a less prominent location, often encouraging OneDrive backup instead. You might need to use the Control Panel method below for direct access.

    Method B: For Windows 10 & Universal Control Panel Access

    This method works for both Windows 10 and Windows 11 by accessing the classic Control Panel.

    1. Open Control Panel:
      • Search: Click the Start button or Search icon on your taskbar, type “Control Panel,” and select it.
      • Run Command: Press Windows key + R, type control, and press Enter.
    2. Set View By: In Control Panel, set “View by:” to “Large icons” or “Small icons” (if it’s not already).
    3. Find File History: Click on “File History.”

    Step 3: Turn On File History and Select Drive

    Once you are in the File History Control Panel window:

    1. Check Status: You’ll see if File History is currently “On” or “Off.”
    2. Select Drive:
      • If it’s “Off,” you’ll likely see your connected external drive listed under “Select a drive.” Click on it to select.
      • If multiple drives are connected or you want to use a network location, click “Select drive” in the left-hand pane. Choose your desired drive and click “OK.”
    3. Turn On: Click the “Turn on” button.
      • File History will immediately begin its first backup of your selected folders. The time this takes depends on the amount of data.

    Step 4: Configure What Files Are Backed Up (Optional)

    By default, File History backs up your personal folders within your user profile, such as:

    • Desktop
    • Documents
    • Downloads
    • Music
    • Pictures
    • Videos
    • OneDrive (if configured to sync files locally)
    • Saved Games
    • Contacts
    • Favorites

    You can customize which folders are included or excluded.

    1. Exclude Folders: In the File History Control Panel window, click “Exclude folders” in the left-hand pane.
    2. Add/Remove Folders:
      • Click “Add” to browse for and select folders you don’t want to back up.
      • Select a folder from the list and click “Remove” if you change your mind.
    3. Save Changes: Click “Save changes.”

    Step 5: Adjust Advanced Settings (Optional)

    You can fine-tune how File History operates.

    1. Advanced Settings: In the File History Control Panel window, click “Advanced settings” in the left-hand pane.
    2. Configure Backup Frequency:
      • Save copies of files:” Use this drop-down to choose how often File History backs up changes (e.g., every 10 minutes, hourly, daily). More frequent backups offer better protection but use more space.
    3. Configure Retention Period:
      • Keep saved versions:” Use this drop-down to select how long File History keeps old versions of your files (e.g., “Until space is needed,” “1 month,” “Forever”). “Until space is needed” is the default and usually sufficient, as it deletes the oldest versions when the drive fills up.
    4. Other Options: You might also find options to clean up versions or change user account settings if you share the computer.
    5. Save Changes: Click “Save changes” or “OK.”

    Step 6: Restore Files Using File History

    This is where your backups pay off. You can restore individual files, entire folders, or all your backed-up data.

    Option A: Restore a Specific File/Folder

    1. Open File History Restore Interface:
      • Search: Click Start, type “Restore your files with File History,” and select the app.
      • Control Panel: Go to Control Panel > File History, then click “Restore personal files” in the left-hand pane.
    2. Browse for Files:
      • The File History window will open, showing you the folders that are being backed up.
      • Navigate to the folder containing the file or subfolder you want to restore.
    3. View Previous Versions:
      • Use the left and right arrows at the bottom of the window to browse through different backup dates and times. As you move through time, you’ll see the state of your files and folders at that particular backup point.
      • When you find the version of the file or folder you want to restore, select it.
    4. Restore:
      • Click the green circular arrow icon at the bottom of the window. This will restore the file/folder to its original location, overwriting the current version if one exists (you’ll be prompted to confirm).
      • Restore to a different location (Optional): Right-click the file/folder and select “Restore to…” to save it to a new location, which is safer if you’re unsure.

    Option B: Restore All Files

    1. Open File History Restore Interface (as above).
    2. Navigate to Top Level: Use the back arrow to go back to the top-level view of your backed-up folders.
    3. Select All: There isn’t a single “Restore All” button. Instead, select all the top-level folders you wish to restore (e.g., Desktop, Documents, Pictures) by clicking and dragging or holding Ctrl and clicking each.
    4. Click Restore Button: Click the green circular arrow icon to restore them to their original locations.

    Important: Keep your external drive connected regularly (e.g., daily or weekly) for File History to perform automatic backups. If the drive is disconnected, File History will pause and notify you.

    Considerations for File History

    • Dedicated Drive: Always use a drive exclusively for File History for best performance and organization.
    • Capacity: Ensure your external drive has sufficient capacity to hold multiple versions of your files.
    • Security: As with any backup, keep your external drive in a safe place, ideally off-site, to protect against physical damage or theft.
    • Complementary to Cloud: File History works well in conjunction with cloud storage services (like OneDrive, Google Drive) for an added layer of protection. File History can even back up your local OneDrive sync folders.

    By setting up and regularly using File History, you create a vital safety net for your personal data, ensuring peace of mind and easy recovery from common data loss scenarios.

    FAQ: How to Back up Files Using File History in Windows

    Q1: What exactly does File History back up?

    File History primarily backs up your personal files stored in default Windows user folders like Desktop, Documents, Downloads, Music, Pictures, and Videos. It also includes Contacts, Favorites, and locally synced OneDrive files. It does NOT create a full system image backup of your operating system or installed programs.

    Q2: Do I need an external drive for File History to work?

    Yes, File History requires a dedicated external drive (like a USB flash drive, an external hard drive, or a network drive) to store its backups. It cannot back up files to the same drive where the original files are located, as that would defeat the purpose of backup for data recovery.

    Q3: How often does File History back up my files?

    By default, File History backs up changes to your files hourly. You can customize this frequency in the Advanced settings of File History (accessible via Control Panel) to be as frequent as every 10 minutes or as infrequent as daily.

    Q4: Can File History restore deleted files or previous versions of files?

    Yes, that’s one of its primary strengths! File History saves multiple versions of your files over time. If you accidentally delete a file, or save over an important document with unwanted changes, you can use the File History restore interface to browse through different time points and recover the deleted file or an older version of a modified file.

    Q5: Is File History the same as a full system backup or System Restore?

    No, they are different:

    • File History: Focuses on backing up personal files and their versions. It’s for data recovery.
    • System Restore: Reverts your Windows operating system’s critical system files, drivers, and registry settings to an earlier state to fix software issues. It does not back up or restore personal files.
    • Full System Backup/System Image: Creates a complete copy of your entire hard drive, including the operating system, programs, and personal files. This is used for disaster recovery where your entire system might need to be rebuilt. File History is not a full system image backup.
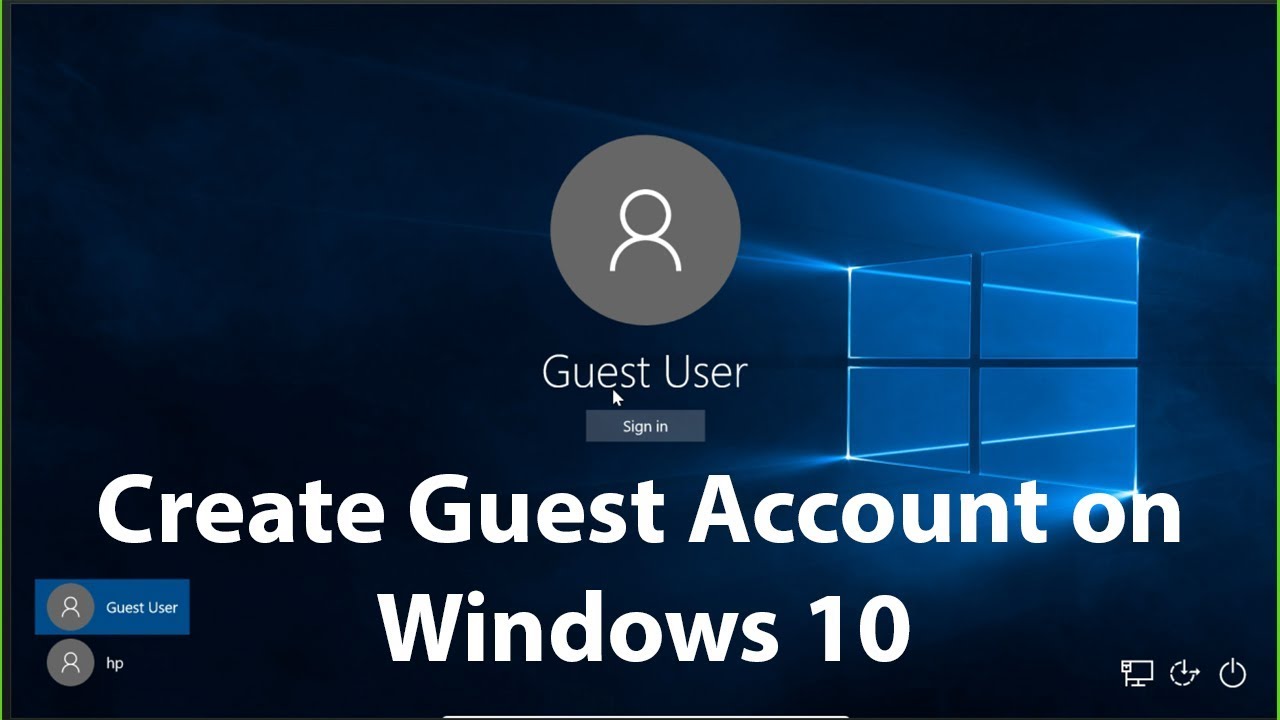
  • How to Create Guest Account in Windows

    How to Create Guest Account in Windows

    Sharing your Windows PC with friends, family, or temporary visitors can be a common scenario. However, you likely don’t want them accessing your personal files, changing system settings, or installing unwanted software. While older versions of Windows had a dedicated “Guest” account, Windows 10 and 11 no longer offer this traditional, built-in feature with its specific ephemeral nature (where changes are erased upon logout).

    Instead, the best way to create a guest account in Windows for modern PCs is to create a standard local user account with limited privileges. This achieves the same goal of providing safe, restricted access to your computer without compromising your main account or system integrity. This guide will walk you through the various methods to set up such an account.

    Why Create a Guest-Like Account?

    • Privacy: Keep your personal files, documents, photos, and Browse history private from temporary users.
    • Security: Prevent guests from installing malware, making unauthorized system changes, or accessing administrative functions.
    • System Stability: Ensure your core system settings remain untouched, preventing accidental (or intentional) disruptions.
    • Clean Slate (Manual Reset): While not automatic like the old Guest account, you can manually delete and recreate this account to provide a fresh environment for each new “guest.”

    Understanding User Account Types in Windows

    Before we start, it’s helpful to know the two main types of user accounts in Windows:

    • Administrator Account: Has full control over the PC, including installing software, changing system settings, and accessing all files. Your primary account should typically be an administrator.
    • Standard User Account: Can run programs, save files in their own user folder, and browse the internet, but cannot install most software, change system settings, or access other users’ files without administrator password approval. This is the ideal type for a “guest” account.

    Method 1: Using Windows Settings (Recommended for Most Users)

    This is the most straightforward and user-friendly way to create a new local standard user account.

    For Windows 11:

    1. Open Settings: Click the Start button and select Settings (the gear icon).
    2. Navigate to Other Users: In the Settings window, click “Accounts” in the left sidebar, then select “Family & other users” or directly “Other users.”
    3. Add Account: Under “Other users,” click the “Add account” button next to “Add other user.”
    4. Bypass Microsoft Account:
      • A “Microsoft account” prompt will appear. Click “I don’t have this person’s sign-in information.”
      • On the next screen, click “Add a user without a Microsoft account.”
    5. Create Local Account:
      • Who’s going to use this PC?: Enter a generic username like “GuestUser,” “Visitor,” or any name you prefer (you cannot use “Guest” as it’s a reserved word, though it will function as a guest account).
      • Password: You can leave the password fields blank if you want a password-free account for easy access. If you want a basic layer of security, enter a password and hint.
      • Click “Next” to create the account.
    6. Verify Account Type:
      • The account will be created as a Standard User by default, which is exactly what you want for a guest-like account.
      • To confirm or change, back on the “Family & other users” screen, find the newly created account. Click on it, then select “Change account type”. Ensure “Standard User” is selected and click “OK.”

    For Windows 10:

    1. Open Settings: Click the Start button and select Settings (the gear icon).
    2. Navigate to Family & other users: In the Settings window, click Accounts, then select “Family & other users” in the left sidebar.
    3. Add Account: Under “Other users,” click Add someone else to this PC.
    4. Bypass Microsoft Account:
      • A “Microsoft account” prompt will appear. Click “I don’t have this person’s sign-in information.”
      • On the next screen, click “Add a user without a Microsoft account.”
    5. Create Local Account:
      • Who’s going to use this PC?: Enter a username like “GuestUser,” “Visitor,” or any suitable name.
      • Password: You can leave the password fields blank.
      • Click “Next” to create the account.
    6. Verify Account Type:
      • The account will be created as a Standard User by default.
      • To confirm or change, find the newly created account under “Other users,” click on it, then click “Change account type.” Ensure “Standard User” is selected and click “OK.”

    Method 2: Using Command Prompt (For Advanced Users)

    You can quickly create a local standard user account using Command Prompt.

    Step-by-Step:

    1. Open Command Prompt as Administrator:
      • Press Win + R, type cmd, and press Enter.
      • Or, search for “Command Prompt” in the Start Menu, right-click, and select “Run as administrator.”
    2. Create the User Account: Type the following command and press Enter. Replace GuestUser with your desired username (e.g., Visitor).

    DOS

    net user GuestUser /add

    (This creates a local user account named “GuestUser”).

    1. (Optional) Set a Password: If you want to set a password, type:

    DOS

    net user GuestUser *

    You will be prompted to enter and confirm the password. Press Enter twice if you want no password.

    1. Add to Guests Group (For traditional guest-like behavior, though limited in modern Windows):
      • This command attempts to add the newly created user to the “Guests” local group. While this group’s permissions are more restrictive, Windows 10/11’s “Guests” group doesn’t behave like the older ephemeral “Guest” account.

    DOS

    net localgroup guests GuestUser /add

    1. Remove from Users Group (Important for security): This ensures the account is not part of the general “Users” group, which usually has more permissions.

    DOS

    net localgroup users GuestUser /delete

    (Note: For accounts created via Settings, they are often already “Standard Users” and not part of the “Guests” group, which is generally secure enough. This step is more relevant if you’re trying to replicate older “Guest” account behavior.)

    1. Exit Command Prompt: Type exit and press Enter.

    Method 3: Using Computer Management (For Pro/Enterprise Users)

    This method provides more granular control and is often used by IT professionals.

    Step-by-Step:

    1. Open Computer Management:
      • Right-click the Start button and select “Computer Management.”
      • Alternatively, press Win + R, type compmgmt.msc, and press Enter.
    2. Navigate to Users: In the left pane, expand Local Users and Groups, then click on Users.
    3. Create New User: Right-click in the empty space in the right pane and select “New User…
    4. Fill in Details:
      • User name: Enter your desired name (e.g., GuestUser).
      • Full name (Optional): Add a descriptive name.
      • Description (Optional): Add a description like “Temporary guest account.”
      • Password: Enter a password or leave it blank.
      • Uncheck “User must change password at next logon.”
      • Check “Password never expires.”
      • Check “Account is disabled” (only if you want to create it disabled and enable later).
      • Click Create,” then “Close.”
    5. Set Account Type (Crucial):
      • Right-click on the newly created user (e.g., GuestUser) and select “Properties.”
      • Go to the “Member Of” tab.
      • Select “Users” and click “Remove.”
      • Click “Add…”
      • In the “Select Groups” dialog, type “Guests” and click “Check Names,” then “OK.”
      • Click “Apply” and “OK.”

    How to Access the Guest-Like Account

    Once the account is created, you can switch to it from the login screen:

    1. Lock your PC: Press Win + L to lock your computer.
    2. Switch User: On the lock screen, click on the user icon (usually in the bottom left corner) to see a list of available user accounts.
    3. Select the Guest Account: Choose the “GuestUser” or “Visitor” account you created.
    4. Log In: If you set a password, enter it. If not, just press Enter.

    Limitations of Modern “Guest” Accounts

    It’s important to reiterate that the modern approach to creating a guest account in Windows 10/11 (a standard local user) differs from the traditional Guest account in older Windows versions:

    • No Automatic Data Wipe: Any changes made by the “guest” (browser history, downloaded files, desktop icons, etc.) are not automatically erased when they log out. To truly clear the account, you would need to delete and recreate it.
    • Limited Customization: While a standard user, it still doesn’t offer the same ephemeral nature as the old Guest account.
    • Admin Privileges Still Required: Guests cannot install software or make system-wide changes without the administrator’s password.
    • File Access: Standard users generally cannot access files in other user profiles unless permissions are explicitly changed by an administrator. However, files on public folders or root directories of other drives might be accessible. If you have sensitive data outside your user profile, consider setting explicit permissions on those folders to deny access to the “Guests” group or the specific guest user.

    Creating a dedicated standard user account is the most effective and secure way to provide temporary, restricted access to your Windows PC. By following these steps, you can confidently share your computer while safeguarding your personal data and maintaining system integrity.

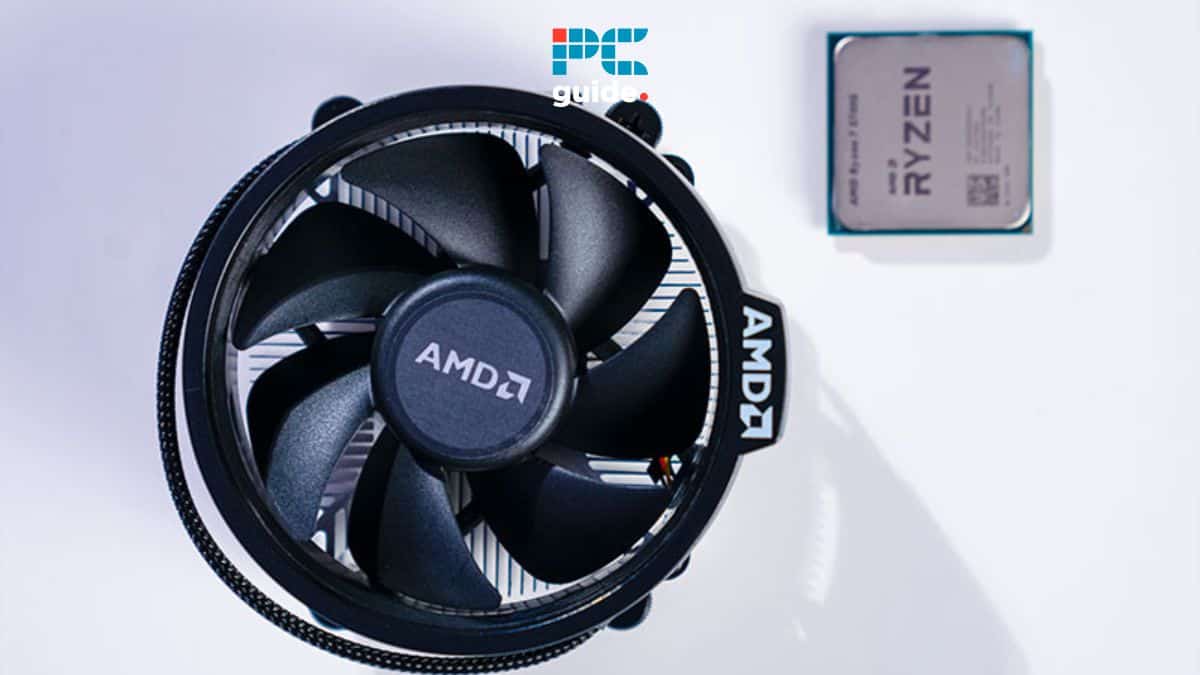
  • How to Monitor fan Speed and Adjust Cooling on your PC

    How to Monitor fan Speed and Adjust Cooling on your PC

    Maintaining optimal temperatures inside your PC is crucial for its performance, stability, and longevity. Overheating can lead to system slowdowns, crashes, and even permanent damage to components like your CPU and GPU. Your PC’s fans are the primary mechanism for moving air and dissipating heat. Knowing how to monitor fan speed and adjust cooling settings empowers you to keep your system running efficiently, quietly, and cool. This guide will walk you through the various methods to check fan RPMs and control your PC’s cooling profile.

    Why Monitor Fan Speed and Adjust Cooling?

    Understanding and controlling your PC’s fans offers several benefits:

    • Prevent Overheating: Ensure components stay within safe operating temperature ranges, especially under heavy load.
    • Optimize Performance: Components like CPUs and GPUs can “throttle” (reduce their speed) when too hot, leading to performance drops. Proper cooling prevents this.
    • Reduce Noise: Set fan curves to run quieter during light tasks and only ramp up when temperatures demand it.
    • Diagnose Issues: Unusual fan speeds (too high or too low) can indicate a problem with a fan, sensor, or dust buildup.
    • Extend Component Lifespan: Consistent high temperatures can shorten the lifespan of electronic components.

    Understanding PC Fans and Their Connections

    Before we dive into monitoring and adjusting, let’s briefly look at the types of fans and how they connect to your motherboard:

    • CPU Fan: Cools your processor. Almost always connected to a dedicated CPU_FAN header on the motherboard.
    • Case Fans: Move air in and out of your PC case. Connected to SYS_FAN, CHA_FAN, or similar headers.
    • GPU Fans: Integrated into your graphics card. Controlled by the GPU’s own BIOS and drivers, though some software can influence them.
    • PSU Fan: Integrated into your power supply. Usually self-regulating and not user-adjustable.

    Most adjustable fans connect via 3-pin (voltage control) or 4-pin (PWM – Pulse Width Modulation – for more precise digital control) headers. PWM fans offer better control.

    Step-by-Step Guide: How to Monitor Fan Speed

    There are several ways to check your PC’s fan speeds, from simple software to more advanced monitoring tools.

    Step 1: Use BIOS/UEFI Settings (Initial Check & Basic Control)

    Your PC’s BIOS (Basic Input/Output System) or UEFI (Unified Extensible Firmware Interface) offers the most direct way to monitor fan speed and often provides basic control without needing additional software.

    1. Reboot Your PC: Restart your computer.
    2. Enter BIOS/UEFI: As your PC starts, repeatedly press the designated key to enter BIOS/UEFI setup. Common keys include Del, F2, F10, F12, or Esc. The specific key is usually displayed on the screen during startup.
    3. Navigate to Fan/Monitor Section: Once in BIOS/UEFI, look for sections labeled “PC Health Status,” “Hardware Monitor,” “Monitor,” “Fan Control,” or “Q-Fan Control” (on ASUS boards).
    4. View Fan RPMs: Here, you should see the fan speed (measured in RPM – Revolutions Per Minute) for your CPU fan and connected case fans. You might also see temperature readings for your CPU and motherboard.
    5. Basic Fan Control: Many BIOS/UEFI settings offer simple fan control options like “Standard,” “Silent,” “Performance,” or “Manual.” In manual mode, you might be able to set a basic fan curve based on temperature.
    6. Exit BIOS/UEFI: Save your changes and exit.

    Step 2: Use Third-Party Monitoring Software (Recommended for Windows)

    For real-time, in-depth fan speed monitoring and temperature tracking while in Windows, third-party software is essential.

    1. Choose a Reliable Software:
      • HWMonitor: A simple, lightweight tool that displays a wide range of sensor readings, including fan RPMs, temperatures (CPU, GPU, motherboard), and voltages. It’s excellent for just monitoring.
      • HWInfo64: More comprehensive than HWMonitor, providing even more detailed sensor data. Can be overwhelming initially but offers invaluable information.
      • SpeedFan (Older, but still works for some): An older but still popular tool that can monitor temperatures and fan speeds, and sometimes allows for direct fan control on older motherboards. Its interface can be less intuitive.
      • Open Hardware Monitor: Another free, open-source option for monitoring.
      • Manufacturer-Specific Software: Your motherboard manufacturer (e.g., ASUS AI Suite, MSI Dragon Center, Gigabyte System Information Viewer) or GPU manufacturer (e.g., MSI Afterburner, ASUS GPU Tweak) often provides their own monitoring and control utilities. These are highly recommended as they are tailored to your specific hardware.
    2. Download and Install: Download the chosen software from its official website. Be cautious of unofficial download sites.
    3. Launch and Interpret: Run the software. You’ll typically see a list of detected sensors. Look for entries labeled “FanX” or “RPM” for your CPU fan and other case fans. You’ll also see CPU and GPU temperatures.
    4. Monitor During Load: To get meaningful readings, monitor fan speed while performing demanding tasks (e.g., gaming, video encoding) to see how fans respond to increased heat.

    Step-by-Step Guide: How to Adjust Cooling (Fan Speed)

    Adjusting your PC’s cooling involves setting fan curves – telling your fans how fast to spin at certain temperatures. This allows for a balance between performance and noise.

    Method 1: Adjust Cooling via BIOS/UEFI (Universal & Stable)

    This is the most reliable way to adjust cooling settings, as these settings are applied at a hardware level before the operating system even loads.

    1. Enter BIOS/UEFI: Follow Step 1 from the “How to Monitor Fan Speed” section to enter your BIOS/UEFI.
    2. Navigate to Fan Control: Find the “Fan Control” or “Monitor” section. It might be under “Advanced,” “Peripherals,” or “Hardware Monitor.”
    3. Locate Fan Headers: You’ll typically see entries for “CPU Fan,” “CHA_FAN1,” “SYS_FAN2,” etc.
    4. Choose Control Mode: For each fan, you’ll usually have options:
      • Auto/Standard: Motherboard automatically manages fan speed based on preset curves.
      • Silent: Prioritizes low noise, fans spin slower.
      • Performance/Turbo: Prioritizes cooling, fans spin faster.
      • Manual/Custom: This is where you can adjust cooling precisely. You’ll typically set a series of “temperature points” and a corresponding “fan speed percentage” (or RPM) for each point. For example:
        • 30°C: 30% speed
        • 50°C: 60% speed
        • 70°C: 90% speed
        • 85°C: 100% speed
    5. Adjust Fan Curves: Create or modify these fan curves to your preference. A good starting point is to have fans run quietly at idle temperatures and gradually ramp up as temperatures increase. Avoid sudden jumps in speed, as this can be jarring.
    6. Save and Exit: Save your changes and exit BIOS/UEFI. Test your new settings under various loads.

    Method 2: Adjust Cooling via Motherboard Manufacturer Software (Windows)

    Many motherboard manufacturers provide dedicated software that allows you to adjust cooling settings directly within Windows, often with a more user-friendly graphical interface than BIOS.

    1. Identify Software: Check your motherboard manufacturer’s website (e.g., ASUS, MSI, Gigabyte, ASRock) for their utility suite. Examples include:
      • ASUS: AI Suite (with Fan Xpert)
      • MSI: Dragon Center / MSI Center (with Frozr AI Cooling)
      • Gigabyte: System Information Viewer (SIV) / RGB Fusion
      • ASRock: A-Tuning / Polychrome Sync
    2. Download and Install: Download the latest version of the utility suite compatible with your specific motherboard model.
    3. Launch Software: Open the installed software.
    4. Navigate to Fan Control: Look for a section related to “Fan Control,” “Cooling,” or “System Tuning.”
    5. Adjust Fan Curves: You’ll usually find options to select individual fans (CPU fan, case fans) and then adjust their fan curves using a drag-and-drop interface or by entering values. These tools often allow you to test fan speeds and monitor temperatures live.
    6. Apply Settings: Apply the new settings. Most of these tools can save profiles for different scenarios (e.g., “Gaming,” “Silent,” “Default”).

    Method 3: Adjust Cooling via GPU-Specific Software (for Graphics Card Fans)

    Your graphics card has its own cooling solution, typically controlled by its own BIOS. However, software allows you to override default settings for better performance or quieter operation.

    1. Choose GPU Software:
      • MSI Afterburner: The most popular and versatile tool for GPU overclocking, monitoring, and fan control. Works with both NVIDIA and AMD GPUs.
      • ASUS GPU Tweak II/III: For ASUS graphics cards.
      • Gigabyte AORUS Engine: For Gigabyte graphics cards.
      • AMD Radeon Software / NVIDIA GeForce Experience: The official driver suites from AMD and NVIDIA also offer some basic fan control options, though Afterburner provides more granular control.
    2. Download and Install: Download the software from the GPU manufacturer’s website or the tool’s official page (e.g., Guru3D for MSI Afterburner).
    3. Launch and Navigate: Open the software and find the fan control section. In MSI Afterburner, toggle the “User Defined” fan speed control to enable custom fan curves.
    4. Adjust Fan Curve: Create a custom fan curve by setting temperature points and corresponding fan speeds (percentage). For example, you might want your GPU fans to stay off below 50°C for silence at idle, and then gradually ramp up.
    5. Apply and Test: Apply the new fan curve. It’s crucial to test these settings under load to ensure stable temperatures and acceptable noise levels. Be cautious with aggressive fan curves that lead to excessive noise, or too passive ones that allow for overheating.
    6. Apply on Startup: Most GPU fan control software allows you to apply your custom fan curve automatically when Windows starts. This is usually an option you tick within the software.

    General Tips for Effective PC Cooling

    Beyond adjusting fan speeds, these practices contribute to better cooling:

    • Clean Regularly: Dust is the enemy of cooling. Regularly clean your PC’s internal components, especially fans and heatsinks, using compressed air. Pay attention to CPU cooler fins, GPU heatsinks, and case fan blades.
    • Optimal Airflow: Ensure your PC case has good airflow. Generally, aim for positive pressure (more intake fans than exhaust fans) to minimize dust intake, or balanced pressure. Make sure intake fans bring in cool air and exhaust fans push out hot air efficiently.
    • Proper Cable Management: Tidy up internal cables. Cluttered cables can block airflow.
    • Ambient Temperature: Operate your PC in a cool, well-ventilated room.
    • Thermal Paste: If your CPU or GPU temperatures are consistently high even with good airflow and fan speeds, consider reapplying thermal paste between the CPU/GPU and their respective heatsinks. This is an advanced task and should be done carefully.

    Conclusion

    Knowing how to monitor fan speed and adjust cooling on your PC is a vital skill for any computer user. By utilizing your BIOS/UEFI, motherboard software, and GPU utilities, you gain precise control over your system’s thermal performance. This proactive approach not only helps prevent costly overheating issues but also allows you to find the perfect balance between keeping your PC cool and maintaining a quiet operating environment. Regular monitoring and occasional adjustments will ensure your PC runs optimally for years to come.

  • How to Schedule Tasks using Task Scheduler in Windows

    How to Schedule Tasks using Task Scheduler in Windows

    The Windows Task Scheduler is a powerful, built-in utility that allows you to automate a wide variety of tasks on your computer. Whether you want to run a specific program at startup, launch a backup script every night, or even just display a reminder message at a certain time, Task Scheduler can handle it. This guide will walk you through the process of creating and managing scheduled tasks on your Windows system.

    As someone who relies on automation to keep my digital life running smoothly, I’ve found the Task Scheduler to be an indispensable tool. It might seem daunting at first glance, but once you understand its core components, you’ll see how versatile it is.

    Step 1: Open Task Scheduler

    There are several ways to access the Task Scheduler in Windows:

    • Search Bar: The quickest way is to type “Task Scheduler” into the Windows search bar (or Start Menu search) and select the application from the results.
    • Run Dialog: Press Windows Key + R to open the Run dialog, type taskschd.msc, and press Enter.
    • Control Panel: Navigate to Control Panel > Administrative Tools > Task Scheduler.

    Once opened, you’ll see the Task Scheduler interface, which consists of a navigation pane on the left, a center pane displaying tasks, and an actions pane on the right.

    Step 2: Create a Basic Task

    For most users, creating a basic task is the simplest way to get started. This wizard-driven approach streamlines the process.

    1. Click “Create Basic Task…”: In the “Actions” pane on the right side of the Task Scheduler window, click on “Create Basic Task…”. This will open the Create Basic Task Wizard.
    2. Name and Describe the Task:
      • Name: Give your task a clear and descriptive name (e.g., “Daily Backup Script,” “Morning News App Launch”).
      • Description (Optional): Add a brief description of what the task does. This is helpful for remembering the purpose of the task later.
      • Click “Next.”
    3. Choose a Trigger: A trigger defines when your task will start. Select one of the following options:
      • Daily: Runs every day or every X days.
      • Weekly: Runs on specific days of the week.
      • Monthly: Runs on specific days of the month or on specific days of the week within a month.
      • One time: Runs only once at a specified date and time.
      • When the computer starts: Runs every time Windows boots up.
      • When I log on: Runs every time you log into your user account.
      • When a specific event is logged: Runs when a particular event occurs in the Windows Event Log (more advanced).
      • After selecting your preferred trigger, click “Next.”
    4. Configure Trigger Details: Depending on the trigger you chose, you’ll need to specify further details.
      • For “Daily,” “Weekly,” or “Monthly,” you’ll set a start date and time, and specify recurrence (e.g., “recur every 1 day”).
      • For “One time,” you’ll set a specific date and time.
      • Click “Next.”
    5. Choose an Action: An action specifies what the task will do when triggered.
      • Start a program: This is the most common action. You can launch an application, a script (like a .bat, .ps1, or .vbs file), or an executable.
      • Send an e-mail: (Less common now, as many email clients handle scheduling).
      • Display a message: Pops up a message box on your screen.
      • Select “Start a program” and click “Next.”
    6. Configure Program Details:
      • Program/script: Click “Browse…” and navigate to the executable file (.exe), script file, or batch file you want to run.
      • Add arguments (optional): If the program or script requires command-line arguments, enter them here.
      • Start in (optional): Specify the working directory for the program. This is often the folder where the program’s executable is located.
      • Click “Next.”
    7. Review and Finish: A summary of your task will be displayed.
      • Review all the settings. If you need to make changes, click “Back.”
      • Optionally, check “Open the Properties dialog for this task when I click Finish” if you want to configure more advanced settings immediately.
      • Click “Finish.”

    Your task is now created and will appear in the Task Scheduler Library.

    Step 3: Create an Advanced Task (Create Task…)

    For more granular control and advanced options, use the “Create Task…” option. This gives you access to multiple tabs for detailed configuration.

    1. Click “Create Task…”: In the “Actions” pane, select “Create Task…”.
    2. General Tab:
      • Name: Give it a clear name.
      • Description: Add a detailed description.
      • Security options:
        • Run whether user is logged on or not: This is useful for tasks that need to run in the background without a user logged in, such as server backups. Requires the task to run with elevated privileges.
        • Run with highest privileges: Essential for tasks that need administrator rights.
        • Configure for: Choose the operating system your task is running on (e.g., Windows 10, Windows Server 2019).
      • Click “OK” to apply changes on any tab.
    3. Triggers Tab:
      • Click “New…” to create a new trigger.
      • You’ll see more options than in the Basic Task Wizard, such as:
        • Begin the task: “On a schedule,” “At startup,” “At log on,” “On idle,” “On an event,” etc.
        • Advanced settings: “Delay task for,” “Repeat task every,” “Stop task if it runs longer than,” “Expire,” “Enabled.” These allow for fine-tuning the trigger behavior.
      • Configure your desired trigger and click “OK.”
    4. Actions Tab:
      • Click “New…” to create a new action.
      • Similar to the basic task, “Start a program” is the most common. Specify the program/script path and any arguments.
      • Click “OK.”
    5. Conditions Tab:
      • This tab allows you to set specific conditions that must be met for the task to run.
      • Power: “Start the task only if the computer is on AC power,” “Stop if the computer switches to battery power.” Crucial for laptop users to prevent battery drain.
      • Network: “Start only if the following network connection is available.” Useful if your task requires internet access or a specific network drive.
      • Idle: “Start only if the computer is idle for…” and “Stop if the computer ceases to be idle.”
    6. Settings Tab:
      • Allow task to be run on demand: Enables manual execution of the task.
      • Run task as soon as possible after a scheduled start is missed: Important for tasks that absolutely must run.
      • If the task is already running, then the following rule applies: Choose how to handle multiple instances of the task (e.g., “Do not start a new instance,” “Queue a new instance,” “Stop the existing instance”).
      • Stop the task if it runs longer than: Prevents a runaway process.
      • If the running task does not end when requested, force it to stop: For stubborn tasks.
    7. Click “OK” once you have configured all tabs to your satisfaction. You might be prompted to enter your user password if you’ve selected “Run whether user is logged on or not” or “Run with highest privileges.”

    Step 4: Manage and Modify Scheduled Tasks

    Once tasks are created, you’ll often need to manage them.

    1. Locate Tasks: All your created tasks are listed in the Task Scheduler Library in the left navigation pane. You can also create subfolders within the library to further organize your tasks.
    2. Enable/Disable a Task:
      • Right-click on the task name.
      • Select “Disable” or “Enable.” Disabling a task temporarily stops it from running without deleting its configuration.
    3. Run a Task Manually:
      • Right-click on the task name.
      • Select “Run.” This is useful for testing your task immediately.
    4. End a Running Task:
      • If a task is currently running, its status will show “Running.”
      • Right-click on the task name and select “End.”
    5. View Task Properties:
      • Right-click on the task name and select “Properties.” This opens the same advanced configuration tabs from Step 3, allowing you to modify any setting.
    6. Delete a Task:
      • Right-click on the task name.
      • Select “Delete.” Confirm your choice.
    7. View Task History:
      • In the Task Scheduler Library, select a task.
      • In the bottom-center pane, click on the “History” tab. This shows a log of when the task ran, whether it succeeded or failed, and any associated events. If “History” is disabled, you can enable it in the “Actions” pane under “Enable All Tasks History.”

    Common Uses for Task Scheduler

    • Automating Backups: Run backup scripts (e.g., using Robocopy) to external drives or network locations.
    • Running Disk Cleanup: Schedule cleanmgr.exe to automatically free up disk space.
    • Updating Software: Schedule checks for software updates.
    • Launching Specific Applications: Automatically open your email client or a specific work application at startup.
    • System Maintenance: Schedule chkdsk or defragmentation (though modern Windows handles this automatically).
    • Custom Notifications: Display a message reminder for important events.

    The Windows Task Scheduler is a robust tool that significantly enhances your ability to automate routine computer tasks. By understanding how to create and manage tasks, you can make your Windows experience more efficient and productive. Experiment with different triggers and actions to discover its full potential for your specific needs.

  • How to Create and Mount a Virtual Hard Disk (VHD) in Windows

    How to Create and Mount a Virtual Hard Disk (VHD) in Windows

    A Virtual Hard Disk (VHD) is a file format that represents a virtualized hard disk drive. In Windows, you can create and mount a VHD as if it were a physical drive, allowing you to store files, install operating systems, or even create a secure, encrypted partition. VHDs are incredibly versatile and are a core component of virtualization technologies like Hyper-V, but they can also be used directly within your Windows operating system for various purposes.

    Why Create and Mount a VHD?

    Using a VHD offers several practical benefits:

    • Data Organization: Create separate “virtual drives” for specific projects, types of files (e.g., games, work documents), or user profiles, keeping your main drive cleaner.
    • Portability: A VHD file can be easily moved between computers, external drives, or cloud storage. You can unmount it from one PC and mount it on another.
    • Security/Encryption: You can encrypt a VHD using BitLocker, providing a secure, transportable, encrypted container for sensitive data. When unmounted, the data is inaccessible.
    • Testing Environments: Ideal for installing and testing new software or even different operating systems without affecting your main Windows installation.
    • Backup/Recovery: A VHD can contain a full system image or important data for backup purposes.
    • Isolation: While not a full virtual machine, a VHD provides a degree of isolation for its contents.

    Understanding VHD Formats: VHD vs. VHDX

    When creating a VHD, you’ll typically choose between two formats:

    • VHD (Virtual Hard Disk): An older format with a maximum size limit of 2 TB. Good for basic use and compatibility with older systems.
    • VHDX (Virtual Hard Disk v2): A newer format (introduced with Windows Server 2012 and Windows 8) with a much larger capacity limit (up to 64 TB). It offers better performance, resilience against data corruption during power failures, and support for larger sector sizes. VHDX is generally recommended for modern Windows systems.

    You’ll also choose between disk types:

    • Fixed size: The VHD file takes up its full allocated size on your physical drive immediately. This offers better performance but consumes more space.
    • Dynamically expanding: The VHD file starts small and grows as you add data to it, up to its maximum specified size. This saves physical disk space but can have slightly lower performance. Recommended for most common use cases unless you need maximum performance.

    How to Create and Mount a Virtual Hard Disk (VHD) in Windows

    We will use the built-in Disk Management utility in Windows for this process.

    Step 1: Open Disk Management

    1. Open Run Dialog: Press the Windows key + R on your keyboard.
    2. Type diskmgmt.msc: In the “Run” dialog box, type diskmgmt.msc and press Enter, or click OK.
      • Alternatively, right-click the Start button and select “Disk Management.
      • Or, search for “Disk Management” in the Start Menu.

    Step 2: Create the VHD File

    1. Action Menu: In the Disk Management window, click on Action in the top menu bar.
    2. Create VHD: Select Create VHD.”
    3. Configure VHD Properties:
      • Location: Click Browse…” to choose where you want to save the VHD file on your physical drive. Give it a meaningful name (e.g., MySecureDrive.vhdx, GameStorage.vhd). It’s recommended to save it on a drive with ample free space.
      • Virtual hard disk size: Enter the desired size for your VHD (e.g., 100 GB, 500 GB). Choose units (MB, GB, TB).
      • Virtual hard disk format:
        • Select VHDX (recommended for modern Windows).
        • Select VHD for older systems or compatibility.
      • Virtual hard disk type:
        • Choose “Dynamically expanding” (recommended for most users to save physical space).
        • Choose Fixed size for maximum performance and predictability.
    4. Click OK.” Windows will now create the VHD file. This might take some time, especially for large fixed-size VHDs. You’ll see the new disk appear in Disk Management as “Disk X” (where X is a new disk number), initially marked as “Not Initialized.”

    Step 3: Initialize the VHD

    Once the VHD is created, it’s like a brand new, unformatted physical hard drive. You need to initialize it.

    1. Locate the New Disk: In the Disk Management window, find the newly created VHD (e.g., “Disk 1,” “Disk 2,” etc.) that is marked “Not Initialized” and “Unallocated.”
    2. Initialize Disk: Right-click on the disk number (e.g., “Disk 1”) where it says “Not Initialized.”
    3. Select Initialize Disk.
    4. Choose Partition Style:
      • GPT (GUID Partition Table): Recommended for modern systems and drives larger than 2 TB.
      • MBR (Master Boot Record): Older standard, limited to 2 TB.
      • Choose GPT for VHDX, and generally for VHDs unless you have a specific reason for MBR.
    5. Click “OK.” The disk status will change to “Online,” and the space will be “Unallocated.”

    Step 4: Create a New Simple Volume (Format the VHD)

    Now, you need to create a partition on the VHD and format it so Windows can use it.

    1. Right-click on the “Unallocated” space within your new VHD (e.g., on the bar where it shows the size).
    2. Select “New Simple Volume…” This will open the New Simple Volume Wizard.
    3. Click “Next” on the Welcome screen.
    4. Specify Volume Size: The maximum available space will be pre-filled. You can reduce it if you want multiple partitions on the VHD, but for a single volume, leave it as is. Click Next.
    5. Assign Drive Letter: Choose a drive letter that isn’t currently in use on your system (e.g., V:, Z:). Click Next.
    6. Format Partition:
      • File system: Choose NTFS (standard for Windows).
      • Allocation unit size: Leave as “Default.”
      • Volume label: Give your VHD a name (e.g., “My Virtual Drive,” “Secure Files”).
      • “Perform a quick format”: Keep this checked for faster formatting.
      • “Enable file and folder compression”: (Optional) Check if you want data on the VHD to be compressed.
    7. Click “Next,” then “Finish.”

    Your VHD is now created, initialized, partitioned, and formatted. It will appear as a new drive in File Explorer (e.g., “My Virtual Drive (V:)”), ready for use.

    How to Mount a VHD

    Once a VHD file is created, you can mount it at any time to make it accessible.

    Method 1: Using Disk Management

    1. Open Disk Management.
    2. Action Menu: Click on “Action” in the top menu bar.
    3. Attach VHD: Select “Attach VHD.”
    4. Location: Click “Browse…” and navigate to the .vhd or .vhdx file you want to mount.
    5. Read-only (Optional): Check this box if you want to mount the VHD in read-only mode, preventing any changes to its contents.
    6. Click “OK.” The VHD will appear as a new drive in File Explorer.

    Method 2: Double-Clicking the VHD File

    The easiest way to mount a VHD is often by simply double-clicking the .vhd or .vhdx file directly in File Explorer. Windows will automatically mount it and assign the next available drive letter.

    How to Dismount a VHD

    When you’re finished using a VHD, you should dismount it. This is similar to safely removing a USB drive.

    1. Open Disk Management.
    2. Locate the Mounted VHD: Find the VHD in the Disk Management window (it will be listed as “Disk X” and show its drive letter).
    3. Dismount: Right-click on the disk number (e.g., “Disk 1”) for the VHD.
    4. Select “Detach VHD.”
    5. Confirm (Optional): You might be prompted to confirm. There’s also an option to “Delete the virtual hard disk file after removing the disk.” Only check this if you want to permanently delete the VHD file itself. Otherwise, leave it unchecked to keep the file for future use.
    6. Click “OK.” The VHD will disappear from File Explorer.

    Advanced VHD Usage

    • BitLocker Encryption: To encrypt a VHD, mount it, then right-click on the drive in File Explorer, select “Turn on BitLocker,” and follow the prompts.
    • Boot from VHD: You can install a separate Windows operating system inside a VHD and configure your PC to boot into it. This is more complex and typically involves using bcdboot commands.
    • Virtual Machines: VHD/VHDX files are the primary disk format for virtual machines in Hyper-V and other virtualization software.

    By mastering the process of how to create and mount a virtual hard disk (VHD) in Windows, you gain a powerful tool for organizing data, enhancing security, and managing your digital workspace more efficiently.

  • How to Use HP Wireless Printer

    How to Use HP Wireless Printer

    HP wireless printers offer incredible convenience, allowing you to print from virtually anywhere in your home or office without being tethered by cables. But let’s be honest—getting that initial connection set up can sometimes feel like a bit of a puzzle, especially considering the range of HP models and connection methods out there.

    As someone who’s helped plenty of users through this process, I can tell you the real trick is just understanding two things: what your printer can do, and how your home Wi-Fi is set up. Whether you’re hooking up a brand-new printer or trying to reconnect one that’s been a little temperamental lately, this guide breaks down the most reliable ways to get everything running smoothly.

    How to Use HP Wireless Printer: A Step-by-Step Guide Before anything else, make sure your HP wireless printer is ready: it’s unboxed, powered on, has paper loaded, and ink cartridges installed. Also, jot down your Wi-Fi network name (SSID) and password—you’ll need them shortly.

    Method 1: Using the HP Smart App (Recommended for Most Users) The HP Smart app is HP’s go-to solution for setting up and managing your printer. It works across Windows, macOS, Android, and iOS, and it’s pretty intuitive once you’re in.

    Step-by-Step Guide:

    Download and Install HP Smart App:

    • On your computer or mobile device, go to 123.hp.com or search for “HP Smart” in your app store.
    • Download and install the app.
    • Heads-up: If you’re using a VPN, it’s a good idea to turn it off for now—it can mess with the setup process.

    Prepare Your Printer for Setup Mode:

    • If it’s a new printer, setup mode should be active by default (usually indicated by a blinking blue wireless light).
    • If not, or if you’re reconnecting, you might need to reset its network settings:
      • Touchscreen printers: Navigate to Wireless or Setup > Network Setup > “Restore Network Settings.”
      • Non-touchscreen models: Common reset methods include:
        • Holding the Wireless button for 5 seconds until the light blinks.
        • Holding Wireless + Cancel (X) buttons together for a few seconds.
        • For HP DeskJet 6000/6400, ENVY 6000/6400, and Tango models: Hold Wi-Fi + Power buttons on the back for 3 seconds.
    • If you’re unsure, your printer manual or HP’s website can help.

    Open HP Smart App and Add Printer:

    • Launch the app and sign in or create an HP account if needed.
    • Click “Set Up a New Printer” or the “+ Add Printer” icon.
    • Allow Bluetooth and location services if prompted—they help the app locate your printer.
    • Select your printer when it appears.

    Connect to Your Wi-Fi Network:

    • The app walks you through connecting to Wi-Fi. If your device is already on the same network, the settings might transfer automatically.
    • Otherwise, choose your Wi-Fi network and enter the password.
    • On some models, you may need to confirm on the printer by pressing a flashing Info or checkmark button.

    Complete Setup and Print:

    • Follow any final prompts to enable features like HP+ (if applicable), register the printer, and install drivers.
    • A solid blue wireless light means you’re good to go.
    • You can now print, scan, and manage your printer from the HP Smart app.

    Method 2: Using the Printer’s Control Panel (For Printers with a Display Screen) If your HP printer has a screen or control panel, you can usually handle setup directly from there—no computer needed initially.

    Step-by-Step Guide:

    Access Wireless Settings:

    • On the control panel, go to Setup, Network, or Wireless settings (the name varies by model).

    Run the Wireless Setup Wizard:

    • Select “Wireless Setup Wizard.”
    • The printer scans for available networks.

    Select Your Network and Enter Password:

    • Pick your Wi-Fi network from the list.
    • Use the screen or arrow buttons to enter your Wi-Fi password (note: it’s case-sensitive).

    Confirm Connection:

    • Once connected, the wireless light should turn solid blue.

    Install Drivers:

    • Go to 123.hp.com from your computer.
    • Enter your printer model and download the driver package. Choose wireless setup during installation.

    Method 3: Using WPS (Wi-Fi Protected Setup) – Push Button Connect If both your printer and router support WPS, this is one of the fastest ways to connect—no password typing required.

    Step-by-Step Guide:

    Place Printer Near Router:

    • Keep them close to ensure a smooth connection.

    Enable WPS on Printer:

    • Touchscreen: Navigate to Wireless settings and choose WPS > Push Button.
    • Physical WPS button: Press and hold it until the wireless light blinks.
    • Non-touchscreen: Usually involves holding the Wireless button for a few seconds.

    Press WPS on Router:

    • Within two minutes, press the WPS button on your router (often marked with a double arrow).

    Wait for Connection:

    • The printer should connect automatically. A solid blue wireless light indicates success.

    Install Drivers:

    • If you haven’t already, head to 123.hp.com and download the necessary drivers.

    Method 4: Using HP Wi-Fi Direct (Direct Connection) No Wi-Fi? No problem. Wi-Fi Direct lets your device talk to the printer directly—great for guests or on-the-go printing.

    Step-by-Step Guide:

    Enable Wi-Fi Direct:

    • Touchscreen: Look in Wireless or Network settings.
    • Non-touchscreen: Press and hold the Wi-Fi Direct button, or print an info page to get details.

    Find Network Name and Password:

    • On the screen or info sheet, note the Wi-Fi Direct name (e.g., “DIRECT-HP-Print-XX”) and password.

    Connect Your Device:

    • Go to Wi-Fi settings and select the printer’s direct network.
    • Enter the password.

    Add Printer to Device:

    • Windows: Settings > Bluetooth & devices > Printers & scanners > Add device.
    • macOS: System Settings > Printers & Scanners > “+” to add.

    Print:

    • Choose the document, select your printer, and hit print.

    Important: You’ll need to reconnect to your usual Wi-Fi to get back online afterward.

    Troubleshooting Common Wireless Printer Issues Even with a smooth setup, hiccups can happen. Here’s what to try if things go sideways:

    Printer Not Found:

    • Make sure it’s powered on and wireless light is either blinking (setup mode) or solid (connected).
    • Confirm both printer and device are on the same network.
    • Try restarting everything—printer, router, and computer.
    • Reduce the distance to your router.
    • Temporarily disable firewall or antivirus to test connectivity (just remember to re-enable it).

    Print Job Stuck:

    • Check for paper and ink.
    • Open print queue and cancel the job.
    • On Windows, restart Print Spooler: Search “Services,” find “Print Spooler,” right-click > Restart.

    Slow Printing or Connection Drops:

    • Improve signal strength—move printer/router closer, try a Wi-Fi extender.
    • Check for router firmware updates.
    • Reduce interference by moving away from other electronics.

    Driver Issues:

    • Download the latest drivers from 123.hp.com.
    • Try HP Print and Scan Doctor for diagnostics (Windows only).

    Once your HP wireless printer is set up properly, it really does open up a new level of convenience for both work and personal use. Hopefully this guide gave you the clarity and confidence to get everything running just the way you want it.

  • How to use speech Recognition to Control Windows

    How to use speech Recognition to Control Windows

    Windows includes a surprisingly capable built-in feature called Windows Speech Recognition (WSR). It lets you control your computer, dictate text, and navigate applications using nothing but your voice. Whether you’re looking for a hands-free way to multitask or you rely on accessibility tools, WSR can dramatically change how you interact with your PC.

    Why Use Speech Recognition to Control Windows?

    There are quite a few good reasons to explore speech control on Windows:

    Accessibility: It’s a game-changer for anyone with physical limitations, making it possible to type, navigate, and use commands without a mouse or keyboard. Hands-Free Operation: It’s perfect when your hands are tied up—say, cooking, crafting, or even presenting. Productivity: Some folks find dictating emails or documents faster than typing, especially during brainstorming. Comfort: If you’ve ever felt wrist strain after hours of typing, this can be a welcome break. Convenience: Launch apps or perform simple actions just by speaking—it’s like having a personal assistant.

    Prerequisites for Using Windows Speech Recognition

    To get started, you’ll need a few things in place:

    A Working Microphone: Quality matters. A decent headset mic tends to work best since it filters out background noise. Compatible Windows Version: WSR works on Windows 7, 8.1, 10, and 11. While the interface has changed slightly over the years, the basics remain consistent. Quiet Environment: Background noise can really throw off accuracy, so try to minimize it.

    Step-by-Step Guide: Setting Up and Using Windows Speech Recognition

    Setting things up doesn’t take long, but giving WSR a bit of training really helps with accuracy.

    Phase 1: Initial Setup

    1. Open Speech Recognition Setup:
      • Click Start, type “Windows Speech Recognition,” and hit Enter.
      • Or navigate to Settings > Ease of Access > Speech (Windows 10) or Settings > Accessibility > Speech (Windows 11), then click “Start Speech Recognition.”
    2. Go Through the Wizard:
      • Welcome screen appears—click “Next.”
      • Choose your microphone type (Headset Mic is ideal) and follow prompts to position it correctly.
      • Read the sample sentence aloud so WSR can adjust volume levels.
    3. Improve Accuracy (Optional, But Worth It):
      • You can opt to let WSR scan your documents/emails to recognize commonly used phrases. Privacy-wise, this is up to you.
    4. Choose Activation Mode:
      • Manual (click to turn it on/off) or Voice Activation (say “Start listening”). The voice option is more seamless, but some prefer manual for control.
    5. Print the Reference Card (Optional):
      • It’s handy to have basic commands printed out. Click “Next.”
    6. Run the Tutorial (Highly Recommended):
      • It’s a bit repetitive, sure, but it helps a lot. WSR learns your voice, and you learn the ropes.
    7. Finish Setup:
      • Once done, click “Finish.”

    Phase 2: Using Windows Speech Recognition

    Now WSR is running, you’ll see a bar docked at the top of your screen.

    Understanding the WSR Bar:

    • “Off-duty” or “Sleeping”: Icon is gray. It’s not listening.
    • “Listening”: Icon turns blue. It’s ready for your commands.
    • “Paused”: Icon is orange. Not listening, but easily reactivated.

    Basic Voice Commands:

    To toggle listening:

    • Say “Start listening” to activate.
    • Say “Stop listening” or “Turn off microphone” to deactivate.

    To open apps:

    • “Open Chrome”
    • “Start Word”

    To control windows:

    • “Show desktop”
    • “Switch to Outlook”
    • “Minimize window”
    • “Scroll down page”
    • “Click Start”
    • “Press Enter”

    For typing and editing:

    • Just start speaking in a text field.
    • Use commands like “New paragraph,” “Delete that,” or “Correct [word].”
    • Say punctuation aloud (e.g., “Period,” “Comma”).

    To access menus:

    • “Click OK”
    • If unsure what to say, say “Show numbers” and then “Click [number].”

    Phase 3: Advanced Training and Customization

    1. Launch WSR and Right-Click the Microphone Icon:
      • Select “Speech options” > “Improve recognition accuracy.”
    2. Train WSR Further:
      • You’ll read more passages. The more you train, the better WSR understands your voice and nuances.
    3. Open the Speech Dictionary:
      • Add custom terms, names, or industry-specific jargon manually.
    4. Access the Full Command List:
      • Check out the Speech Reference Card for all the built-in commands.
    5. Advanced Customization:
      • Tech-savvy users can create macros or custom commands using third-party tools.

    Tips for Best Results

    • Speak Clearly: Don’t over-enunciate, just speak normally.
    • Use Natural Pauses: Especially between commands.
    • Learn the Commands: Familiarity goes a long way.
    • Correct Errors: Use “Correct that” to help WSR learn from its mistakes.
    • Minimize Noise: Quiet surroundings lead to better recognition.
    • Upgrade Your Mic: It can make a night-and-day difference.

    My Personal Experience with WSR

    I tried WSR initially just for fun. The first go-around was a bit clunky, honestly, but once I did the full tutorial, the system became noticeably smarter. I especially love using it for quick notes or firing off an email when my hands are busy. Discovering the “Show numbers” feature was a game-changer—it made clicking through dense menus super manageable without touching the mouse. WSR isn’t perfect for everything, but it’s genuinely useful when you find the right workflow.

    Conclusion

    Using Speech Recognition in Windows can open up a whole new, hands-free way to use your computer. Whether you’re aiming to boost productivity, ease physical strain, or just try something different, WSR offers a lot under the hood. With the right setup, a bit of training, and some patience, it’s a tool worth having in your digital toolkit.

  • How to Use HP Envy 360 Laptop Features

    How to Use HP Envy 360 Laptop Features

    The HP Envy x360 laptop series is renowned for its versatility, offering a powerful combination of laptop functionality with tablet flexibility. Its signature 360-degree hinge allows it to transform into various modes, catering to different tasks and preferences. But there’s much more to the Envy x360 than just its convertible design. Here’s how to tap into its full range of features to enhance your productivity, creativity, and entertainment experience.

    1. Mastering the 360-Degree Hinge: Exploring Modes

    The defining feature of the Envy x360 is its flexible hinge. Here are the modes it supports:

    • Laptop Mode: Ideal for traditional work like typing or browsing. Just open the laptop normally.
    • Tent Mode: Stand it up like an inverted “V.” Great for watching videos or video calls on limited desk space.
    • Stand Mode: Fold it back so the keyboard acts as a stand. Best for presentations or drawing with a stylus.
    • Tablet Mode: Fold the screen completely flat. Perfect for touch-focused tasks like reading, sketching, or note-taking.

    Tip: Windows usually prompts to switch to Tablet Mode when you change orientation. You can also do this manually from the Action Center.

    1. Using the Touchscreen and Stylus

    Many Envy x360 models feature a touchscreen and support for HP Digital Pen:

    • Touch Gestures: Swipe, tap, and zoom to navigate intuitively.
    • Digital Pen: Pair via Bluetooth to unlock precise drawing, note-taking, or signing documents.
    • Windows Ink Workspace: Find this via the pen icon on the taskbar. It includes tools like Sticky Notes and Sketchpad.
    1. Enhancing Audio with Bang & Olufsen (B&O)

    HP partners with B&O to deliver superior audio:

    • Audio Control App: Look for “HP Audio Control” in your Start Menu.
    • Customize Sound Profiles: Adjust equalizers or choose presets for music, movies, or voice clarity.
    • Tip: Keep audio drivers updated through HP Support Assistant for the best experience.
    1. Optimizing Performance and Battery

    HP utilities help you get the most out of your system:

    • HP Support Assistant: Keeps drivers updated and helps with diagnostics.
    • HP Command Center: (Available on some models) Adjust performance profiles, thermal settings, and more.
    • HP Smart: If you use an HP printer, this app simplifies printing and scanning tasks.
    1. Privacy and Security Features

    Modern Envy x360 models include helpful privacy tools:

    • Fingerprint Reader: Set up via Settings > Accounts > Sign-in options.
    • Webcam Kill Switch: A physical shutter lets you block the camera.
    • Microphone Mute Key: Look for a mic icon on the keyboard with an LED indicator.
    1. Managing Display and Visual Comfort

    Make the most of your vibrant display:

    • HP Display Control: Calibrate color profiles for photo work, movies, etc. (on supported models).
    • Night Light: Found in Settings > System > Display. Reduces blue light in the evening.
    1. Understanding Ports and Connectivity

    Know your way around the physical ports:

    • USB-A & USB-C: Connect everything from legacy peripherals to fast-charging accessories.
    • HDMI: Hook up to external monitors or projectors.
    • Audio Jack & MicroSD Reader: For headphones or expanding storage.

    By mastering these features, you can transform your HP Envy x360 into a versatile productivity and entertainment hub. Whether you’re sketching with a stylus, flipping into tablet mode, or fine-tuning audio and performance settings, the Envy x360 is built to keep up with whatever your day demands.