Digital transformation has quietly reached the most essential item in your pocket, your identification. As of 2026, the shift from plastic cards to Mobile Driver’s Licenses and Digital IDs has accelerated across the globe. These digital credentials are not just images saved on a phone. They are encrypted, verifiable tokens designed to be authenticated instantly, often revealing less personal information than a physical card.
That still catches people off guard. A digital ID can confirm you are over a certain age without exposing your address or license number. It feels like a small change, but it reflects a much bigger shift in how identity is handled.
This guide explains how to securely transfer your identification to your mobile device while maintaining strong privacy and security standards.
Core Entities in Digital Identity
Before starting the transfer, it helps to understand what is actually protecting your information behind the scenes. Digital IDs rely on layered systems, not convenience alone.
Mobile Driver’s License mDL: A digital version of your driver’s license stored on a smartphone that follows international standards such as ISO 18013-5. Unlike a physical card, an mDL supports selective disclosure, allowing you to prove specific facts, such as age eligibility, without revealing everything.
Mobile Wallet: An encrypted application such as Apple Wallet or Google Wallet. These wallets rely on a Secure Element, a dedicated hardware chip that keeps sensitive credentials isolated from the rest of the device.
Issuing Authority: The official government body such as a DMV, State Department, or National Registry that cryptographically signs your digital ID. This signature is what makes the credential trustworthy to scanners, checkpoints, and verification systems.
Method 1: Adding a State ID or Driver’s License Using Apple Wallet
Apple Wallet currently supports digital IDs in participating U.S. states and select international regions. The setup process uses the iPhone camera, NFC hardware, and government records to confirm authenticity.
Step 1: Check Compatibility
You need an iPhone 11 or newer running the latest iOS version. Two-Factor Authentication must be enabled on your Apple Account. Without it, the setup will not proceed.
Step 2: Initiate the Add Process
Open the Wallet app.
Tap the Add plus button in the top right corner.
Select Driver’s License or State ID.
Choose your state from the list of supported regions.
Step 3: Scan the Physical ID
You will be asked to scan the front and back of your physical license.
A small detail that matters: place the card on a plain, dark surface with good lighting. Glare or shadows are the most common causes of failed scans.
Step 4: Complete Face and Gesture Verification
To prevent identity theft, the app will prompt you to take Live Photos or perform simple movements such as turning your head or blinking. This confirms the ID is being added by its rightful owner.
Step 5: Submit for Approval
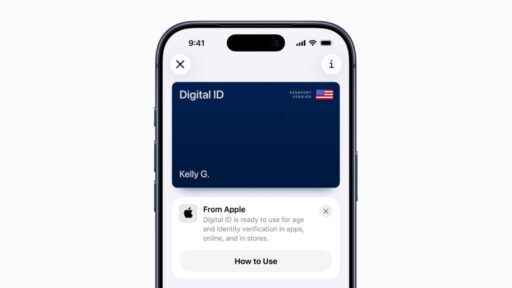
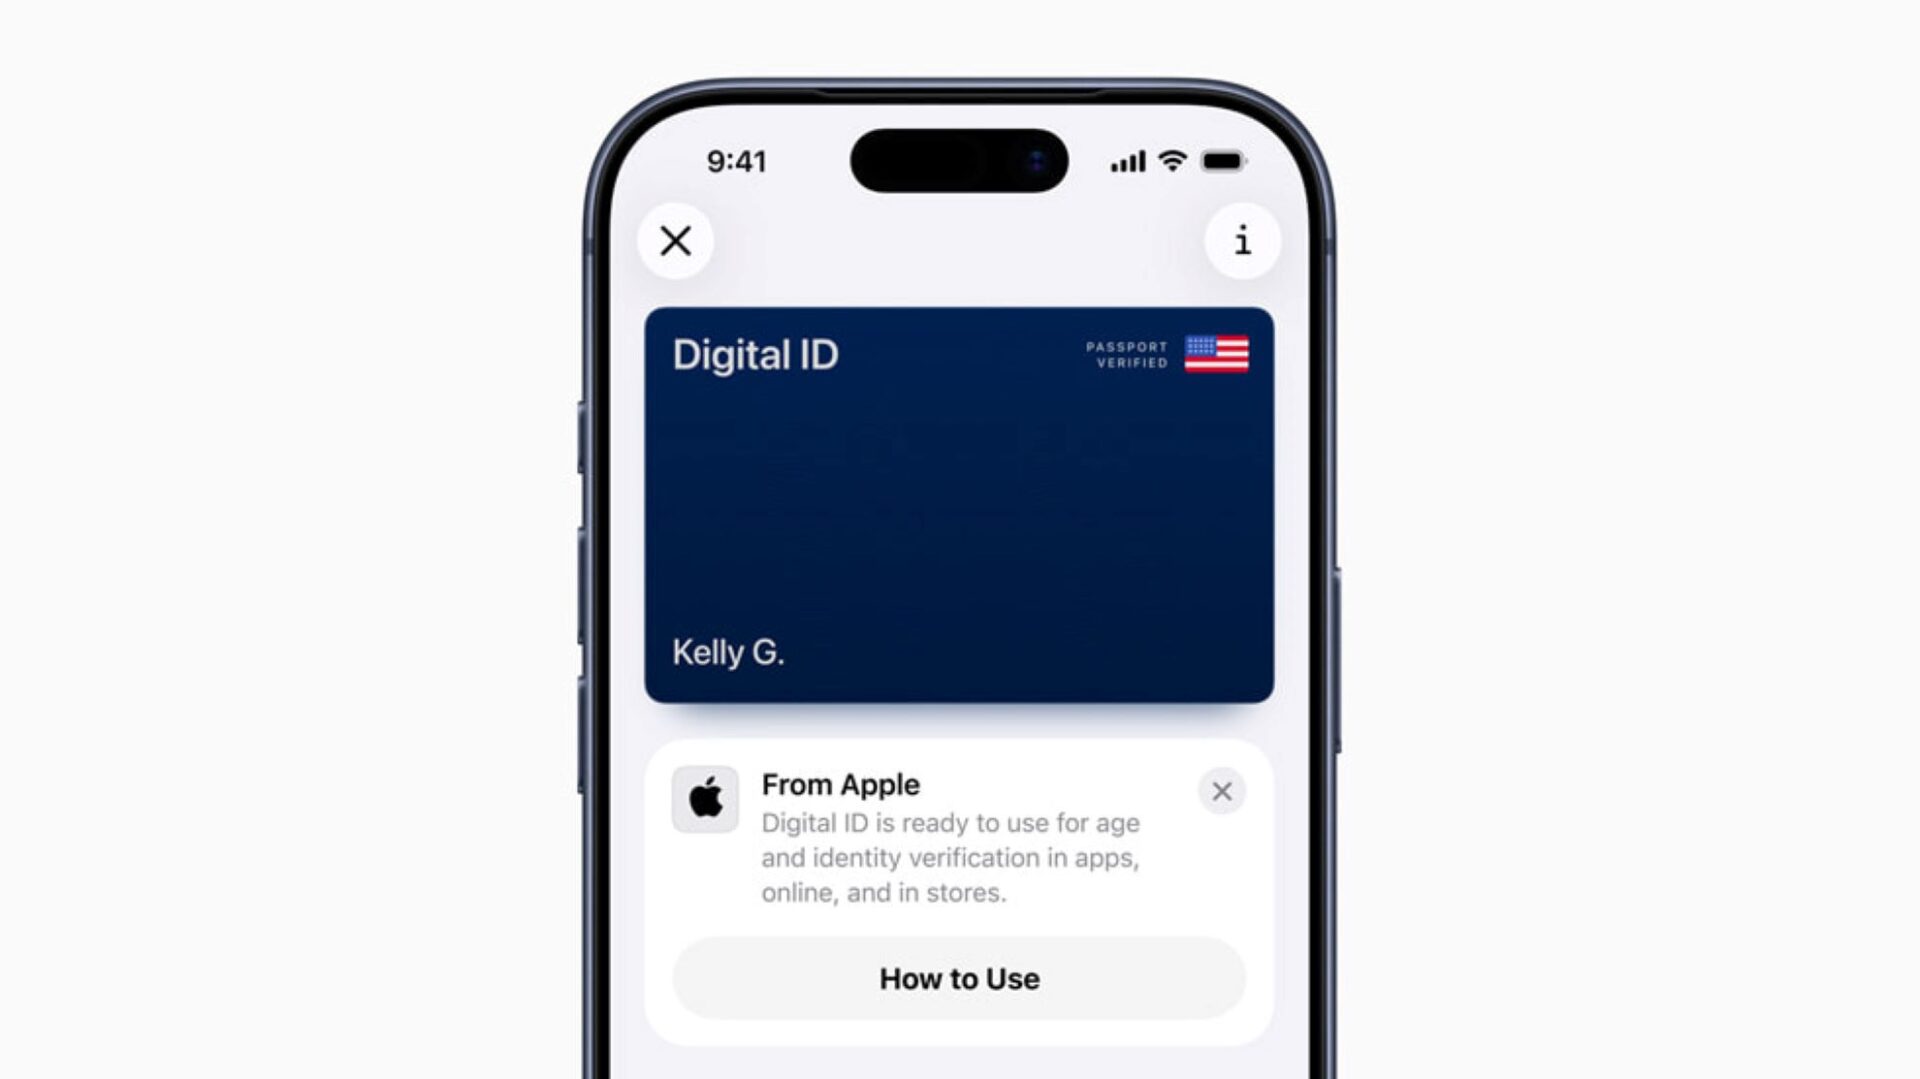
Once submitted, your state DMV verifies the information. Approval may take a few minutes or several days, depending on the region. You will receive a notification once your Digital ID is available.
Method 2: Adding a Digital ID or Passport Using Google Wallet
Google Wallet follows similar security principles but supports a broader range of Android devices, which makes it more widely accessible.
Step 1: Prepare Your Device
Ensure NFC is enabled and a secure screen lock is active, such as a PIN, fingerprint, or face unlock. Android 8.0 or higher is required.
Step 2: Start the Setup
Open the Google Wallet app.
Tap Add to Wallet.
Select ID Card.
Choose your state or U.S. Passport, if available in your region.
Step 3: Scan and Authenticate
Follow the prompts to scan the machine-readable zone on your ID. For passports, you may be asked to hold your phone against the passport cover to read the embedded NFC chip.
Step 4: Identity Confirmation
You will likely be prompted to take a selfie. Google compares this image with the photo held by the Issuing Authority to confirm a match. It feels routine, but this step plays a major role in fraud prevention.
Method 3: Using Government-Specific Apps Internationally
In many regions outside the United States, digital identity begins with government-issued applications rather than commercial wallets.
The European Union, for example, is rolling out the EU Digital Identity Wallet framework. By late 2026, most EU member states are expected to provide official national apps.
Download the Official App
Search for your country’s verified identity application, such as AusweisApp in Germany or MyGovID in Australia. Always confirm the developer listing to avoid unofficial copies.
Verify via NFC
Most modern national IDs contain an embedded chip. Hold your phone against the card to read the encrypted data directly from the document.
Cross-Platform Sync
After verification, many government apps allow you to push the credential into your primary Apple or Google Wallet, reducing duplication while keeping control centralized.
Critical Security Practices to Follow
Even with strong encryption in place, user behavior still matters. These practical steps are worth treating as essentials.
Never Share Screenshot
Screenshots of digital IDs are not secure credentials. They lack cryptographic verification and can be easily copied or misused.
Enable Remote Wipe
Make sure Find My iPhone or Find My Device on Android is active. If your phone is lost, you can remotely erase wallet data before it can be accessed.
Always Use Biometrics
Require Face ID or fingerprint authentication when presenting your ID. This ensures that even if your phone is unlocked, the ID cannot be displayed without your presence.
Use Selective Disclosure
When prompted, choose options like Share Only Necessary Info. This allows you to confirm eligibility, such as age requirements, without revealing your full identity.
Digital IDs are not just about convenience. They represent a shift toward more controlled, privacy-focused identity sharing. The setup process may feel slightly involved at first, but once completed, it often proves to be safer and more intuitive than carrying a physical card.
Frequently Asked Questions (FAQ)
Q. Is a digital ID as valid as a physical one?
A. In many U.S. states and TSA checkpoints, yes. However, acceptance varies by business. You should always carry your physical ID as a backup, especially for driving or international travel.
Q. What happens if my phone battery dies?
A. If your phone is dead, you cannot present your digital ID. This is a primary reason why authorities recommend keeping your physical card in your vehicle or bag.
Q. Can the police track my location if I use a digital ID?
A. No. The ISO 18013-5 standard used by mobile wallets is designed so that the issuer (the DMV) does not receive information about where you showed your ID. The transaction stays between your phone and the reader.
Q. Why won’t my passport scan in the app?
A. Many users on platforms like Reddit report issues with phone cases. If the NFC chip isn’t reading, remove your phone case and try again. Thick or metallic cases can block the signal.
Q. Can I have my ID on two different phones?
A. Generally, no. Most issuing authorities limit a digital ID to one “active” device at a time to prevent identity duplication.