Experiencing Wi-Fi connectivity issues on your Windows PC can be frustrating. Whether you’re using Windows 10 or Windows 11, various factors can prevent your computer from connecting to a wireless network. This comprehensive guide provides step-by-step solutions to troubleshoot and resolve common Wi-Fi connection problems.
- Preliminary Checks
Before diving into advanced troubleshooting, perform these basic checks:
- Ensure Wi-Fi is Enabled: Click on the network icon in the taskbar to verify that Wi-Fi is turned on.
- Airplane Mode: Make sure Airplane Mode is disabled, as it turns off all wireless communications.
- Correct Network and Password: Confirm you’re connecting to the correct network and that the password entered is accurate.
- Other Devices: Check if other devices can connect to the same Wi-Fi network. If not, the issue might be with the router or internet service provider.
- Restart Devices
Sometimes, a simple restart can resolve connectivity issues:
- Restart Your Computer: Rebooting can clear temporary glitches affecting the network adapter.
- Restart Router/Modem: Unplug your router and modem, wait for about 30 seconds, then plug them back in. Allow a few minutes for them to fully restart.
- Run the Network Troubleshooter
Windows has a built-in tool to diagnose and fix network problems:
- Windows 10:
- Go to Settings > Update & Security > Troubleshoot > Additional troubleshooters.
- Select Internet Connections and click Run the troubleshooter.
- Windows 11:
- Navigate to Settings > System > Troubleshoot > Other troubleshooters.
- Click Run next to Internet Connections.
Follow the on-screen instructions to complete the troubleshooting process.
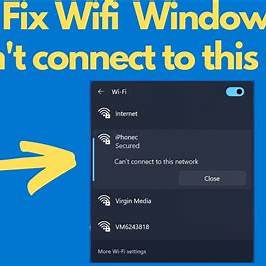
- Forget and Reconnect to the Network
Removing the network and reconnecting can resolve issues caused by corrupted settings:
- Click on the network icon in the taskbar.
- Right-click on the problematic Wi-Fi network and select Forget.
- Reconnect by selecting the network and entering the password.
- Update Network Drivers
Outdated or corrupt drivers can prevent Wi-Fi connections:
- Press Win + X and select Device Manager.
- Expand Network adapters.
- Right-click on your wireless adapter and choose Update driver.
- Select Search automatically for updated driver software.
If Windows doesn’t find a new driver, visit the manufacturer’s website to download and install the latest version.
- Disable Power Management Settings
Power-saving settings can sometimes disable the wireless adapter:
- In Device Manager, right-click on your wireless adapter and select Properties.
- Go to the Power Management tab.
- Uncheck Allow the computer to turn off this device to save power.
- Click OK to apply the changes.
- Reset TCP/IP Stack
Resetting the TCP/IP stack can resolve network issues:
- Press Win + X and select Windows Terminal (Admin) or Command Prompt (Admin).
- Type the following commands, pressing Enter after each:
perl
CopyEdit
netsh winsock reset
netsh int ip reset
- Restart your computer.
- Check for Windows Updates
Installing the latest Windows updates can fix known issues:
- Windows 10: Go to Settings > Update & Security > Windows Update.
- Windows 11: Navigate to Settings > Windows Update.
Click Check for updates and install any available updates.
- Disable Firewall and Antivirus Temporarily
Security software can sometimes block network connections:
- Disable Firewall:
- Go to Control Panel > System and Security > Windows Defender Firewall.
- Click Turn Windows Defender Firewall on or off.
- Select Turn off Windows Defender Firewall for both private and public networks.
- Disable Antivirus:
- Open your antivirus program and temporarily disable it.
Note: Remember to re-enable your firewall and antivirus after testing the connection.
- Perform a Network Reset
If all else fails, resetting network settings can help:
- Windows 10:
- Go to Settings > Network & Internet > Status.
- Click Network reset at the bottom.
- Click Reset now.
- Windows 11:
- Navigate to Settings > Network & Internet > Advanced network settings.
- Click Network reset.
- Click Reset now.
Your computer will restart, and network settings will return to default.
Conclusion
Wi-Fi connectivity issues in Windows can stem from various causes, including software glitches, outdated drivers, or incorrect settings. By systematically following the steps outlined above, you can identify and resolve most common problems. Regularly updating your system and drivers, along with proper network management, can prevent future connectivity issues.