Category: Editorial

  • How to Recover Permanently Deleted Files in Windows

    How to Recover Permanently Deleted Files in Windows

    That heart-stopping moment when you realize you’ve permanently deleted the wrong file is something many of us have experienced. Whether you used Shift + Delete or emptied your Recycle Bin, the file seems gone forever. But, in many cases, it isn’t.

    When you “permanently” delete a file in Windows, the operating system doesn’t immediately erase the data. Instead, it removes the file’s address from its index and marks the space it occupies as “available.” The actual data remains on your hard drive until new data overwrites it. This gives you a window of opportunity to retrieve the file.

    Important: The key to success in file recovery is acting quickly and correctly. Here’s how to recover permanently deleted files in Windows, whether you’re using built-in tools or third-party software.

    Step 1: Stop Using the Drive!

    Do not skip this step. The moment you realize you’ve deleted a file, stop using the drive immediately (C:, D:, etc.). Every action you take—like installing programs or browsing the web—could overwrite the space where your deleted file was stored, making recovery impossible.

    Here’s what to avoid:

    • Do not save any new files.
    • Do not install new programs.
    • Do not browse the web. If your browser cache is on that drive, even that could overwrite your file.

    If possible, use a separate computer or a USB drive to install recovery tools.

    Method 1: Check for Backups (The Easiest Option)

    Before diving into recovery software, check if you have any backups.

    • File History: If you have File History enabled, this is your best bet:
      1. Open the Start Menu, type “Restore your files with File History,” and press Enter.
      2. Navigate to the folder where your file was last located.
      3. Browse through previous versions of the folder using the arrow buttons.
      4. When you find the file, select it and click Restore.
    • Cloud Storage: If your files were synced to cloud services like OneDrive, Google Drive, or Dropbox, check their Trash or Recycle Bin on the web version of the service.

    Method 2: Use Windows File Recovery Tool

    Microsoft offers a free, command-line tool called Windows File Recovery. Though it’s powerful, it’s more suited for users comfortable with basic commands.

    1. Install Windows File Recovery from the Microsoft Store. Note: It must be installed on a different drive from the one you are recovering from.
    2. Open Windows File Recovery from the Start Menu.
    3. The basic command syntax for recovery is:

    css

    Copy

    winfr [source-drive:] [destination-drive:] [/mode] [/switches]

    Example:

    bash

    Copy

    winfr C: E: /regular /n \Users\<YourUsername>\Documents\

      • Source-drive: The drive the file was on (e.g., C:).
      • Destination-drive: A different drive where the recovered file will be saved (e.g., E:).

    Method 3: Use Third-Party Recovery Software (The Most Common Method)

    If you’re not comfortable with command-line tools, third-party file recovery software is a user-friendly option. Recuva and PhotoRec are excellent free options.

    1. Download and install recovery software on a separate drive (not the one you’re recovering from).
    2. Launch the recovery tool and select the drive where your files were deleted.
    3. Choose between a Quick Scan or Deep Scan.
    4. Once the scan is complete, preview and recover the files.
    5. When prompted, save the recovered files to a different drive (e.g., a USB drive) to avoid overwriting the original data.

    Method 4: Prevention Is the Best Cure

    Preventing file loss is the most effective approach:

    • Enable File History to create automatic backups.
    • Use Cloud Syncing (e.g., OneDrive, Google Drive) to back up files regularly.
    • Double-check before Shift + Delete. Make it a habit to use the regular Delete key, which sends files to the Recycle Bin, allowing you to recover them later.

    By following these methods, you’ll have the best chance of recovering your permanently deleted files and turning what could have been a disaster into a minor inconvenience.

    This revised version is a bit more streamlined, with concise section headings and step-by-step instructions to improve readability. It also includes a few formatting tweaks to help emphasize key actions (e.g., bold for important terms).

  • How to Create and Mount a Virtual Hard Disk (VHD) in Windows

    How to Create and Mount a Virtual Hard Disk (VHD) in Windows

    A Virtual Hard Disk (VHD) is a file format that represents a virtualized hard disk drive. In Windows, you can create and mount a VHD as if it were a physical drive, allowing you to store files, install operating systems, or even create a secure, encrypted partition. VHDs are incredibly versatile and are a core component of virtualization technologies like Hyper-V, but they can also be used directly within your Windows operating system for various purposes.

    Why Create and Mount a VHD?

    Using a VHD offers several practical benefits:

    • Data Organization: Create separate “virtual drives” for specific projects, types of files (e.g., games, work documents), or user profiles, keeping your main drive cleaner.
    • Portability: A VHD file can be easily moved between computers, external drives, or cloud storage. You can unmount it from one PC and mount it on another.
    • Security/Encryption: You can encrypt a VHD using BitLocker, providing a secure, transportable, encrypted container for sensitive data. When unmounted, the data is inaccessible.
    • Testing Environments: Ideal for installing and testing new software or even different operating systems without affecting your main Windows installation.
    • Backup/Recovery: A VHD can contain a full system image or important data for backup purposes.
    • Isolation: While not a full virtual machine, a VHD provides a degree of isolation for its contents.

    Understanding VHD Formats: VHD vs. VHDX

    When creating a VHD, you’ll typically choose between two formats:

    • VHD (Virtual Hard Disk): An older format with a maximum size limit of 2 TB. Good for basic use and compatibility with older systems.
    • VHDX (Virtual Hard Disk v2): A newer format (introduced with Windows Server 2012 and Windows 8) with a much larger capacity limit (up to 64 TB). It offers better performance, resilience against data corruption during power failures, and support for larger sector sizes. VHDX is generally recommended for modern Windows systems.

    You’ll also choose between disk types:

    • Fixed size: The VHD file takes up its full allocated size on your physical drive immediately. This offers better performance but consumes more space.
    • Dynamically expanding: The VHD file starts small and grows as you add data to it, up to its maximum specified size. This saves physical disk space but can have slightly lower performance. Recommended for most common use cases unless you need maximum performance.

    How to Create and Mount a Virtual Hard Disk (VHD) in Windows

    We will use the built-in Disk Management utility in Windows for this process.

    Step 1: Open Disk Management

    1. Open Run Dialog: Press the Windows key + R on your keyboard.
    2. Type diskmgmt.msc: In the “Run” dialog box, type diskmgmt.msc and press Enter, or click OK.
      • Alternatively, right-click the Start button and select “Disk Management.
      • Or, search for “Disk Management” in the Start Menu.

    Step 2: Create the VHD File

    1. Action Menu: In the Disk Management window, click on Action in the top menu bar.
    2. Create VHD: Select Create VHD.”
    3. Configure VHD Properties:
      • Location: Click Browse…” to choose where you want to save the VHD file on your physical drive. Give it a meaningful name (e.g., MySecureDrive.vhdx, GameStorage.vhd). It’s recommended to save it on a drive with ample free space.
      • Virtual hard disk size: Enter the desired size for your VHD (e.g., 100 GB, 500 GB). Choose units (MB, GB, TB).
      • Virtual hard disk format:
        • Select VHDX (recommended for modern Windows).
        • Select VHD for older systems or compatibility.
      • Virtual hard disk type:
        • Choose “Dynamically expanding” (recommended for most users to save physical space).
        • Choose Fixed size for maximum performance and predictability.
    4. Click OK.” Windows will now create the VHD file. This might take some time, especially for large fixed-size VHDs. You’ll see the new disk appear in Disk Management as “Disk X” (where X is a new disk number), initially marked as “Not Initialized.”

    Step 3: Initialize the VHD

    Once the VHD is created, it’s like a brand new, unformatted physical hard drive. You need to initialize it.

    1. Locate the New Disk: In the Disk Management window, find the newly created VHD (e.g., “Disk 1,” “Disk 2,” etc.) that is marked “Not Initialized” and “Unallocated.”
    2. Initialize Disk: Right-click on the disk number (e.g., “Disk 1”) where it says “Not Initialized.”
    3. Select Initialize Disk.
    4. Choose Partition Style:
      • GPT (GUID Partition Table): Recommended for modern systems and drives larger than 2 TB.
      • MBR (Master Boot Record): Older standard, limited to 2 TB.
      • Choose GPT for VHDX, and generally for VHDs unless you have a specific reason for MBR.
    5. Click “OK.” The disk status will change to “Online,” and the space will be “Unallocated.”

    Step 4: Create a New Simple Volume (Format the VHD)

    Now, you need to create a partition on the VHD and format it so Windows can use it.

    1. Right-click on the “Unallocated” space within your new VHD (e.g., on the bar where it shows the size).
    2. Select “New Simple Volume…” This will open the New Simple Volume Wizard.
    3. Click “Next” on the Welcome screen.
    4. Specify Volume Size: The maximum available space will be pre-filled. You can reduce it if you want multiple partitions on the VHD, but for a single volume, leave it as is. Click Next.
    5. Assign Drive Letter: Choose a drive letter that isn’t currently in use on your system (e.g., V:, Z:). Click Next.
    6. Format Partition:
      • File system: Choose NTFS (standard for Windows).
      • Allocation unit size: Leave as “Default.”
      • Volume label: Give your VHD a name (e.g., “My Virtual Drive,” “Secure Files”).
      • “Perform a quick format”: Keep this checked for faster formatting.
      • “Enable file and folder compression”: (Optional) Check if you want data on the VHD to be compressed.
    7. Click “Next,” then “Finish.”

    Your VHD is now created, initialized, partitioned, and formatted. It will appear as a new drive in File Explorer (e.g., “My Virtual Drive (V:)”), ready for use.

    How to Mount a VHD

    Once a VHD file is created, you can mount it at any time to make it accessible.

    Method 1: Using Disk Management

    1. Open Disk Management.
    2. Action Menu: Click on “Action” in the top menu bar.
    3. Attach VHD: Select “Attach VHD.”
    4. Location: Click “Browse…” and navigate to the .vhd or .vhdx file you want to mount.
    5. Read-only (Optional): Check this box if you want to mount the VHD in read-only mode, preventing any changes to its contents.
    6. Click “OK.” The VHD will appear as a new drive in File Explorer.

    Method 2: Double-Clicking the VHD File

    The easiest way to mount a VHD is often by simply double-clicking the .vhd or .vhdx file directly in File Explorer. Windows will automatically mount it and assign the next available drive letter.

    How to Dismount a VHD

    When you’re finished using a VHD, you should dismount it. This is similar to safely removing a USB drive.

    1. Open Disk Management.
    2. Locate the Mounted VHD: Find the VHD in the Disk Management window (it will be listed as “Disk X” and show its drive letter).
    3. Dismount: Right-click on the disk number (e.g., “Disk 1”) for the VHD.
    4. Select “Detach VHD.”
    5. Confirm (Optional): You might be prompted to confirm. There’s also an option to “Delete the virtual hard disk file after removing the disk.” Only check this if you want to permanently delete the VHD file itself. Otherwise, leave it unchecked to keep the file for future use.
    6. Click “OK.” The VHD will disappear from File Explorer.

    Advanced VHD Usage

    • BitLocker Encryption: To encrypt a VHD, mount it, then right-click on the drive in File Explorer, select “Turn on BitLocker,” and follow the prompts.
    • Boot from VHD: You can install a separate Windows operating system inside a VHD and configure your PC to boot into it. This is more complex and typically involves using bcdboot commands.
    • Virtual Machines: VHD/VHDX files are the primary disk format for virtual machines in Hyper-V and other virtualization software.

    By mastering the process of how to create and mount a virtual hard disk (VHD) in Windows, you gain a powerful tool for organizing data, enhancing security, and managing your digital workspace more efficiently.

  • How to Use HP Wireless Printer

    How to Use HP Wireless Printer

    HP wireless printers offer incredible convenience, allowing you to print from virtually anywhere in your home or office without being tethered by cables. But let’s be honest—getting that initial connection set up can sometimes feel like a bit of a puzzle, especially considering the range of HP models and connection methods out there.

    As someone who’s helped plenty of users through this process, I can tell you the real trick is just understanding two things: what your printer can do, and how your home Wi-Fi is set up. Whether you’re hooking up a brand-new printer or trying to reconnect one that’s been a little temperamental lately, this guide breaks down the most reliable ways to get everything running smoothly.

    How to Use HP Wireless Printer: A Step-by-Step Guide Before anything else, make sure your HP wireless printer is ready: it’s unboxed, powered on, has paper loaded, and ink cartridges installed. Also, jot down your Wi-Fi network name (SSID) and password—you’ll need them shortly.

    Method 1: Using the HP Smart App (Recommended for Most Users) The HP Smart app is HP’s go-to solution for setting up and managing your printer. It works across Windows, macOS, Android, and iOS, and it’s pretty intuitive once you’re in.

    Step-by-Step Guide:

    Download and Install HP Smart App:

    • On your computer or mobile device, go to 123.hp.com or search for “HP Smart” in your app store.
    • Download and install the app.
    • Heads-up: If you’re using a VPN, it’s a good idea to turn it off for now—it can mess with the setup process.

    Prepare Your Printer for Setup Mode:

    • If it’s a new printer, setup mode should be active by default (usually indicated by a blinking blue wireless light).
    • If not, or if you’re reconnecting, you might need to reset its network settings:
      • Touchscreen printers: Navigate to Wireless or Setup > Network Setup > “Restore Network Settings.”
      • Non-touchscreen models: Common reset methods include:
        • Holding the Wireless button for 5 seconds until the light blinks.
        • Holding Wireless + Cancel (X) buttons together for a few seconds.
        • For HP DeskJet 6000/6400, ENVY 6000/6400, and Tango models: Hold Wi-Fi + Power buttons on the back for 3 seconds.
    • If you’re unsure, your printer manual or HP’s website can help.

    Open HP Smart App and Add Printer:

    • Launch the app and sign in or create an HP account if needed.
    • Click “Set Up a New Printer” or the “+ Add Printer” icon.
    • Allow Bluetooth and location services if prompted—they help the app locate your printer.
    • Select your printer when it appears.

    Connect to Your Wi-Fi Network:

    • The app walks you through connecting to Wi-Fi. If your device is already on the same network, the settings might transfer automatically.
    • Otherwise, choose your Wi-Fi network and enter the password.
    • On some models, you may need to confirm on the printer by pressing a flashing Info or checkmark button.

    Complete Setup and Print:

    • Follow any final prompts to enable features like HP+ (if applicable), register the printer, and install drivers.
    • A solid blue wireless light means you’re good to go.
    • You can now print, scan, and manage your printer from the HP Smart app.

    Method 2: Using the Printer’s Control Panel (For Printers with a Display Screen) If your HP printer has a screen or control panel, you can usually handle setup directly from there—no computer needed initially.

    Step-by-Step Guide:

    Access Wireless Settings:

    • On the control panel, go to Setup, Network, or Wireless settings (the name varies by model).

    Run the Wireless Setup Wizard:

    • Select “Wireless Setup Wizard.”
    • The printer scans for available networks.

    Select Your Network and Enter Password:

    • Pick your Wi-Fi network from the list.
    • Use the screen or arrow buttons to enter your Wi-Fi password (note: it’s case-sensitive).

    Confirm Connection:

    • Once connected, the wireless light should turn solid blue.

    Install Drivers:

    • Go to 123.hp.com from your computer.
    • Enter your printer model and download the driver package. Choose wireless setup during installation.

    Method 3: Using WPS (Wi-Fi Protected Setup) – Push Button Connect If both your printer and router support WPS, this is one of the fastest ways to connect—no password typing required.

    Step-by-Step Guide:

    Place Printer Near Router:

    • Keep them close to ensure a smooth connection.

    Enable WPS on Printer:

    • Touchscreen: Navigate to Wireless settings and choose WPS > Push Button.
    • Physical WPS button: Press and hold it until the wireless light blinks.
    • Non-touchscreen: Usually involves holding the Wireless button for a few seconds.

    Press WPS on Router:

    • Within two minutes, press the WPS button on your router (often marked with a double arrow).

    Wait for Connection:

    • The printer should connect automatically. A solid blue wireless light indicates success.

    Install Drivers:

    • If you haven’t already, head to 123.hp.com and download the necessary drivers.

    Method 4: Using HP Wi-Fi Direct (Direct Connection) No Wi-Fi? No problem. Wi-Fi Direct lets your device talk to the printer directly—great for guests or on-the-go printing.

    Step-by-Step Guide:

    Enable Wi-Fi Direct:

    • Touchscreen: Look in Wireless or Network settings.
    • Non-touchscreen: Press and hold the Wi-Fi Direct button, or print an info page to get details.

    Find Network Name and Password:

    • On the screen or info sheet, note the Wi-Fi Direct name (e.g., “DIRECT-HP-Print-XX”) and password.

    Connect Your Device:

    • Go to Wi-Fi settings and select the printer’s direct network.
    • Enter the password.

    Add Printer to Device:

    • Windows: Settings > Bluetooth & devices > Printers & scanners > Add device.
    • macOS: System Settings > Printers & Scanners > “+” to add.

    Print:

    • Choose the document, select your printer, and hit print.

    Important: You’ll need to reconnect to your usual Wi-Fi to get back online afterward.

    Troubleshooting Common Wireless Printer Issues Even with a smooth setup, hiccups can happen. Here’s what to try if things go sideways:

    Printer Not Found:

    • Make sure it’s powered on and wireless light is either blinking (setup mode) or solid (connected).
    • Confirm both printer and device are on the same network.
    • Try restarting everything—printer, router, and computer.
    • Reduce the distance to your router.
    • Temporarily disable firewall or antivirus to test connectivity (just remember to re-enable it).

    Print Job Stuck:

    • Check for paper and ink.
    • Open print queue and cancel the job.
    • On Windows, restart Print Spooler: Search “Services,” find “Print Spooler,” right-click > Restart.

    Slow Printing or Connection Drops:

    • Improve signal strength—move printer/router closer, try a Wi-Fi extender.
    • Check for router firmware updates.
    • Reduce interference by moving away from other electronics.

    Driver Issues:

    • Download the latest drivers from 123.hp.com.
    • Try HP Print and Scan Doctor for diagnostics (Windows only).

    Once your HP wireless printer is set up properly, it really does open up a new level of convenience for both work and personal use. Hopefully this guide gave you the clarity and confidence to get everything running just the way you want it.

  • How to use speech Recognition to Control Windows

    How to use speech Recognition to Control Windows

    Windows includes a surprisingly capable built-in feature called Windows Speech Recognition (WSR). It lets you control your computer, dictate text, and navigate applications using nothing but your voice. Whether you’re looking for a hands-free way to multitask or you rely on accessibility tools, WSR can dramatically change how you interact with your PC.

    Why Use Speech Recognition to Control Windows?

    There are quite a few good reasons to explore speech control on Windows:

    Accessibility: It’s a game-changer for anyone with physical limitations, making it possible to type, navigate, and use commands without a mouse or keyboard. Hands-Free Operation: It’s perfect when your hands are tied up—say, cooking, crafting, or even presenting. Productivity: Some folks find dictating emails or documents faster than typing, especially during brainstorming. Comfort: If you’ve ever felt wrist strain after hours of typing, this can be a welcome break. Convenience: Launch apps or perform simple actions just by speaking—it’s like having a personal assistant.

    Prerequisites for Using Windows Speech Recognition

    To get started, you’ll need a few things in place:

    A Working Microphone: Quality matters. A decent headset mic tends to work best since it filters out background noise. Compatible Windows Version: WSR works on Windows 7, 8.1, 10, and 11. While the interface has changed slightly over the years, the basics remain consistent. Quiet Environment: Background noise can really throw off accuracy, so try to minimize it.

    Step-by-Step Guide: Setting Up and Using Windows Speech Recognition

    Setting things up doesn’t take long, but giving WSR a bit of training really helps with accuracy.

    Phase 1: Initial Setup

    1. Open Speech Recognition Setup:
      • Click Start, type “Windows Speech Recognition,” and hit Enter.
      • Or navigate to Settings > Ease of Access > Speech (Windows 10) or Settings > Accessibility > Speech (Windows 11), then click “Start Speech Recognition.”
    2. Go Through the Wizard:
      • Welcome screen appears—click “Next.”
      • Choose your microphone type (Headset Mic is ideal) and follow prompts to position it correctly.
      • Read the sample sentence aloud so WSR can adjust volume levels.
    3. Improve Accuracy (Optional, But Worth It):
      • You can opt to let WSR scan your documents/emails to recognize commonly used phrases. Privacy-wise, this is up to you.
    4. Choose Activation Mode:
      • Manual (click to turn it on/off) or Voice Activation (say “Start listening”). The voice option is more seamless, but some prefer manual for control.
    5. Print the Reference Card (Optional):
      • It’s handy to have basic commands printed out. Click “Next.”
    6. Run the Tutorial (Highly Recommended):
      • It’s a bit repetitive, sure, but it helps a lot. WSR learns your voice, and you learn the ropes.
    7. Finish Setup:
      • Once done, click “Finish.”

    Phase 2: Using Windows Speech Recognition

    Now WSR is running, you’ll see a bar docked at the top of your screen.

    Understanding the WSR Bar:

    • “Off-duty” or “Sleeping”: Icon is gray. It’s not listening.
    • “Listening”: Icon turns blue. It’s ready for your commands.
    • “Paused”: Icon is orange. Not listening, but easily reactivated.

    Basic Voice Commands:

    To toggle listening:

    • Say “Start listening” to activate.
    • Say “Stop listening” or “Turn off microphone” to deactivate.

    To open apps:

    • “Open Chrome”
    • “Start Word”

    To control windows:

    • “Show desktop”
    • “Switch to Outlook”
    • “Minimize window”
    • “Scroll down page”
    • “Click Start”
    • “Press Enter”

    For typing and editing:

    • Just start speaking in a text field.
    • Use commands like “New paragraph,” “Delete that,” or “Correct [word].”
    • Say punctuation aloud (e.g., “Period,” “Comma”).

    To access menus:

    • “Click OK”
    • If unsure what to say, say “Show numbers” and then “Click [number].”

    Phase 3: Advanced Training and Customization

    1. Launch WSR and Right-Click the Microphone Icon:
      • Select “Speech options” > “Improve recognition accuracy.”
    2. Train WSR Further:
      • You’ll read more passages. The more you train, the better WSR understands your voice and nuances.
    3. Open the Speech Dictionary:
      • Add custom terms, names, or industry-specific jargon manually.
    4. Access the Full Command List:
      • Check out the Speech Reference Card for all the built-in commands.
    5. Advanced Customization:
      • Tech-savvy users can create macros or custom commands using third-party tools.

    Tips for Best Results

    • Speak Clearly: Don’t over-enunciate, just speak normally.
    • Use Natural Pauses: Especially between commands.
    • Learn the Commands: Familiarity goes a long way.
    • Correct Errors: Use “Correct that” to help WSR learn from its mistakes.
    • Minimize Noise: Quiet surroundings lead to better recognition.
    • Upgrade Your Mic: It can make a night-and-day difference.

    My Personal Experience with WSR

    I tried WSR initially just for fun. The first go-around was a bit clunky, honestly, but once I did the full tutorial, the system became noticeably smarter. I especially love using it for quick notes or firing off an email when my hands are busy. Discovering the “Show numbers” feature was a game-changer—it made clicking through dense menus super manageable without touching the mouse. WSR isn’t perfect for everything, but it’s genuinely useful when you find the right workflow.

    Conclusion

    Using Speech Recognition in Windows can open up a whole new, hands-free way to use your computer. Whether you’re aiming to boost productivity, ease physical strain, or just try something different, WSR offers a lot under the hood. With the right setup, a bit of training, and some patience, it’s a tool worth having in your digital toolkit.

  • How to Use HP Envy 360 Laptop Features

    How to Use HP Envy 360 Laptop Features

    The HP Envy x360 laptop series is renowned for its versatility, offering a powerful combination of laptop functionality with tablet flexibility. Its signature 360-degree hinge allows it to transform into various modes, catering to different tasks and preferences. But there’s much more to the Envy x360 than just its convertible design. Here’s how to tap into its full range of features to enhance your productivity, creativity, and entertainment experience.

    1. Mastering the 360-Degree Hinge: Exploring Modes

    The defining feature of the Envy x360 is its flexible hinge. Here are the modes it supports:

    • Laptop Mode: Ideal for traditional work like typing or browsing. Just open the laptop normally.
    • Tent Mode: Stand it up like an inverted “V.” Great for watching videos or video calls on limited desk space.
    • Stand Mode: Fold it back so the keyboard acts as a stand. Best for presentations or drawing with a stylus.
    • Tablet Mode: Fold the screen completely flat. Perfect for touch-focused tasks like reading, sketching, or note-taking.

    Tip: Windows usually prompts to switch to Tablet Mode when you change orientation. You can also do this manually from the Action Center.

    1. Using the Touchscreen and Stylus

    Many Envy x360 models feature a touchscreen and support for HP Digital Pen:

    • Touch Gestures: Swipe, tap, and zoom to navigate intuitively.
    • Digital Pen: Pair via Bluetooth to unlock precise drawing, note-taking, or signing documents.
    • Windows Ink Workspace: Find this via the pen icon on the taskbar. It includes tools like Sticky Notes and Sketchpad.
    1. Enhancing Audio with Bang & Olufsen (B&O)

    HP partners with B&O to deliver superior audio:

    • Audio Control App: Look for “HP Audio Control” in your Start Menu.
    • Customize Sound Profiles: Adjust equalizers or choose presets for music, movies, or voice clarity.
    • Tip: Keep audio drivers updated through HP Support Assistant for the best experience.
    1. Optimizing Performance and Battery

    HP utilities help you get the most out of your system:

    • HP Support Assistant: Keeps drivers updated and helps with diagnostics.
    • HP Command Center: (Available on some models) Adjust performance profiles, thermal settings, and more.
    • HP Smart: If you use an HP printer, this app simplifies printing and scanning tasks.
    1. Privacy and Security Features

    Modern Envy x360 models include helpful privacy tools:

    • Fingerprint Reader: Set up via Settings > Accounts > Sign-in options.
    • Webcam Kill Switch: A physical shutter lets you block the camera.
    • Microphone Mute Key: Look for a mic icon on the keyboard with an LED indicator.
    1. Managing Display and Visual Comfort

    Make the most of your vibrant display:

    • HP Display Control: Calibrate color profiles for photo work, movies, etc. (on supported models).
    • Night Light: Found in Settings > System > Display. Reduces blue light in the evening.
    1. Understanding Ports and Connectivity

    Know your way around the physical ports:

    • USB-A & USB-C: Connect everything from legacy peripherals to fast-charging accessories.
    • HDMI: Hook up to external monitors or projectors.
    • Audio Jack & MicroSD Reader: For headphones or expanding storage.

    By mastering these features, you can transform your HP Envy x360 into a versatile productivity and entertainment hub. Whether you’re sketching with a stylus, flipping into tablet mode, or fine-tuning audio and performance settings, the Envy x360 is built to keep up with whatever your day demands.

  • How to Change Apple ID Email

    How to Change Apple ID Email

    Changing your Apple ID email might seem risky at first—especially if you’re worried about losing important data like photos, contacts, app purchases, or iCloud backups. But the truth is, you can change your Apple ID email without losing any data—if you follow the correct steps.

    I’ve personally helped friends and clients change their Apple ID email without issues, and in this guide, I’ll walk you through a detailed, foolproof process based on real usage, Apple documentation, and best practices. This article is meant to give you confidence in completing this task while ensuring your data remains fully intact.

    What Is Your Apple ID and Why Changing Its Email Matters

    Your Apple ID is the account used across all Apple services—iCloud, App Store, FaceTime, Messages, Apple Music, Find My iPhone, and more. It is typically an email address, and over time, you might want to change it because:

    • You no longer use the current email address.

    • You want to switch from a third-party email (like Gmail) to an @icloud.com address.

    • Your old email address is no longer secure or accessible.

    Changing your Apple ID email is not the same as creating a new Apple ID. When done correctly, all your data—including purchases, photos, iCloud content, and subscriptions—remains linked to your account.

    Before You Start: Important Things to Know

    • You need access to your current Apple ID and password.
    • You must have access to the new email address you want to use.
    • If your Apple ID is already an Apple domain email (e.g., @icloud.com), you cannot change it to a third-party address.
    • Your data is stored on Apple’s servers via iCloud, so your device does not erase anything during this process.

    Step 1: Back Up Your iPhone (Optional but Recommended)

    Even though changing your Apple ID email won’t delete your data, it’s smart to back up your iPhone as a precaution.

    To back up with iCloud:

    1. Go to Settings > [Your Name] > iCloud > iCloud Backup.
    2. Tap Back Up Now.

    To back up with a computer:

    1. Connect your iPhone to your Mac or PC.
    2. Open Finder (macOS Catalina or later) or iTunes (macOS Mojave or Windows).
    3. Select your iPhone and click Back Up Now.

    From my personal experience, this gives you peace of mind in case anything unexpected happens during the Apple ID update.

    Step 2: Sign Out of Other Devices (If Needed)

    To avoid sync issues or login prompts during the change, sign out of other Apple devices temporarily.

    To sign out:

    1. On any other iPhone, iPad, or Mac signed in with your Apple ID, go to Settings > Apple ID > Sign Out.
    2. You can always sign back in after the email change is complete.

    If you only use one device, you can skip this step.

    Step 3: Check If You Can Change the Apple ID Email

    Not all Apple IDs can be changed.

    To check:

    1. Go to Settings > [Your Name] > Name, Phone Numbers, Email.
    2. Tap Edit next to Contactable At.
    3. If the email is a third-party address (like Gmail, Outlook), you can change it.
    4. If it’s an Apple email (e.g., @icloud.com), you can’t change it to a non-Apple email.

    Step 4: Change Your Apple ID Email

    You can change the email directly from your iPhone or through Apple’s website.

    Method 1: On your iPhone

    1. Open Settings.
    2. Tap [Your Name] > Name, Phone Numbers, Email.
    3. Tap Edit next to Contactable At.
    4. Tap the red minus button next to your current email and then Delete.
    5. Tap Continue when prompted.
    6. Enter the new email address you want to use.
    7. Enter your Apple ID password to confirm.
    8. A verification code will be sent to the new email address.
    9. Enter the verification code to finish.

    Method 2: On Apple’s website

    1. Go to applesupport and sign in.
    2. Under Account, click Edit.
    3. Click Change Apple ID.
    4. Enter your new email and confirm the code sent to it.

    Step 5: Sign In Again and Verify Your Settings

    Once the Apple ID change is confirmed, sign back in using your new email address.

    On your iPhone:

    1. Go to Settings > [Your Name].
    2. If prompted, sign in again using the new Apple ID email and your existing password.

    Check all synced services:

    • Photos
    • Contacts
    • iCloud Drive
    • Mail
    • Notes
    • Calendar

    All you data should still be there. In my experience, Apple seamlessly transfers everything when the account is properly updated.

    Step 6: Re-sign Into Other Devices and Services

    If you use your Apple ID on more than one device, repeat the following on each one:

    1. Go to Settings > Sign In to your iPhone (if signed out).
    2. Enter your new Apple ID email and password.
    3. Re-enable services like iCloud, Messages, and FaceTime.

    Also update your Apple ID credentials in apps and services like:

    • App Store
    • iTunes
    • Apple Music
    • Apple TV+
    • Find My iPhone

    Step 7: Update Email in Key Apple Services (If Needed)

    While your Apple ID is updated, some services may require manual sign-in with the new email:

    • iCloud on Mac or Windows
    • Apple Mail
    • Family Sharing settings

    Make sure to update it in places where your email is used for communication or access recovery.

    Frequently Asked Questions

    Will I lose my photos or iCloud data?

    No. As long as you change your Apple ID email without creating a new account, your iCloud data stays linked and intact.

    Can I use an @icloud.com address as my new Apple ID?

    Yes. If you have created an @icloud.com alias, you can switch to it permanently. But once done, you cannot switch back to a third-party email.

    What happens to purchases and subscriptions?

    Your purchases, downloads, subscriptions, and Apple services remain linked to the same account, even after changing the email.

    Final Thoughts

    Changing your Apple ID email is a straightforward process that doesn’t result in any data loss—as long as you’re changing the email on your existing account, not creating a new Apple ID. I’ve done this on multiple iPhones and Macs, and everything—from photos to contacts to subscriptions—remained untouched. Always ensure your new email is secure and accessible. Also, use this opportunity to enable two-factor authentication if you haven’t already for added security.

  • How to Install Bluetooth Drivers Manually

    How to Install Bluetooth Drivers Manually

    Bluetooth is essential for wireless connectivity between your Windows PC and peripherals like headphones, speakers, phones, or keyboards. However, if your Bluetooth is missing from the Device Manager or not working properly, the issue may be related to missing, outdated, or corrupted Bluetooth drivers. Installing Bluetooth drivers manually is often necessary after a clean OS installation, hardware change, or when automatic updates fail. I’ve had to do this on various laptops, especially when manufacturers didn’t include pre-installed drivers or when Windows Update didn’t detect the right version. This guide walks you through how to install Bluetooth drivers manually on Windows 10 or 11—clearly and accurately, based on first-hand experience and the latest technical guidance.

    What Are Bluetooth Drivers and Why Do You Need Them?

    A Bluetooth driver is a software component that enables communication between your PC’s operating system and the Bluetooth hardware. Without it:

    • Your PC may not detect Bluetooth devices
    • The Bluetooth toggle may be missing from Settings
    • Device pairing may fail or disconnect randomly
    • No Bluetooth icon appears in the system tray

    Installing the correct driver resolves these issues and ensures proper functionality.

    When Do You Need to Install Bluetooth Drivers Manually?

    You may need to manually install drivers when:

    • You performed a clean installation of Windows
    • Bluetooth is missing from Device Manager
    • Windows failed to detect or update the driver automatically
    • You want to install the latest version from the OEM
    • You are replacing or upgrading the Bluetooth module

    Before You Begin: Basic Checks

    1. Check if Bluetooth Hardware Exists

    Open Device Manager:

    • Press Windows + X → Click Device Manager

    Look for:

    • “Bluetooth” section
    • Or under “Network adapters” (some devices list it there)

    If not visible:

    • Click View > Show hidden devices
    • If still missing, verify that Bluetooth is enabled in BIOS/UEFI
    1. Know Your System and Bluetooth Adapter

    Before downloading drivers:

    • Identify your system model and Bluetooth chipset (Intel, Realtek, Broadcom, etc.)

    You can find this via:

    • OEM website (using laptop/PC model)
    • System Information (msinfo32)
    • Using tools like Speccy (for advanced users)

    Step-by-Step Guide: How to Install Bluetooth Drivers Manually

    Step 1: Download the Correct Bluetooth Driver

    Go to the official website of your laptop or motherboard manufacturer. Do not rely on third-party driver websites—they may be outdated or unsafe.

    Examples:

    • Dell: support.dell.com
    • HP: support.hp.com
    • Lenovo: support.lenovo.com
    • Acer: support.acer.com
    • ASUS: support.asus.com
    • Intel (for Bluetooth chipset drivers):

    Download tips:

    • Choose the correct OS version (Windows 10/11, 64-bit)
    • Look for Bluetooth, not Wireless/Wi-Fi
    • Download the .exe installer or .zip package

    Save the file to your Downloads folder.

    Step 2: Uninstall Any Existing or Corrupt Bluetooth Drivers

    Sometimes old or faulty drivers interfere with new installations.

    Steps:

    1. Open Device Manager
    2. Expand Bluetooth (or Network Adapters if listed there)
    3. Right-click the Bluetooth device > Uninstall device
    4. Check “Delete the driver software for this device” if prompted
    5. Click Uninstall

    Repeat for any duplicate or ghost entries.

    Restart your computer after uninstalling.

    Step 3: Install the Bluetooth Driver Manually

    If You Have a .exe File:

    1. Double-click the .exe file
    2. Follow the on-screen installer wizard
    3. Restart the PC after installation

    If You Have a .zip or Extracted Driver Folder:

    1. Extract the folder to your desktop
    2. Open Device Manager
    3. Right-click on the Unknown device or existing Bluetooth hardware
    4. Select Update driver
    5. Choose “Browse my computer for drivers”
    6. Click Browse and select the extracted folder
    7. Click Next
    8. Windows will install the driver if compatible

    Once complete, restart your system.

    Step 4: Verify That Bluetooth Is Working

    After reboot:

    1. Press Windows + I > Go to Bluetooth & devices
    2. The Bluetooth toggle should now be visible
    3. Open Device Manager and confirm Bluetooth device appears correctly
    4. Look for the Bluetooth icon in the system tray

    Try pairing a device like a wireless mouse or headphones to confirm.

    Troubleshooting Tips

    Bluetooth Still Missing After Driver Installation?

    • Go to Settings > Devices > Bluetooth and see if toggle appears
    • Open Services (type services.msc)
      • Make sure Bluetooth Support Service is Running and Automatic
    • Recheck BIOS settings: Bluetooth must be enabled in firmware
    • Run Windows Troubleshooter:
      • Settings > System > Troubleshoot > Other troubleshooters > Bluetooth

    Use Windows Optional Updates

    Sometimes the latest driver is available via Windows Update.

    1. Go to Settings > Windows Update > Advanced options
    2. Click Optional updates
    3. If Bluetooth drivers are listed, select and install them

    Optional: Re-enable Bluetooth Support Service

    If the Bluetooth Support Service is not active, it may block driver function.

    Steps:

    1. Press Windows + R, type services.msc, hit Enter
    2. Find Bluetooth Support Service
    3. Right-click > Properties
    4. Set Startup type: Automatic
    5. Click Start, then Apply

    Best Practices

    • Always use OEM-provided drivers when available
    • Avoid using generic or outdated third-party drivers
    • If the adapter is external (USB Bluetooth dongle), use the manufacturer’s support page
    • Keep a backup of working driver files in case of future issues
    • Use Device Manager > Driver > Roll back if the new driver causes problems

    Conclusion

    Installing Bluetooth drivers manually is a reliable way to fix connectivity issues, especially when automatic updates don’t work. By following this guide—downloading the correct drivers, uninstalling old versions, and installing through Device Manager or executable packages—you can get Bluetooth working again on any Windows PC. I’ve used this exact method on Dell, Lenovo, and HP laptops where Bluetooth failed to work post-clean install. With careful steps and the right driver, manual installation is both safe and effective.

  • How to Check CPU and RAM Usage in Windows

    How to Check CPU and RAM Usage in Windows

    Monitoring CPU and RAM usage in Windows is essential for understanding how your computer is performing. High CPU or memory usage can cause system slowdowns, application crashes, or overheating. Knowing how to check system resource usage helps you troubleshoot issues, identify performance bottlenecks, and keep your PC running smoothly.

    This guide will walk you through several methods to check your CPU usage and RAM usage in Windows 10 and 11. I’ve personally used these methods across various devices—from high-end desktops to low-power laptops—and will share practical tips to help you get the most out of your system.

    Why Monitor CPU and RAM Usage?

    Here are a few common reasons you might want to keep an eye on resource usage:

    • Your computer is running slow or freezing
    • Apps are crashing or not responding
    • You suspect a background process is using too much CPU or memory
    • You’re checking system capacity before installing new software or games
    • You’re troubleshooting thermal issues or fan noise

    Windows includes several built-in tools for checking resource usage. Let’s go through each method step by step.

    Method 1: Use Task Manager

    Task Manager is the most accessible tool for checking CPU and RAM usage in real-time.

    Step 1: Open Task Manager

    You can open Task Manager in multiple ways:

    • Press Ctrl + Shift + Esc
    • Right-click on the taskbar and select Task Manager
    • Press Ctrl + Alt + Delete and choose Task Manager

    If it opens in compact view, click More details at the bottom.

    Step 2: Monitor CPU and Memory Usage

    Once you’re in the full Task Manager view:

    • Click on the Processes tab.
    • You’ll see a list of all running apps and background processes.
    • Under the CPU column, you can see how much processor power each process is using (in percentage).
    • Under the Memory column, you can view RAM usage (in MB or percentage).

    You can sort columns to see which programs are using the most resources.

    Step 3: View System-Wide Usage

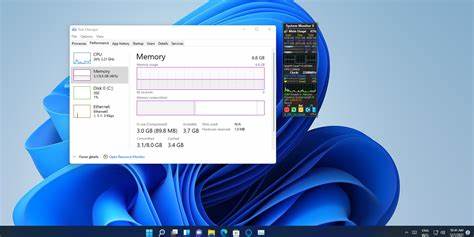
    • Switch to the Performance tab.
    • Click CPU to view:
      • Usage percentage
      • Number of cores and threads
      • Processor speed and uptime
    • Click Memory to view:
      • Total installed RAM
      • Amount in use
      • Available memory
      • Memory speed and slot information

    This section gives a clearer snapshot of how your CPU and RAM are performing over time.

    Method 2: Use Resource Monitor

    Resource Monitor offers a more detailed view than Task Manager and is useful for advanced monitoring.

    Step 1: Open Resource Monitor

    • Press Windows + R, type resmon, and press Enter
    • Or open Task Manager > Performance tab > Open Resource Monitor (at the bottom)

    Step 2: Monitor CPU Usage

    • Click the CPU tab.
    • You’ll see a live graph of CPU usage for all cores.
    • Below, the Processes section shows each process’s CPU activity.
    • Use the Average CPU column to identify long-running processes that consume the most power.

    Step 3: Monitor Memory Usage

    • Click the Memory tab.
    • You’ll see a bar graph showing memory usage:
      • Hardware Reserved
      • In Use
      • Modified
      • Standby
      • Free
    • Scroll down to see a list of processes and how much RAM each one is using.

    This tool is especially helpful when troubleshooting a memory leak or figuring out which applications are hogging RAM.

    Method 3: Use Performance Monitor (Advanced Users)

    Performance Monitor allows you to build custom tracking tools and logs for system performance over time.

    Step 1: Open Performance Monitor

    • Press Windows + R, type perfmon, and hit Enter
    • In the left pane, expand Performance Monitor

    Step 2: Add CPU and Memory Counters

    1. Click the green plus icon to add counters.
    2. From the list:
      • Select Processor > % Processor Time (choose All instances).
      • Select Memory > Available MBytes, Committed Bytes, and Cache Bytes.
    3. Click Add, then OK.

    You’ll now see a graph tracking these parameters in real time.

    This tool is ideal for long-term monitoring or diagnosing performance issues that occur intermittently.

    Method 4: Use Windows Settings (Quick Overview)

    If you want a quick summary:

    1. Open Settings with Windows + I
    2. Go to System > About
    3. Under Device specifications, you can see:
      • Processor (CPU)
      • Installed RAM

    This doesn’t show usage, but helps identify hardware capacity.

    Method 5: Use Command Prompt or PowerShell

    These tools are text-based but useful if you’re scripting or need a fast check.

    Check RAM usage:

    Open Command Prompt or PowerShell and type:

    mathematica

    CopyEdit

    systeminfo | findstr /C:”Total Physical Memory”

    mathematica

    CopyEdit

    systeminfo | findstr /C:”Available Physical Memory”

    Check CPU load:

    Use PowerShell:

    sql

    CopyEdit

    Get-CimInstance win32_processor | select LoadPercentage

    This gives the current CPU load in percentage.

    Tips to Troubleshoot High CPU or RAM Usage

    If you’re seeing consistently high usage, here are steps I personally use to troubleshoot:

    1. Check for Background Apps

    Some apps (like Chrome, OneDrive, or antivirus software) use a lot of resources even when idle. Disable non-essential apps from Task Manager > Startup.

    1. End Problematic Tasks

    Use Task Manager to find processes using too much CPU or RAM. Right-click and choose End Task to temporarily stop them.

    1. Scan for Malware

    Unusual CPU or RAM spikes may be caused by malicious software. Run a full scan using Windows Defender or a trusted antivirus tool.

    1. Update Software and Drivers

    Outdated drivers or buggy apps can cause leaks or high resource usage. Update from Windows Update > Advanced Options > Optional Updates.

    1. Add More RAM

    If your memory usage is constantly above 80% and your device allows upgrades, adding more RAM can significantly improve performance.

    My Personal Experience

    On my primary laptop, I regularly check Task Manager to monitor CPU spikes when working with heavy apps like video editors or large Excel files. I’ve noticed apps like Chrome can use over 2 GB of RAM with many tabs open.

    By using Resource Monitor, I once diagnosed a memory leak caused by a misbehaving browser extension. Since then, it’s become a habit to check these tools whenever my system slows down unexpectedly.

    Conclusion

    Knowing how to check CPU and RAM usage in Windows gives you control over your system’s performance. Whether you’re troubleshooting a slowdown, monitoring resource usage while gaming, or just curious about what’s going on in the background, the built-in tools in Windows offer everything you need.

  • How to Fix Wi-Fi Not Connecting in Windows

    How to Fix Wi-Fi Not Connecting in Windows

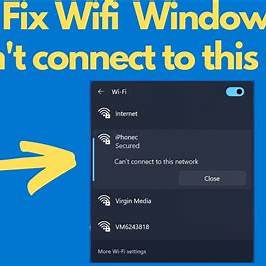
    Experiencing Wi-Fi connectivity issues on your Windows PC can be frustrating. Whether you’re using Windows 10 or Windows 11, various factors can prevent your computer from connecting to a wireless network. This comprehensive guide provides step-by-step solutions to troubleshoot and resolve common Wi-Fi connection problems.

    1. Preliminary Checks

    Before diving into advanced troubleshooting, perform these basic checks:

    • Ensure Wi-Fi is Enabled: Click on the network icon in the taskbar to verify that Wi-Fi is turned on.
    • Airplane Mode: Make sure Airplane Mode is disabled, as it turns off all wireless communications.
    • Correct Network and Password: Confirm you’re connecting to the correct network and that the password entered is accurate.
    • Other Devices: Check if other devices can connect to the same Wi-Fi network. If not, the issue might be with the router or internet service provider.
    1. Restart Devices

    Sometimes, a simple restart can resolve connectivity issues:

    • Restart Your Computer: Rebooting can clear temporary glitches affecting the network adapter.
    • Restart Router/Modem: Unplug your router and modem, wait for about 30 seconds, then plug them back in. Allow a few minutes for them to fully restart.
    1. Run the Network Troubleshooter

    Windows has a built-in tool to diagnose and fix network problems:

    1. Windows 10:
      • Go to Settings > Update & Security > Troubleshoot > Additional troubleshooters.
      • Select Internet Connections and click Run the troubleshooter.
    2. Windows 11:
      • Navigate to Settings > System > Troubleshoot > Other troubleshooters.
      • Click Run next to Internet Connections.

    Follow the on-screen instructions to complete the troubleshooting process.

    1. Forget and Reconnect to the Network

    Removing the network and reconnecting can resolve issues caused by corrupted settings:

    1. Click on the network icon in the taskbar.
    2. Right-click on the problematic Wi-Fi network and select Forget.
    3. Reconnect by selecting the network and entering the password.
    1. Update Network Drivers

    Outdated or corrupt drivers can prevent Wi-Fi connections:

    1. Press Win + X and select Device Manager.
    2. Expand Network adapters.
    3. Right-click on your wireless adapter and choose Update driver.
    4. Select Search automatically for updated driver software.

    If Windows doesn’t find a new driver, visit the manufacturer’s website to download and install the latest version.

    1. Disable Power Management Settings

    Power-saving settings can sometimes disable the wireless adapter:

    1. In Device Manager, right-click on your wireless adapter and select Properties.
    2. Go to the Power Management tab.
    3. Uncheck Allow the computer to turn off this device to save power.
    4. Click OK to apply the changes.
    1. Reset TCP/IP Stack

    Resetting the TCP/IP stack can resolve network issues:

    1. Press Win + X and select Windows Terminal (Admin) or Command Prompt (Admin).
    2. Type the following commands, pressing Enter after each:

    perl

    CopyEdit

    netsh winsock reset

    netsh int ip reset

    1. Restart your computer.
    1. Check for Windows Updates

    Installing the latest Windows updates can fix known issues:

    • Windows 10: Go to Settings > Update & Security > Windows Update.
    • Windows 11: Navigate to Settings > Windows Update.

    Click Check for updates and install any available updates.

    1. Disable Firewall and Antivirus Temporarily

    Security software can sometimes block network connections:

    1. Disable Firewall:
      • Go to Control Panel > System and Security > Windows Defender Firewall.
      • Click Turn Windows Defender Firewall on or off.
      • Select Turn off Windows Defender Firewall for both private and public networks.
    2. Disable Antivirus:
      • Open your antivirus program and temporarily disable it.

    Note: Remember to re-enable your firewall and antivirus after testing the connection.

    1. Perform a Network Reset

    If all else fails, resetting network settings can help:

    1. Windows 10:
      • Go to Settings > Network & Internet > Status.
      • Click Network reset at the bottom.
      • Click Reset now.
    2. Windows 11:
      • Navigate to Settings > Network & Internet > Advanced network settings.
      • Click Network reset.
      • Click Reset now.

    Your computer will restart, and network settings will return to default.

    Conclusion

    Wi-Fi connectivity issues in Windows can stem from various causes, including software glitches, outdated drivers, or incorrect settings. By systematically following the steps outlined above, you can identify and resolve most common problems. Regularly updating your system and drivers, along with proper network management, can prevent future connectivity issues.

  • How to Free up Space on Windows

    How to Free up Space on Windows

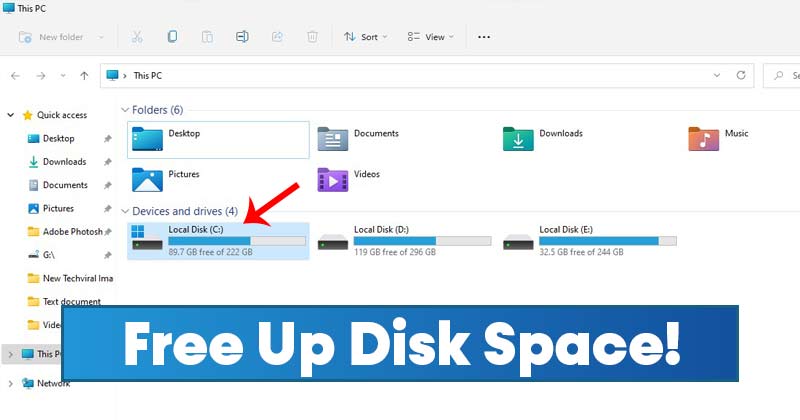
    Freeing up disk space on your Windows PC is essential for maintaining optimal performance and ensuring you have room for important files and applications. Over time, your system accumulates unnecessary files, outdated backups, and unused applications that can consume valuable storage. This guide provides a comprehensive, step-by-step approach to reclaiming disk space on Windows 10 and Windows 11 systems.

    1. Utilize Storage Sense

    Storage Sense is a built-in Windows feature that automatically frees up space by deleting unnecessary files.

    Steps to Enable and Configure Storage Sense:

    1. Press Windows + I to open Settings.
    2. Navigate to System > Storage.
    3. Toggle on Storage Sense.
    4. Click on “Configure Storage Sense or run it now”.
    5. Set preferences for deleting temporary files, files in the Recycle Bin, and files in the Downloads folder.
    6. Click “Clean now” to initiate an immediate cleanup.

    Note: Adjust the frequency of automatic cleanups based on your usage patterns.

    1. Run Disk Cleanup

    Disk Cleanup is a legacy tool that helps remove temporary files and system files.

    Steps to Use Disk Cleanup:

    1. Press Windows + S, type “Disk Cleanup”, and select the tool.
    2. Choose the drive you want to clean (typically C:) and click OK.
    3. Click “Clean up system files”.
    4. Select the file types to delete, such as:
      • Windows Update Cleanup
      • Temporary Internet Files
      • Recycle Bin
      • Temporary files
    5. Click OK, then Delete Files to confirm.

    Note: Deleting “Previous Windows installations” can free up significant space but will remove the option to revert to an earlier version.

    1. Uninstall Unused Applications

    Removing applications you no longer use can free up substantial disk space.

    Steps to Uninstall Applications:

    1. Open Settings > Apps > Apps & features.
    2. Sort applications by size to identify large programs.
    3. Click on the application you wish to remove and select Uninstall.
    4. Follow the prompts to complete the uninstallation.

    Tip: Regularly review installed applications to keep your system lean.

    1. Analyze Disk Space Usage

    Understanding what consumes your disk space helps in targeted cleanup.

    Steps to Analyze Disk Space:

    1. Open Settings > System > Storage.
    2. Click on the drive (e.g., C:) to view storage usage by category.
    3. Identify categories consuming significant space, such as Apps & features, Temporary files, or Documents.
    4. Click on a category to manage and delete unnecessary files.

    Note: Use third-party tools like WinDirStat for a more detailed analysis.

    1. Empty the Recycle Bin

    Files in the Recycle Bin still occupy disk space until permanently deleted.

    Steps to Empty the Recycle Bin:

    1. Locate the Recycle Bin icon on your desktop.
    2. Right-click on the icon and select Empty Recycle Bin.
    3. Confirm the action when prompted.

    Tip: Regularly empty the Recycle Bin to maintain free space.

    1. Delete Temporary Files

    Temporary files can accumulate and consume significant storage.

    Steps to Delete Temporary Files:

    1. Open Settings > System > Storage.
    2. Click on Temporary files.
    3. Select the types of temporary files to remove, such as:
      • Temporary Internet Files
      • Delivery Optimization Files
      • Thumbnails
    4. Click Remove files to delete the selected items.

    Note: Review the list carefully to avoid deleting important files.

    1. Move Files to External Storage or Cloud

    Transferring files to external drives or cloud storage can free up local disk space.

    Options:

    • External Storage: Use USB drives or external hard drives to store large files.
    • Cloud Storage: Utilize services like OneDrive, Google Drive, or Dropbox to store files online.

    Tip: Regularly back up important files to prevent data loss.

    1. Disable Hibernation

    Hibernation mode saves the system state to the hard drive, consuming disk space.

    Steps to Disable Hibernation:

    1. Press Windows + X and select Command Prompt (Admin) or Windows PowerShell (Admin).
    2. Type powercfg -h off and press Enter.

    Note: Disabling hibernation will remove the hibernate option from the shutdown menu.

    1. Compress Files and Folders

    Compressing files reduces their size, freeing up disk space.

    Steps to Compress Files:

    1. Right-click on the file or folder you want to compress.
    2. Select Properties.
    3. Click on the Advanced button.
    4. Check Compress contents to save disk space.
    5. Click OK, then Apply, and choose whether to apply changes to subfolders and files.

    Tip: Compress infrequently accessed files to save space without impacting performance.

    1. Use Third-Party Cleanup Tools

    Third-party tools can provide additional options for cleaning up disk space.

    Popular Tools:

    • WinDirStat: Visualizes disk usage and helps identify large files and folders.
    • BleachBit: Cleans cache, temporary files, and other unnecessary data.
    • CCleaner: Removes junk files and manages startup programs.

    Note: Ensure you download these tools from their official websites to avoid malware.

    Conclusion

    Regular maintenance of your Windows PC by freeing up disk space ensures optimal performance and extends the life of your system. By following the steps outlined above, you can effectively manage your storage and prevent issues related to low disk space.