Building your own PC is an exciting endeavor, offering you complete control over performance and budget. However, connecting all the internal components correctly is crucial for a successful build. I’ve personally guided many first-time builders through this process, and this comprehensive guide will walk you through each step of how to connect the internal components on your PC build in April 2025, ensuring a smooth and functional system.
Crucial First Step: Preparation and Safety
Before you start connecting anything, ensure your workspace is clean, well-lit, and static-free. Use an anti-static wrist strap to prevent electrostatic discharge (ESD), which can damage sensitive components. Refer to your component manuals for specific instructions.
Step 1: Installing the CPU on the Motherboard (The Brain)
The CPU is the heart of your PC, and its installation on the motherboard is a delicate but essential first step.
- Open the CPU Socket Lever: Locate the CPU socket on the motherboard. It will have a lever or arm that you need to gently lift to open the socket.
- Align the CPU: Look for a small arrow or triangle on one corner of the CPU. This marker needs to align with a corresponding mark on the CPU socket.
- Gently Place the CPU: Carefully place the CPU into the socket, ensuring it sits flush without any force. Do not force it!
- Close the CPU Socket Lever: Once the CPU is seated correctly, gently close the lever to secure it in place.
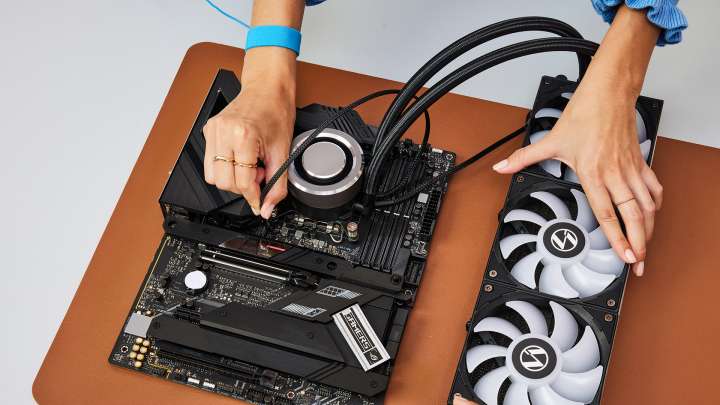
Step 2: Installing the CPU Cooler (Keeping Things Cool)
Your CPU generates heat, so installing a cooler is vital to prevent overheating.
- Apply Thermal Paste (If Necessary): If your CPU cooler doesn’t have pre-applied thermal paste, apply a small amount (about the size of a grain of rice) to the top center of the CPU.
- Mount the Cooler: Place the CPU cooler on top of the CPU, aligning the mounting holes with the standoffs on the motherboard. Secure the cooler with screws or clips, following the cooler’s specific instructions. Tighten screws evenly.
Step 3: Installing RAM on the Motherboard (Short-Term Memory)
RAM provides fast access to data for your CPU.
- Locate the RAM Slots: Find the long, thin slots on your motherboard with clips on either end. Refer to your motherboard manual to determine the correct slots to use for your desired RAM configuration (e.g., dual-channel).
- Open the RAM Slot Clips: Gently push outwards on the clips at both ends of the RAM slots.
- Align the RAM Module: Align the notch on the RAM stick with the notch in the slot.
- Insert the RAM Module: Press down firmly and evenly on both ends of the RAM stick until it clicks into place and the clips close.
Step 4: Mounting the Motherboard in the Case (The Foundation)
The motherboard houses all your main components.
- Install Stand-offs: Ensure your PC case has stand-offs installed in the correct positions for your motherboard size (ATX, microATX, etc.). These elevate the motherboard and prevent short circuits.
- Place the Motherboard: Carefully place the motherboard into the case, aligning the screw holes with the stand-offs.
- Secure the Motherboard: Screw the motherboard to the stand-offs using Phillips head screws. Don’t overtighten.
Step 5: Installing the Graphics Card (GPU – For Visual Power)
The GPU is essential for gaming and graphically intensive tasks.
- Locate the Primary PCIe x16 Slot: This is usually the longest PCIe slot on your motherboard and often a different color.
- Remove Slot Covers: Remove the appropriate slot covers from the back of your PC case that align with the PCIe x16 slot.
- Open the PCIe Slot Clip: There’s usually a small clip at the end of the PCIe slot. Open it.
- Insert the Graphics Card: Align the gold connector pins on the graphics card with the PCIe slot and press down firmly until it clicks into place and the clip closes.
- Secure the Graphics Card: Screw the graphics card to the case using the tabs you exposed by removing the slot covers.
Step 6: Installing Storage Devices (SSDs and HDDs – For Your Data)
SSDs provide fast storage for your OS and frequently used programs, while HDDs offer larger capacity for mass storage.
- Locate Drive Bays: Find the drive bays in your PC case (usually at the front or bottom).
- Mount the Drives: Secure your SSD and/or HDD in the drive bays using screws.
- Connect SATA Data Cables: Connect one end of a SATA data cable to the data port on your SSD/HDD and the other end to a SATA port on your motherboard. Note which SATA port on the motherboard you use.
Step 7: Installing the Power Supply Unit (PSU – The Power Source)
The PSU provides power to all your components.
- Place the PSU: Put the PSU in its designated bay in the PC case (usually at the bottom-rear).
- Secure the PSU: Screw the PSU to the case.
Step 8: Connecting Power Supply Cables (Providing the Juice)
Connect the appropriate power cables from the PSU to your components. Refer to your component manuals for specific connections.
- 24-pin ATX Connector: Connect the large 24-pin ATX cable from the PSU to the corresponding connector on the motherboard. This is the main power connector.
- 8-pin (or 4+4 pin) EPS Connector: Connect the 8-pin (or split 4+4 pin) EPS cable from the PSU to the CPU power connector on the motherboard (usually near the CPU socket).
- PCIe Power Connectors (6-pin or 8-pin): If your graphics card requires additional power, connect the appropriate PCIe power cables from the PSU to the connectors on the graphics card.
- SATA Power Connectors: Connect SATA power cables from the PSU to the power connectors on your SSDs and HDDs.
Step 9: Connecting Case Fans and Front Panel Connectors (Cooling and Controls)
Connect the cables for your case fans and the front panel connectors (power button, USB ports, audio jacks) to the motherboard. Refer to your motherboard manual for the location and orientation of these connectors.
- Case Fans: Connect the fan cables to the fan headers on the motherboard.
- Front Panel Connectors: Carefully connect the small cables from your case’s front panel to the corresponding pins on the motherboard (usually labeled PWRBTN, RESET, USB, AUDIO, etc.).
Step 10: Cable Management (Keeping Things Tidy)
Organize and route your cables neatly using cable ties or Velcro straps. Good cable management improves airflow and makes future upgrades easier.
My Personal Insights on Connecting PC Components
Building a PC can be a rewarding experience. Take your time, double-check connections, and don’t hesitate to consult your manuals. In a place like Delhi, where dust can be a concern, good cable management promoting airflow is especially important for component longevity. Enjoy your new PC!