Upgrading your computer’s graphics card (GPU) is one of the most significant ways to boost gaming performance, improve visual fidelity in creative applications, and even enhance general system responsiveness. Whether you’ve just purchased a shiny new GPU in Delhi, India, or are looking to upgrade your existing system, installing it correctly is crucial for optimal performance. I’ve personally installed countless graphics cards over the years, and this guide will walk you through a detailed, step-by-step process on how to install a graphics card in your PC in April 2025.
Crucial First Step: Preparation and Safety
Before you begin, ensure your computer is completely powered off and unplugged from the wall outlet. Ground yourself using an anti-static wrist strap to prevent electrostatic discharge (ESD), which can damage sensitive components. Refer to your graphics card and motherboard manuals for any specific instructions.
Step 1: Checking Compatibility (Ensuring a Perfect Fit)
Before you even open your PC, ensure your new graphics card is compatible with your system.
- Motherboard PCIe Slot: Your graphics card will use a PCIe (Peripheral Component Interconnect Express) x16 slot. Most modern motherboards have at least one. Check your motherboard manual to locate the primary PCIe x16 slot (it’s usually the longest slot and often a different color). Ensure your new GPU uses the same PCIe version (e.g., PCIe 4.0, PCIe 5.0) as your motherboard for optimal performance, although generally, newer cards are backward compatible with older slots.
- Power Supply Unit (PSU): Your new graphics card will likely require additional power from your PSU. Check the power requirements of your GPU (listed on the product page or in the manual) and ensure your PSU provides sufficient wattage. Also, check if your PSU has the necessary PCIe power connectors (usually 6-pin or 8-pin connectors). You might need to upgrade your PSU if it doesn’t meet the requirements. In regions like Delhi, India, ensure your PSU is also compatible with the local voltage.
- Case Size: Make sure your PC case has enough physical space to accommodate the size of your new graphics card. High-end GPUs can be quite large.
Step 2: Preparing Your PC for Installation (Opening the Case and Making Space)
Now, let’s get your PC ready for the new GPU.
- Open Your Computer Case: Remove the side panels of your desktop computer case. Consult your case manual if you’re unsure how to do this.
- Locate the PCIe x16 Slot: Identify the primary PCIe x16 slot on your motherboard.
- Remove Existing Graphics Card (If Applicable): If you are upgrading, you’ll need to remove your old graphics card. Locate the retaining clip at the end of the PCIe slot and gently push or pull it to release the old card. Carefully grasp the old card by its edges and pull it straight out of the slot.
- Remove Slot Covers: Look at the back of your PC case, aligned with the PCIe x16 slot. There will be metal slot covers that need to be removed to make space for the output ports of your new graphics card. Remove the appropriate number of slot covers (usually one or two) using a screwdriver if necessary.
Step 3: Installing the New Graphics Card (The Physical Connection)
With your PC prepared, it’s time to install the new GPU.
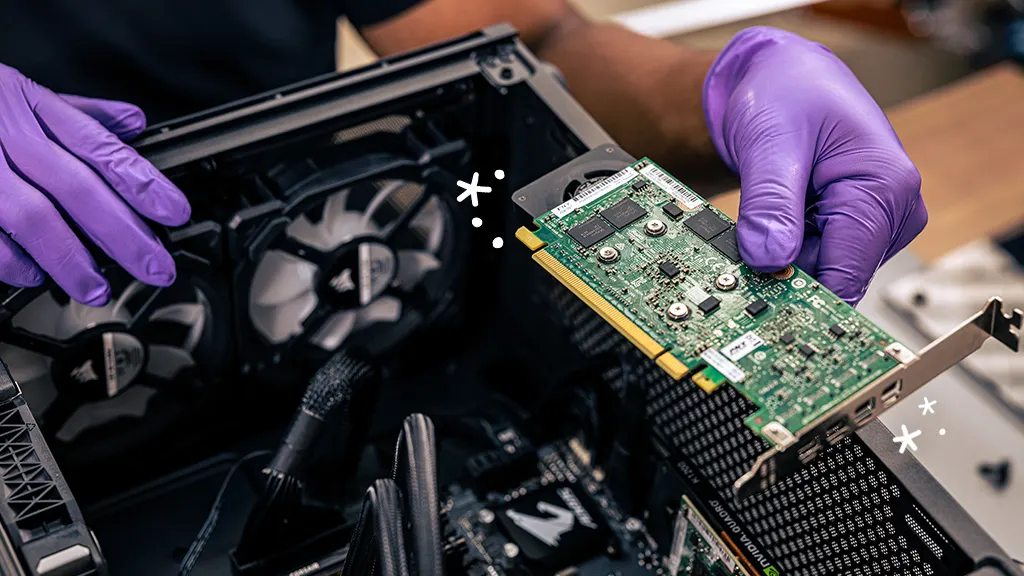
- Align the Graphics Card: Align the gold connector pins on the bottom edge of your new graphics card with the PCIe x16 slot on your motherboard.
- Insert the Graphics Card: Press down firmly and evenly on the top of the graphics card until it clicks securely into the PCIe slot. You should hear or feel the retaining clip on the end of the slot snap into place.
- Secure the Graphics Card to the Case: Using the screw(s) you exposed by removing the slot covers in Step 2, secure the graphics card to the back of your PC case. This will prevent it from moving around.
Step 4: Connecting Power Supply Cables (Providing the Necessary Juice)
Most modern, mid-range to high-end graphics cards require direct power from your PSU.
- Locate PCIe Power Connectors on Your PSU: Find the 6-pin or 8-pin PCIe power cables coming from your power supply unit. Your graphics card manual will specify the type and number of connectors required.
- Connect Power Cables to the Graphics Card: Plug the appropriate PCIe power cable(s) into the corresponding connector(s) on your graphics card. Ensure the connection is firm and secure.
Step 5: Reassembling Your Computer (Putting It All Back Together)
With the graphics card installed and powered, you can now reassemble your PC.
- Carefully Route Cables: Ensure any cables are routed away from the graphics card fans to allow for proper airflow.
- Replace the Side Panels: Align the side panels of your computer case and secure them with the screws you removed earlier. Don’t overtighten.
Step 6: Connecting Your Monitor (Seeing the Visual Output)
Now, connect your monitor to your new graphics card.
- Locate the Video Ports on Your Graphics Card: Look at the back of your PC case, aligned with your new graphics card. You should see the GPU’s video output ports (usually HDMI and/or DisplayPort).
- Connect Your Monitor Cable: Connect your monitor cable (HDMI or DisplayPort) to one of the available ports on your graphics card. Make sure the other end is securely connected to your monitor.
Step 7: Installing Graphics Drivers (Making the Software Work with the Hardware)
With the physical installation complete, you need to install the drivers that allow your operating system and applications to communicate with your new graphics card.
- Power On Your Computer: Plug in your computer and turn it on.
- Download Drivers from Manufacturer Website: Once your operating system has loaded, open a web browser and go to the official website of your graphics card manufacturer (NVIDIA, AMD, or Intel).
- Search for Drivers: Find the drivers for your specific graphics card model and your operating system (Windows 10 or Windows 11 in April 2025).
- Download and Install Drivers: Download the latest drivers and run the installer file. Follow the on-screen instructions to install the drivers. It’s often recommended to perform a “clean install” if you are upgrading from a different manufacturer’s card.
- Restart Your Computer: After the driver installation is complete, restart your computer.
Step 8: Verifying the Installation (Confirming Success)
Once your computer restarts, you can verify that your new graphics card is installed and working correctly.
- Open Device Manager: Right-click on the Start button and select “Device Manager.”
- Expand Display Adapters: Double-click on “Display adapters.” You should see your new graphics card listed without any yellow exclamation marks or error indicators.
Congratulations! You have successfully installed your new graphics card. You should now be able to enjoy improved graphics performance in your favorite games and applications in April 2025.
My Personal Insights on Installing Graphics Cards
Having installed numerous graphics cards over the years, I can say that the process is generally straightforward. The most important steps are ensuring compatibility beforehand and taking your time during the physical installation. In a place like Delhi, India, where power stability can sometimes be a concern, having a power supply that meets the demands of your new GPU is crucial for reliable performance. Don’t hesitate to consult online resources or seek help from experienced PC builders if you encounter any difficulties. Enjoy your upgraded graphics!