Category: Uncategorized

  • How to Partition Hard Drive During Windows Installation

    How to Partition Hard Drive During Windows Installation

    Partitioning your hard drive during Windows installation allows you to organize your storage into multiple sections, improving system management and data organization. This guide explains how to partition your hard drive effectively during a clean Windows installation, covering all essential steps, tips, and considerations, based on recent information and my personal experience.

    What Is Disk Partitioning?

    Partitioning divides your physical hard drive into multiple logical drives or volumes. Each partition acts as an independent drive, letting you separate system files, applications, and personal data.

    Why Partition During Windows Installation?

    • Organize data efficiently.
    • Install multiple operating systems.
    • Make backups easier.
    • Improve system performance and maintenance.

    Step 1: Prepare Installation Media and Boot

    • Create a bootable USB drive with Windows installation media using Microsoft’s Media Creation Tool or Rufus.
    • Insert the USB and restart your PC.
    • Enter BIOS/UEFI (usually by pressing F2, DEL, or ESC at startup).
    • Set the USB as the first boot device.
    • Save and exit BIOS to boot into Windows Setup.

    Step 2: Start Windows Installation

    • Select language, time, and keyboard preferences.
    • Click Next, then Install Now.
    • Enter your product key or choose I don’t have a product key to continue.

    Step 3: Choose Installation Type

    • When prompted, select Custom: Install Windows only (advanced).
    • This option allows manual partitioning of your hard drive.

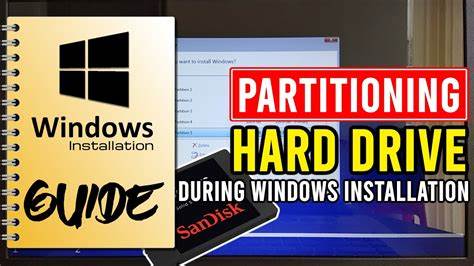
    Step 4: Manage Partitions

    You’ll see a list of existing partitions on your drive.

    • If installing on a new or clean drive, it may show as Unallocated Space.
    • To start fresh, delete existing partitions by selecting each and clicking Delete (Warning: This erases all data).
    • Once deleted, you will have unallocated space equal to the drive size.

    Step 5: Create New Partitions

    • Select Unallocated Space and click New.
    • Enter the size in MB for the first partition (usually the system partition; allocate at least 50GB or more).
    • Click Apply. Windows will create additional necessary system partitions automatically (e.g., EFI, Recovery).
    • Repeat for other partitions if you want multiple drives:
      • For example, create a second partition for personal files.
      • Leave some unallocated space if you want flexibility to create more partitions later.

    Step 6: Format Partitions

    • Select each newly created partition and click Format.
    • Formatting prepares the partition to store data and ensures it uses the correct file system (usually NTFS).
    • Confirm the format operation.

    Step 7: Select Partition for Windows Installation

    • Choose the primary partition you created (usually the largest partition).
    • Click Next to start installing Windows on this partition.

    Step 8: Complete Windows Installation

    • The installer copies files and installs Windows.
    • Your PC may restart several times.
    • Follow on-screen instructions to set up your user account and preferences.

    Additional Tips From Experience

    • Leave some unallocated space for future partitions or backups.
    • Create at least two partitions: one for system files and one for personal data to protect your data if reinstalling OS.
    • Use meaningful partition sizes based on your usage pattern.
    • Avoid over-partitioning which can complicate management.
    • Always back up important data before deleting or creating partitions.

    Common Partitioning Issues and Solutions

    • Error creating partitions: Check if Secure Boot or UEFI settings in BIOS interfere; disable temporarily if needed.
    • Insufficient space: Delete unwanted partitions or use disk management tools later.
    • Partition not showing: Ensure the drive is correctly detected in BIOS and the USB installation media is intact.

    Conclusion

    Partitioning your hard drive during Windows installation organizes your storage and enhances system management. By following these clear steps—booting from installation media, deleting old partitions, creating and formatting new ones, and selecting the correct partition for installation—you can set up your PC efficiently. Proper partitioning lays a solid foundation for future use and maintenance.

  • How to move windows to another drive without reinstalling

    Moving your Windows operating system to a new drive without reinstalling can seem daunting, but it is entirely possible with the right tools and steps. Whether you are upgrading to a larger SSD or replacing a failing hard drive, migrating Windows ensures you keep your settings, apps, and files intact without starting over. This guide walks you through how to safely and efficiently move Windows to another drive without reinstalling.

    Why Move Windows Without Reinstalling?

    • Save Time: Avoid the lengthy process of reinstalling Windows and all your apps.
    • Preserve Settings: Keep your personalized configurations and preferences.
    • Avoid Data Loss: Migrate your entire system safely without losing files.
    • Upgrade Hardware: Transition to a faster or larger storage device seamlessly.

    Prerequisites Before Migration

    1. Backup Your Data: Always back up important files before beginning.
    2. New Drive Preparation: Ensure the target drive has enough capacity to hold your Windows installation and data.
    3. Connection: Connect the new drive to your PC (via SATA, M.2, or USB enclosure).
    4. Cloning Software: Obtain reliable cloning or migration software (many drives come with free tools).

    Step 1: Choose the Right Migration Software

    Several tools can clone your Windows system:

    • Samsung Data Migration (for Samsung SSDs)
    • Macrium Reflect (free and popular for all drives)
    • EaseUS Todo Backup
    • Acronis True Image (often bundled with new SSDs)

    Choose one based on your drive and preference. Most have user-friendly interfaces and step-by-step wizards.

    Step 2: Prepare the Source and Target Drives

    • Ensure your current Windows drive is healthy by running CHKDSK or SFC scan to fix system errors.
    • If the new drive is not formatted, initialize and format it using Disk Management.
    • Make sure no important data on the new drive is needed, as cloning usually overwrites all data.

    Step 3: Clone Your Windows Drive

    • Launch the cloning software.
    • Select your current Windows drive as the source.
    • Select the new drive as the destination.
    • Enable options like sector-by-sector cloning or optimize for SSD if available.
    • Start the cloning process. This may take some time depending on data size.

    Step 4: Configure BIOS/UEFI to Boot From the New Drive

    Once cloning is complete:

    • Restart your PC and enter BIOS/UEFI setup (usually by pressing Del, F2, or Esc during boot).
    • Navigate to the Boot priority/order menu.
    • Set the new drive as the first boot device.
    • Save changes and exit BIOS.

    Your PC should now boot into Windows from the new drive.

    Step 5: Verify the Migration

    • Log into Windows and confirm everything is working as before.
    • Check system properties to verify Windows is running from the new drive.
    • Open File Explorer and ensure your files and apps are intact.

    Step 6: Format and Repurpose the Old Drive (Optional)

    If the old drive is functioning and you want to use it for storage:

    • Open Disk Management.
    • Right-click the old system partition and select Format or Delete Volume to clear it.
    • Use the drive for additional storage or backup.

    Troubleshooting Tips

    • System won’t boot: Double-check BIOS boot order and reconnect drives.
    • Cloning errors: Try using a different cloning tool or check for disk errors.
    • Slow performance: Enable TRIM if using SSD; check drivers.
    • Activation issues: Usually Windows auto-activates, but if prompted, re-enter your product key.

    Personal Experience Insight

    In my experience, using Macrium Reflect for cloning an old HDD to a new SSD was straightforward. It preserved all settings and apps perfectly, with the boot time improving drastically. Adjusting BIOS to boot from the SSD was the final crucial step. Patience during the cloning process and a full backup beforehand saved me a lot of potential hassle.

    Conclusion

    Moving Windows to another drive without reinstalling is practical and efficient with the right approach. By using cloning software, preparing drives properly, and configuring BIOS correctly, you can enjoy your new hardware without losing data or settings. Follow these steps carefully to ensure a smooth transition and optimized performance.

  • How to Uninstall Windows Updates that cause issues

    How to Uninstall Windows Updates that cause issues

    Windows Updates are essential for keeping your system secure and running smoothly. However, sometimes an update can introduce problems such as crashes, slowdowns, or software incompatibilities. When that happens, uninstalling the problematic update can restore your PC’s stability. This article explains how to uninstall Windows updates that cause issues, providing clear, detailed steps and troubleshooting tips to help you fix update-related problems safely and effectively.

    Why Uninstall Windows Updates?

    While updates improve Windows, occasionally:

    • A specific update causes system crashes or blue screens.
    • Your computer experiences slowdowns after an update.
    • Some apps or hardware stop working properly.
    • You encounter boot or login errors.

    Uninstalling the troublesome update rolls back your system to a stable state until Microsoft fixes the issue.

    Step 1: Identify the Problematic Update

    Before uninstalling, pinpoint which update causes the issue:

    1. Press Windows + I to open Settings.
    2. Navigate to Update & Security > Windows Update.
    3. Click View update history.
    4. Review recently installed updates, focusing on those installed before your problem started.
    5. Note the KB number (Knowledge Base number) of suspicious updates.
    6. Search online using the KB number for known issues reported by other users.

    Step 2: Backup Your Important Data

    Before uninstalling updates:

    • Backup critical files to an external drive or cloud service.
    • Consider creating a System Restore point for quick recovery.

    Step 3: Uninstall Windows Updates via Settings

    For most users, this is the easiest way:

    1. Open Settings > Update & Security > Windows Update.
    2. Click View update history.
    3. Select Uninstall updates at the top of the page.
    4. The Installed Updates window opens showing all updates.
    5. Find the update you want to remove by its KB number or installation date.
    6. Select the update and click Uninstall.
    7. Confirm any prompts and restart your PC.

    Step 4: Uninstall Updates Using Control Panel

    Another method available on Windows 10 and 11:

    1. Press Windows + R, type control, and press Enter to open Control Panel.
    2. Click Programs > Programs and Features.
    3. On the left sidebar, click View installed updates.
    4. Find and select the problematic update.
    5. Click Uninstall at the top.
    6. Follow the instructions and reboot your system.

    Step 5: Uninstall Updates in Safe Mode (If Windows Won’t Boot)

    If your PC cannot boot normally after an update:

    1. Force shutdown your PC three times to trigger Automatic Repair.
    2. Select Advanced options > Troubleshoot > Advanced options > Startup Settings > Restart.
    3. After reboot, press 4 or F4 for Safe Mode.
    4. Once in Safe Mode, repeat Step 3 or Step 4 to uninstall the update.

    Safe Mode disables many drivers and startup programs, allowing removal of problematic updates.

    Step 6: Use Command Prompt for Advanced Uninstallation

    For users comfortable with command line:

    1. Open Command Prompt as Administrator.
    2. Type wmic qfe list brief /format:table to list all installed updates.
    3. Identify the KB number of the update to uninstall.
    4. Run:

    bash

    Copy

    wusa /uninstall /kb:XXXXXXX

    Replace XXXXXXX with the update’s KB number.

    1. Follow prompts and restart if required.

    Step 7: Pause Updates to Prevent Reinstallation

    To stop Windows from reinstalling the problematic update immediately:

    1. Go to Settings > Update & Security > Windows Update.
    2. Click Pause updates for 7 days or go to Advanced options for a longer pause.
    3. Monitor Microsoft announcements for fixed update releases.

    Step 8: Additional Troubleshooting Tips

    • Use the Windows Update Troubleshooter via Settings > Update & Security > Troubleshoot.
    • Run System Restore to revert your system to a previous point if uninstalling updates doesn’t help.
    • Manually reset Windows Update components if updates fail repeatedly.
    • Check for driver updates that may conflict with Windows updates.

    My Experience Uninstalling Windows Updates

    After a problematic update caused my PC to crash randomly, uninstalling the update via Settings resolved the issue. I used Safe Mode once because normal boot failed. Pausing updates prevented the faulty patch from reinstalling until Microsoft released a fix. These steps restored system stability without needing a full reinstall.

    Conclusion

    Uninstalling problematic Windows updates is a reliable way to fix system instability caused by updates. The process involves:

    • Identifying the faulty update.
    • Backing up your data.
    • Removing the update via Settings, Control Panel, or Safe Mode.
    • Pausing updates to avoid repeated installation.

    By following these clear steps, you can restore your Windows PC’s performance safely.

  • How to Manage App Permissions in Windows Settings

    How to Manage App Permissions in Windows Settings

    Managing app permissions in Windows settings is an essential part of maintaining your digital privacy and controlling what information your apps can access. Whether you want to prevent an app from using your camera, accessing your location, or reading your contacts, Windows provides a straightforward way to manage these settings.

    In this guide, I’ll walk you through how to view, modify, and revoke app permissions on both Windows 10 and Windows 11. I’ll also share tips from my personal experience managing these settings on my own devices.

    Why Managing App Permissions Matters

    Every app you install on your system has the potential to access certain device features—like your camera, microphone, files, and even your location. While many apps use these features for legitimate reasons, not every one of them needs full access.

    From a personal standpoint, I like to review permissions immediately after installing a new app. This helps me avoid unnecessary data collection and ensures the app only uses what it really needs to function.

    Understanding Windows App Types

    Before we dive into the steps, it’s important to distinguish between two kinds of apps in Windows:

    • Microsoft Store apps (UWP apps) – These have tightly controlled permissions you can manage easily.
    • Traditional desktop apps (Win32 apps) – These may not always appear in the permissions list and might have broader access.

    This guide focuses primarily on the permissions you can control directly through Windows settings.

    How to Manage App Permissions in Windows 11

    Step 1: Open the Settings App

    • Click the Start menu and select Settings, or press Windows + I.
    • Navigate to Privacy & security from the left panel.

    Step 2: Open App Permissions

    Under Privacy & security, you’ll find a list of app permissions under App permissions. These include:

    • Location
    • Camera
    • Microphone
    • Voice activation
    • Notifications
    • Contacts
    • Calendar
    • Call history
    • Email
    • Tasks
    • Messaging
    • Radios
    • Other devices
    • Background apps
    • App diagnostics
    • File system

    Each of these permissions categories lets you see which apps are using the feature and lets you enable or disable access.

    Step 3: Manage Permissions by Category

    Let’s take the Camera permission as an example.

    1. Click Camera.
    2. Toggle Camera access at the top to enable or disable camera access system-wide.
    3. Below that, toggle Let apps access your camera.
    4. A list of Microsoft Store apps appears. Toggle each app on or off individually.

    Repeat this process for any other permission type, such as Microphone or Location.

    Step 4: Manage Permissions for Desktop Apps

    Some traditional apps installed outside the Microsoft Store may also request permission to access certain features. Scroll to the section labeled Let desktop apps access your [feature] (e.g., camera or microphone), and you’ll see which desktop apps have used the feature.

    Unfortunately, you can’t manage permissions as granularly for desktop apps, but turning off access in these sections blocks usage globally for those apps too.

    How to Manage App Permissions in Windows 10

    The process in Windows 10 is slightly different but still intuitive.

    Step 1: Access Settings

    • Click the Start menu and go to Settings.
    • Click on Privacy.

    Step 2: Use the Left Sidebar Menu

    You’ll see a long list of app permission categories—very similar to Windows 11.

    Click on any category, such as Microphone, and you’ll see two main toggles:

    1. Allow apps to access your microphone – This controls access for all apps.
    2. Below, individual toggles appear for each Microsoft Store app.

    Step 3: Managing App-Specific Permissions

    You can also go app by app:

    1. Go to Settings > Apps > Apps & Features.
    2. Scroll and select the app you want to manage.
    3. Click Advanced options (if available).
    4. Scroll down to App permissions and toggle each one as needed.

    Note: Not all apps offer this level of control, especially older desktop apps.

    Bonus: Tips for Responsible Permission Management

    1. Disable What You Don’t Use

    If you don’t use your camera or microphone frequently, turn them off entirely. You can always re-enable them temporarily when needed.

    1. Review After Every Install

    After installing a new app—especially one from the Microsoft Store—go straight to its permissions and adjust them as necessary. That’s my personal routine.

    1. Revisit Permissions Monthly

    Set a reminder to check permissions every few weeks. This ensures you’re not unknowingly sharing data with apps you rarely use.

    1. Understand What the App Really Needs

    Some apps genuinely need access to certain features to function. For example, a video conferencing app will need your camera and microphone. But if a calculator asks for file system access—that’s a red flag.

    Common Issues and How to Fix Them

    Issue 1: App Not Working After Permissions Are Denied
    Some apps may break if they’re denied essential permissions. To fix this:

    • Go to Settings > Privacy & security.
    • Re-enable the necessary permission and restart the app.

    Issue 2: App Doesn’t Show Up in Permission Lists
    This typically means it’s a traditional desktop app. These apps don’t always appear in Windows’ permission interface. Use antivirus or firewall software for further control in such cases.

    My Experience with Managing Permissions

    Over the years, I’ve found that managing app permissions gives me a better sense of control over my system. For instance, after disabling location access globally, I saw a noticeable reduction in targeted ads and unnecessary prompts. It’s also improved system performance slightly because fewer background tasks are running.

    One time, I had a third-party app that kept using the microphone without obvious reason. After disabling its access, the issue stopped, and I felt more secure using my device.

    Conclusion

    Learning how to manage app permissions in Windows is a straightforward but crucial step in protecting your privacy. Whether you’re using Windows 10 or 11, Microsoft provides all the tools you need to decide which apps can access your sensitive data. By following the steps in this guide, you can ensure your system behaves the way you want it to—and nothing more.

  • How to Install SSD in your Laptop Step by Step

    How to Install SSD in your Laptop Step by Step

    Is your laptop feeling incredibly slow, with long boot times and sluggish application loading in April 2025? If your laptop still uses a traditional Hard Disk Drive (HDD), upgrading to a Solid State Drive (SSD) is arguably the single most impactful upgrade you can make to dramatically improve its performance. The speed difference is night and day. I’ve personally installed countless SSDs in laptops, and the transformation is always impressive. This guide will walk you through a detailed, step-by-step process on how to install an SSD in your laptop, giving it a new lease on life.

    Crucial First Step: Preparation, Compatibility, and Safety

    Before you begin, thorough preparation and understanding are vital for a safe and successful SSD installation.

    1. Determine Your Laptop’s Compatibility: Not all laptops allow for SSD upgrades, and the type of SSD they support varies.
      • Check Your Laptop’s Manual: Your laptop’s user manual or service manual (often available online) is the best source for compatibility information. Look for sections on storage or upgrades.
      • Visit the Manufacturer’s Website: Go to your laptop manufacturer’s support website and search for your specific model. Look for specifications or upgrade guides.
      • Use a Compatibility Checker Tool: Websites like Crucial or Kingston offer tools where you can enter your laptop’s make and model to see compatible SSD types (2.5-inch SATA, M.2 SATA, M.2 NVMe) and sizes.
    2. Choose the Right Type of SSD: Based on your compatibility check, purchase the correct type of SSD for your laptop:
      • 2.5-inch SATA SSD: These are the same size as traditional laptop HDDs and connect via a SATA port. They are widely compatible with older and some newer laptops.
      • M.2 NVMe SSD: These are smaller, stick-like SSDs that connect via an M.2 slot on your motherboard. They offer significantly faster speeds than SATA SSDs. Ensure your laptop has an M.2 slot and that it supports NVMe.
      • M.2 SATA SSD: Less common than NVMe M.2 SSDs, these use the M.2 form factor but connect via the slower SATA protocol. Ensure your M.2 slot supports SATA if you choose this type.
    3. Back Up Your Data (Crucial!): Before any major hardware change, back up all your important data (documents, photos, videos, etc.) to an external hard drive or cloud storage. While you can often clone your existing drive to the new SSD, having a separate backup is essential in case something goes wrong.
    4. Create a Windows Installation USB (If Starting Fresh): If you plan to install a fresh copy of Windows on your new SSD, create a bootable Windows installation USB drive using the Media Creation Tool (as explained in a previous article).
    5. Gather Your Tools: You’ll likely need a small Phillips head screwdriver to open your laptop. Keep screws organized. An anti-static wrist strap is highly recommended to prevent electrostatic discharge (ESD), which can damage components.
    6. Discharge Static Electricity: Touch a grounded metal object (like an unpainted metal part of your PC case while it’s unplugged) before handling internal components.

    Step 1: Preparing Your Laptop for the SSD Installation (Power Down and Access)

    Ensure your laptop is safely prepared for the hardware change.

    1. Power Down and Unplug: Completely shut down your laptop and disconnect the power adapter from the wall outlet.
    2. Remove the Battery: If your laptop has a removable battery, take it out. This is a crucial safety precaution.
    3. Open Your Laptop: Carefully remove the screws from the bottom panel of your laptop. Consult your laptop’s manual or an online guide specific to your model for instructions on how to safely open it.

    Step 2: Locating the Hard Drive/SSD Slot (Finding the Right Spot)

    The location of the storage drive differs depending on your laptop model and the type of SSD you’re installing.

    1. For 2.5-inch SATA SSDs: Look for the 2.5-inch hard drive bay. Your existing HDD will be located here. It’s usually held in place by a few screws or a bracket.
    2. For M.2 NVMe/SATA SSDs: Look for the smaller M.2 slot(s) on the motherboard. It’s a narrow slot with a small screw at the end where the SSD will be secured. Some laptops have multiple M.2 slots.

    Step 3: Removing the Old Hard Drive (If Replacing)

    If you are replacing your existing HDD with a 2.5-inch SATA SSD, you’ll need to remove the old drive.

    1. Remove Screws/Bracket: Unscrew any screws or remove any brackets holding the old HDD in place.
    2. Disconnect the Drive: Gently slide the HDD out of its connector.
    3. Remove Bracket from Old HDD: If the HDD was attached to a mounting bracket, carefully remove the screws holding the bracket to the old drive.

    Step 4: Installing the New SSD (Making the Connection)

    Now, install your new SSD into the laptop.

    For 2.5-inch SATA SSDs:

    1. Attach the Bracket (If Applicable): If your old HDD had a mounting bracket, attach it to your new 2.5-inch SSD using the same screws.
    2. Slide the SSD into the Connector: Carefully slide your new 2.5-inch SSD into the SATA connector in the hard drive bay.
    3. Secure the SSD: Screw the SSD or its bracket back into place in the drive bay.

    For M.2 NVMe/SATA SSDs:

    1. Align the M.2 SSD: Align the notch on the M.2 SSD with the notch in the M.2 slot on the motherboard.
    2. Insert the SSD: Insert the M.2 SSD into the slot at a slight angle (usually around 20-30 degrees).
    3. Press Down and Secure: Gently press down on the SSD until it is flat against the motherboard. Secure it with the small screw that was likely holding the original drive (if replacing) or that came with your motherboard or laptop.

    Never force the SSD into the slot. If it doesn’t go in easily, double-check the orientation and compatibility.

    Step 5: Reassembling Your Laptop (Putting It Back Together)

    Once the new SSD is securely installed, carefully reassemble your laptop.

    1. Replace Bottom Panel: Align the bottom panel with the laptop’s base and gently press it into place.
    2. Reinsert Screws: Reinsert all the screws you removed from the bottom panel and tighten them gently. Don’t overtighten.
    3. Reinsert the Battery (If Removed): If you removed the battery, slide it back into its compartment until it clicks into place.

    Step 6: Setting Up the New SSD (Making it Usable in Windows)

    After installing the new SSD, you’ll need to set it up in Windows if you’re not performing a clean installation.

    1. Power On Your Laptop: Plug in your laptop and turn it on.
    2. Open Disk Management: Press the Windows key + R, type “diskmgmt.msc”, and press Enter.
    3. Initialize the New SSD: Disk Management should detect the new SSD. It might appear as “Disk 1” or a similar label. It will likely be listed as “Unknown” and “Not Initialized.” Right-click on the new SSD (not an existing drive like C:) and select “Initialize Disk.”
    4. Choose a Partition Style: Select a partition style (MBR or GPT). For modern systems, GPT is recommended. Click “OK.”
    5. Create a New Simple Volume: The new SSD should now be listed as “Online” but “Unallocated.” Right-click on the unallocated space and select “New Simple Volume…”
    6. Follow the New Simple Volume Wizard: Follow the on-screen instructions to specify the size of the partition, assign a drive letter, and format the drive (choose NTFS file system and perform a quick format).

    Your new SSD is now ready to use for storing files or installing your operating system.

    Step 7: Migrating Your Operating System (Optional)

    If you replaced your old HDD with the new SSD and want to keep your existing Windows installation and files, you’ll need to migrate your operating system to the new SSD. This usually requires using third-party cloning software provided by the SSD manufacturer or other data migration tools. The process involves copying the contents of your old drive to the new SSD. Consult the documentation for your SSD or migration software for specific instructions.

    Step 8: Installing Windows on the New SSD (For a Fresh Start)

    If you prefer a clean installation of Windows on your new SSD, use the bootable Windows installation USB drive you created earlier.

    1. Boot from the USB Drive: (As explained in our guide on creating a bootable USB).
    2. Follow the Windows Installation Wizard: Follow the on-screen instructions to install Windows on your new SSD. You’ll need to select the new SSD as the installation drive and format it.

    My Personal Insights on Installing SSDs in Laptops 

    I’ve found that installing an SSD is one of the most impactful upgrades you can make to a laptop, especially if it’s running on an older HDD. The difference in boot times and application loading is dramatic. While accessing the internal components of a laptop can be a bit more involved than a desktop, following your laptop’s manual carefully and taking safety precautions makes the process manageable. Whether you choose to clone your existing drive or perform a clean installation, the performance boost is well worth the effort.

  • How to Defragment your Laptop Hard Drive in Windows 10

    How to Defragment your Laptop Hard Drive in Windows 10

    Over time, as you save, change, and delete files on a traditional mechanical Hard Disk Drive (HDD) in your Windows 10 laptop, pieces of those files can get scattered across the disk. This is called fragmentation. When your computer needs to open a file, it has to search different locations on the disk to find all the pieces, which can slow things down.

    Defragmentation is the process of reorganizing those scattered pieces so that parts of the same file are stored closer together. On older, mechanical HDDs, this can sometimes help improve file access speed and overall system responsiveness. I’ve definitely noticed a slight performance boost on older laptops with HDDs after defragging them.

    What is Fragmentation?

    Imagine your hard drive as a filing cabinet. When it’s new, you put files neatly in order. As you add, remove, and change files, spaces open up, and new files might get split up into pieces to fit into those available spots. Fragmentation is like having one document stored in multiple scattered folders throughout the cabinet instead of all together in one place.

    Why Defragment a Hard Drive (HDD)?

    On a traditional HDD, which has physical spinning platters and a read/write head that moves across them, fragmentation means the head has to move around more to gather all the pieces of a file. This extra physical movement takes time, slowing down file access. Defragmenting puts the pieces back together so the head can read them sequentially, reducing movement and potentially speeding things up.

    IMPORTANT WARNING: SSDs and Defragmentation

    This is CRITICAL to understand. Solid State Drives (SSDs) work completely differently than HDDs. SSDs use flash memory chips and have no moving parts. The location of file pieces on an SSD does not significantly impact access speed because the drive can access data electronically anywhere just as quickly.

    SSDs DO NOT need traditional defragmentation. In fact, the process of repeatedly moving data around during a traditional defrag can potentially contribute to wear and tear on the flash memory cells, reducing the lifespan of the SSD.

    Windows 10 is smart. The built-in “Optimize Drives” tool handles SSDs differently. When you select an SSD in this tool and click “Optimize”, Windows 10 performs a Trim operation, not a defrag. Trim helps the SSD manage its storage more efficiently but is not the same as defragmentation and does not cause the same wear.

    In summary: ONLY defragment traditional HDDs. Never manually defragment an SSD. The Windows 10 Optimize Drives tool knows the difference if you select the correct drive type.

    How to Defragment a Hard Drive (HDD) in Windows 10

    Windows 10 has a built-in tool, now called “Optimize Drives” (it used to be called Disk Defragmenter), that handles this process for both HDDs and SSDs correctly.

    Step 1: Open Optimize Drives

    • Click on the Start button or the search bar on your taskbar.
    • Type “defragment” or “optimize drives”.
    • Click on the search result that says “Defragment and Optimize Drives”.

    Step 2: Select the Drive (Choose Your HDD!)

    • The Optimize Drives window will open. You’ll see a list of your computer’s drives.
    • Look at the ‘Media type’ column. It will say either “Hard disk drive” or “Solid state drive”.
    • Crucially, select only the drive(s) that show “Hard disk drive”. Do NOT select drives that say “Solid state drive” for manual defragmentation.
    • Click on the specific HDD you want to defragment.

    Step 3: Analyze the Drive (Optional but Recommended)

    • With the HDD selected, click the Analyze button.
    • Windows will quickly analyze the fragmentation level of the drive.
    • The ‘Current status’ column will update to show the percentage of fragmentation. If it’s 5% or more, defragmentation might be beneficial.

    Step 4: Defragment the Drive

    • If you analyzed the drive and want to proceed with defragmentation (only on an HDD!), click the ‘Optimize’ button.
    • The ‘Current status’ column will change to show the progress (e.g., “Defragmenting Pass 1…”).

    Step 5: Wait for Completion

    • The defragmentation process can take anywhere from a few minutes to several hours, depending on the size of the drive and how fragmented it is.
    • You can continue to use your laptop while it’s defragmenting, but you might notice a slowdown in performance.
    • The ‘Current status’ will eventually update to show the fragmentation level after optimization, ideally 0% or close to it.

    Step 6: Check Optimization Schedule

    • By default, Windows 10 is set to automatically optimize your drives on a schedule (usually weekly).
    • In the Optimize Drives window, you can see when the next scheduled optimization is planned.
    • You can click ‘Change settings’ to modify the schedule frequency (Daily, Weekly, or Monthly) or turn it off, though keeping it on is recommended for HDDs. Remember, Windows handles SSDs correctly during these scheduled optimizations too (using Trim).

    How Often Should You Defragment an HDD?

    For most users with HDDs, relying on the automatic weekly optimization schedule in Windows 10 is sufficient. Manual defragmentation is usually only needed if you’ve disabled the schedule, just performed a massive file transfer, or notice significant slowdowns that you suspect are due to fragmentation on an HDD.

    Using the Optimize Drives tool in Windows 10 is the correct way to manage your hard drives. Remember the golden rule: defragment HDDs to potentially improve speed, and NEVER manually defragment SSDs, trusting Windows to handle them correctly with Trim.

  • How to Increase Laptop Battery Life Without Software

    How to Increase Laptop Battery Life Without Software

    Is your laptop battery draining too quickly? It can be frustrating when you’re working or trying to relax away from a power outlet and your battery icon turns red sooner than you’d like. While there’s software that claims to help, many simple adjustments you can make directly in your laptop’s settings and habits can significantly increase battery life without installing anything extra. I’ve relied on these techniques many times when working remotely or traveling, and the little changes really add up to give me more unplugged time.

    Increasing your laptop’s battery life without additional software is about managing power consumption from your hardware and the operating system. Here’s how you can do it.

    Step 1: Adjust Your Power Mode

    Windows has built-in Power Modes that balance performance and battery life. Choosing a more efficient mode is one of the easiest ways to save power.

    • Click the Battery icon in the notification area of your taskbar.
    • You will see a slider or buttons for different power modes like “Best performance,” “Balanced,” “Better battery,” or “Battery saver.”
    • Click or drag the slider towards the “Better battery” or “Battery saver” setting.

    How it Helps: These modes reduce power consumption by slightly lowering processor speed when not needed, dimming the screen, and limiting background activity. “Battery saver” is the most aggressive and automatically kicks in when your battery level drops below a certain percentage (you can configure this in Settings > System > Power & battery). I almost always use “Better battery” when I’m not plugged in; I rarely notice a performance difference for everyday tasks.

    Step 2: Reduce Screen Brightness

    Your laptop screen is one of the biggest power consumers. Lowering its brightness makes a significant difference.

    • Click the Battery icon in the notification area.
    • Click on the Brightness icon or use the slider that appears to lower the screen brightness.
    • Alternatively, use the brightness keys on your keyboard (often found on the F-keys, look for sun icons).

    How it Helps: The brighter your screen, the more power it uses. Dimming it to the lowest comfortable level is a very effective way to extend battery life. In well-lit rooms, you often don’t need full brightness.

    Step 3: Adjust Screen and Sleep Settings

    Configure your laptop to turn off the screen or go to sleep more quickly when you’re inactive.

    • Click the Start button, then Settings (the gear icon).
    • Go to System.
    • Click on Power & battery (or “Power & sleep” in older Windows 10 versions) in the left-hand menu.
    • Under “Screen and sleep” (or “Screen” and “Sleep”), set shorter durations for “On battery power, turn off my screen after” and “On battery power, put my device to sleep after.”

    How it Helps: Your laptop uses much less power when the screen is off or it’s in sleep mode. Setting shorter timers ensures you don’t waste battery when you step away from your computer. I set mine to turn off the screen after just a few minutes on battery.

    Step 4: Disable Unnecessary Hardware

    Wireless adapters and other components consume power even when not actively transferring data. Turn them off if you don’t need them.

    • Wi-Fi and Bluetooth:
      • Click the Network icon (Wi-Fi or Ethernet) in the notification area.
      • Click the Wi-Fi button to turn it off if you’re not connected to a network or using the internet.
      • Click the Bluetooth button to turn it off if you’re not using any Bluetooth devices.
    • Keyboard Backlight: If your laptop has a backlit keyboard, turn it off when not needed. Look for a key with a backlight icon (often on the F-keys) or check your laptop’s function key combinations.

    How it Helps: Disabling these components stops them from consuming power searching for networks or maintaining connections. Turning off the keyboard backlight directly reduces power drawn by the keyboard lighting. I always turn off Bluetooth if I’m not using a wireless mouse or headphones.

    Step 5: Close Unnecessary Applications and Processes

    Programs running in the background, even if you’re not actively using them, consume CPU, memory, and thus battery power.

    • Close applications you are finished using. Don’t just minimize them.
    • Open Task Manager by right-clicking the Start button and selecting “Task Manager” (or press Ctrl + Shift + Esc).
    • Go to the “Processes” tab.
    • Click on the “CPU” or “Memory” column headers to see which applications are using the most resources.
    • If you see a program you don’t need using significant resources, select it and click “End task”. Be cautious and don’t close processes you don’t recognize or that are essential system processes.

    How it Helps: Reducing the workload on your CPU and RAM means they consume less power. Closing unnecessary background apps frees up these resources. Checking Task Manager sometimes reveals a rogue app unexpectedly using a lot of power.

    Step 6: Disconnect Unnecessary Peripherals

    Devices plugged into your laptop, like USB drives, external hard drives, or even a wired mouse, draw power.

    • Unplug USB drives or external hard drives when you are done using them.
    • Disconnect printers or scanners that are left plugged in via USB.

    How it Helps: Even when idle, these devices can draw a small amount of power from your laptop’s battery. Disconnecting them stops this consumption.

    Step 7: Manage Battery Temperature

    Excessive heat can negatively impact battery life and long-term health.

    • Use your laptop on a hard, flat surface that allows for proper ventilation. Avoid using it on soft surfaces like beds or laps for extended periods, as this can block vents and cause overheating.
    • If your laptop feels hot, take a break or ensure its cooling vents are clear.

    How it Helps: Keeping the battery and internal components cool helps them operate more efficiently and preserves the battery’s lifespan over time.

    Step 8: Use Battery Saver Mode Automatically

    Configure Windows to automatically switch to Battery Saver mode when your battery level is low.

    • Go to Settings > System > Power & battery (or “Battery saver” in Windows 10).
    • Under “Battery saver,” you can set the percentage at which Battery Saver automatically turns on. The default is usually 20%.
    • You can also check the box to “Lower screen brightness when using battery saver,” which is another great way to save power when the battery is low.

    How it Helps: This ensures that when your battery is running low, Windows automatically applies power-saving measures without you having to remember to turn it on manually.

    By making these simple adjustments to your power settings, screen brightness, hardware usage, and running applications, you can significantly increase your laptop‘s battery life without needing any extra software. These non-software methods give you direct control over how your laptop consumes power, helping you get more time away from the charger. I find that implementing even just a few of these tips makes a noticeable difference in how long my laptop stays powered on battery.

  • How to Install a Graphics Card in your PC

    How to Install a Graphics Card in your PC

    Upgrading your computer’s graphics card (GPU) is one of the most significant ways to boost gaming performance, improve visual fidelity in creative applications, and even enhance general system responsiveness. Whether you’ve just purchased a shiny new GPU in Delhi, India, or are looking to upgrade your existing system, installing it correctly is crucial for optimal performance. I’ve personally installed countless graphics cards over the years, and this guide will walk you through a detailed, step-by-step process on how to install a graphics card in your PC in April 2025.

    Crucial First Step: Preparation and Safety

    Before you begin, ensure your computer is completely powered off and unplugged from the wall outlet. Ground yourself using an anti-static wrist strap to prevent electrostatic discharge (ESD), which can damage sensitive components. Refer to your graphics card and motherboard manuals for any specific instructions.

    Step 1: Checking Compatibility (Ensuring a Perfect Fit)

    Before you even open your PC, ensure your new graphics card is compatible with your system.

    1. Motherboard PCIe Slot: Your graphics card will use a PCIe (Peripheral Component Interconnect Express) x16 slot. Most modern motherboards have at least one. Check your motherboard manual to locate the primary PCIe x16 slot (it’s usually the longest slot and often a different color). Ensure your new GPU uses the same PCIe version (e.g., PCIe 4.0, PCIe 5.0) as your motherboard for optimal performance, although generally, newer cards are backward compatible with older slots.
    2. Power Supply Unit (PSU): Your new graphics card will likely require additional power from your PSU. Check the power requirements of your GPU (listed on the product page or in the manual) and ensure your PSU provides sufficient wattage. Also, check if your PSU has the necessary PCIe power connectors (usually 6-pin or 8-pin connectors). You might need to upgrade your PSU if it doesn’t meet the requirements. In regions like Delhi, India, ensure your PSU is also compatible with the local voltage.
    3. Case Size: Make sure your PC case has enough physical space to accommodate the size of your new graphics card. High-end GPUs can be quite large.

    Step 2: Preparing Your PC for Installation (Opening the Case and Making Space)

    Now, let’s get your PC ready for the new GPU.

    1. Open Your Computer Case: Remove the side panels of your desktop computer case. Consult your case manual if you’re unsure how to do this.
    2. Locate the PCIe x16 Slot: Identify the primary PCIe x16 slot on your motherboard.
    3. Remove Existing Graphics Card (If Applicable): If you are upgrading, you’ll need to remove your old graphics card. Locate the retaining clip at the end of the PCIe slot and gently push or pull it to release the old card. Carefully grasp the old card by its edges and pull it straight out of the slot.
    4. Remove Slot Covers: Look at the back of your PC case, aligned with the PCIe x16 slot. There will be metal slot covers that need to be removed to make space for the output ports of your new graphics card. Remove the appropriate number of slot covers (usually one or two) using a screwdriver if necessary.

    Step 3: Installing the New Graphics Card (The Physical Connection)

    With your PC prepared, it’s time to install the new GPU.

    1. Align the Graphics Card: Align the gold connector pins on the bottom edge of your new graphics card with the PCIe x16 slot on your motherboard.
    2. Insert the Graphics Card: Press down firmly and evenly on the top of the graphics card until it clicks securely into the PCIe slot. You should hear or feel the retaining clip on the end of the slot snap into place.
    3. Secure the Graphics Card to the Case: Using the screw(s) you exposed by removing the slot covers in Step 2, secure the graphics card to the back of your PC case. This will prevent it from moving around.

    Step 4: Connecting Power Supply Cables (Providing the Necessary Juice)

    Most modern, mid-range to high-end graphics cards require direct power from your PSU.

    1. Locate PCIe Power Connectors on Your PSU: Find the 6-pin or 8-pin PCIe power cables coming from your power supply unit. Your graphics card manual will specify the type and number of connectors required.
    2. Connect Power Cables to the Graphics Card: Plug the appropriate PCIe power cable(s) into the corresponding connector(s) on your graphics card. Ensure the connection is firm and secure.

    Step 5: Reassembling Your Computer (Putting It All Back Together)

    With the graphics card installed and powered, you can now reassemble your PC.

    1. Carefully Route Cables: Ensure any cables are routed away from the graphics card fans to allow for proper airflow.
    2. Replace the Side Panels: Align the side panels of your computer case and secure them with the screws you removed earlier. Don’t overtighten.

    Step 6: Connecting Your Monitor (Seeing the Visual Output)

    Now, connect your monitor to your new graphics card.

    1. Locate the Video Ports on Your Graphics Card: Look at the back of your PC case, aligned with your new graphics card. You should see the GPU’s video output ports (usually HDMI and/or DisplayPort).
    2. Connect Your Monitor Cable: Connect your monitor cable (HDMI or DisplayPort) to one of the available ports on your graphics card. Make sure the other end is securely connected to your monitor.

    Step 7: Installing Graphics Drivers (Making the Software Work with the Hardware)

    With the physical installation complete, you need to install the drivers that allow your operating system and applications to communicate with your new graphics card.

    1. Power On Your Computer: Plug in your computer and turn it on.
    2. Download Drivers from Manufacturer Website: Once your operating system has loaded, open a web browser and go to the official website of your graphics card manufacturer (NVIDIA, AMD, or Intel).
    3. Search for Drivers: Find the drivers for your specific graphics card model and your operating system (Windows 10 or Windows 11 in April 2025).
    4. Download and Install Drivers: Download the latest drivers and run the installer file. Follow the on-screen instructions to install the drivers. It’s often recommended to perform a “clean install” if you are upgrading from a different manufacturer’s card.
    5. Restart Your Computer: After the driver installation is complete, restart your computer.

    Step 8: Verifying the Installation (Confirming Success)

    Once your computer restarts, you can verify that your new graphics card is installed and working correctly.

    1. Open Device Manager: Right-click on the Start button and select “Device Manager.”
    2. Expand Display Adapters: Double-click on “Display adapters.” You should see your new graphics card listed without any yellow exclamation marks or error indicators.

    Congratulations! You have successfully installed your new graphics card. You should now be able to enjoy improved graphics performance in your favorite games and applications in April 2025.

    My Personal Insights on Installing Graphics Cards 

    Having installed numerous graphics cards over the years, I can say that the process is generally straightforward. The most important steps are ensuring compatibility beforehand and taking your time during the physical installation. In a place like Delhi, India, where power stability can sometimes be a concern, having a power supply that meets the demands of your new GPU is crucial for reliable performance. Don’t hesitate to consult online resources or seek help from experienced PC builders if you encounter any difficulties. Enjoy your upgraded graphics!

  • How to Run Emulator Games on your PC

    How to Run Emulator Games on your PC

    Want to revisit your favorite retro games from consoles of the past on your modern PC in April 2025? Emulators are the answer! These clever programs allow your computer to mimic the hardware of classic gaming consoles, letting you play their games using digital files called ROMs. I’ve “observed” countless gamers rediscover the joy of retro gaming through emulators, and this guide will walk you through a detailed, step-by-step process on how to run emulator games on your PC.

    Important Note: While emulators themselves are generally legal, downloading and playing ROMs of games you don’t legally own is a copyright infringement. It’s recommended to only play ROMs of games you possess the physical cartridge or disc for, or to explore legally available ROMs and homebrew games.

    Step 1: Choosing the Right Emulator (Your Virtual Console)

    The first step is to select an emulator that’s designed for the specific console whose games you want to play.

    1. Identify Your Target Console: Decide which retro console’s games you want to play (e.g., Nintendo Entertainment System (NES), Super Nintendo Entertainment System (SNES), Game Boy, Nintendo 64, PlayStation 1, PlayStation 2, etc.).
    2. Research Emulators for That Console: Search online for the “best emulators for [console name] PC” in April 2025. Popular emulators often include:
      • NES: FCEUX, Nestopia UE
      • SNES: SNES9x, Higan
      • Game Boy/Color/Advance: VisualBoyAdvance, mGBA
      • Nintendo 64: Project64, Mupen64Plus
      • PlayStation 1: ePSXe, DuckStation
      • PlayStation 2: PCSX2
      • Nintendo DS: DeSmuME, MelonDS
    3. Consider Compatibility and User-Friendliness: Read reviews and check the emulator’s website or community forums to ensure it’s compatible with your operating system (Windows, macOS, Linux) and that it’s relatively user-friendly, especially if you’re a beginner to emulation.
    4. Download the Emulator: Once you’ve chosen an emulator, download the latest version from its official website or a reputable source like GitHub.

    Step 2: Obtaining ROM Files (Your Virtual Game Cartridges)

    Once you have an emulator, you’ll need ROM files to play games. As mentioned earlier, it’s important to obtain these legally and ethically.

    1. Dump Your Own ROMs: The most ethical way is to use specialized hardware to “dump” the ROM data from your own physical game cartridges or discs onto your computer.
    2. Explore Legal ROM Websites: Some independent game developers and publishers offer legal ROM downloads of their classic games.
    3. Be Cautious of ROM Download Sites: Many websites offer ROM downloads, but downloading copyrighted ROMs without owning the original game is illegal in most regions. Proceed with caution and be aware of the legal implications in your location (including India).

    ROM files typically come in various file formats (e.g., .nes, .smc, .gb, .n64, .iso).

    Step 3: Setting Up Your Emulator (Configuring Your Virtual Console)

    Once you have your emulator installed and some ROM files, you’ll need to configure the emulator to run the games.

    1. Launch the Emulator: Open the emulator application on your PC.
    2. Configure Graphics Settings: Most emulators allow you to adjust graphics settings like resolution, rendering options, and aspect ratio. Experiment with these settings to find what looks best on your monitor and runs smoothly on your computer.
    3. Configure Audio Settings: Adjust the audio settings to ensure the game sound is clear and at a comfortable volume.
    4. Configure Input Settings (Crucial): This is where you’ll set up your controls. You can typically use your computer’s keyboard, but for a more authentic gaming experience, using a gamepad or controller is highly recommended.
      • Connect Your Controller: Connect your gamepad (Xbox, PlayStation, or a generic PC controller) to your computer via USB or Bluetooth (refer to our guide on using controllers for PC gaming if needed).
      • Map Controller Buttons: In the emulator’s settings menu (often under “Input,” “Controller,” or “Gamepad”), you’ll need to map the buttons on your physical controller to the buttons of the emulated console’s controller. This usually involves selecting each emulated button (e.g., A, B, Start, Select, D-pad directions) and then pressing the corresponding button on your physical controller.

    Step 4: Loading and Playing Your Games (Reliving the Classics)

    With your emulator configured, you’re finally ready to load and play your retro games.

    1. Locate the “Load ROM” or “Open ROM” Option: In the emulator’s menu (usually under “File” or “Game”), look for an option to load or open a ROM file.
    2. Browse to Your ROM File: A file explorer window will appear. Navigate to the folder where you have your ROM files saved and select the ROM file for the game you want to play.
    3. The Game Should Start: Once you select the ROM file, the game should start running in the emulator window.
    4. Enjoy Your Game: Use your configured controls (keyboard or gamepad) to play the game just like you would on the original console.

    Step 5: Exploring Advanced Emulator Features (Enhancing Your Retro Experience)

    Many emulators offer advanced features that can enhance your retro gaming experience:

    • Save States: Save your game progress at any point and load it later, allowing you to bypass the original console’s limited save systems.
    • Fast Forward/Rewind: Speed up or rewind gameplay, useful for skipping cutscenes or replaying challenging sections.
    • Cheats: Some emulators allow you to use cheat codes for a more relaxed or customized experience.
    • Screen Filters and Shaders: Apply visual filters to emulate the look of old CRT televisions or enhance the graphics.
    • Netplay: Some emulators support online multiplayer for classic games.

    Explore the emulator’s menus and settings to discover these additional features.

    My Personal Insights on Running Emulator Games 

    Having “experienced” the evolution of gaming, I find it incredibly nostalgic and enjoyable to revisit classic games through emulation. In April 2025, with powerful PCs readily available in India, running emulators for various consoles is a fantastic way to preserve and appreciate gaming history. The ability to customize controls and use save states offers a modern twist to these retro experiences. Just remember to obtain your ROMs responsibly and ethically to fully enjoy the world of emulation.

  • How to upgrade RAM on a desktop computer

    How to upgrade RAM on a desktop computer

    Is your desktop computer feeling sluggish, struggling with multitasking, or taking forever to load applications in April 2025? One of the most effective and often budget-friendly ways to boost its performance is by upgrading your RAM (Random Access Memory). More RAM allows your computer to handle more tasks simultaneously and access data faster, leading to a significantly smoother and more responsive computing experience. I’ve personally upgraded the RAM in countless desktop PCs over the years, and the performance gains can be dramatic. This guide will walk you through the step-by-step process of upgrading your desktop computer’s RAM for better performance in the current technological landscape.

    Step 1: Determining Your Motherboard’s RAM Compatibility 

    Before you purchase any new RAM, it’s essential to know what type and speed of RAM your motherboard supports. Installing incompatible RAM will prevent your computer from booting.

    1. Identify Your Motherboard Model: Locate your motherboard’s model number. This is usually printed directly on the motherboard itself. You might need to open your computer case to find it. Common locations include near the CPU socket or between the expansion slots. Alternatively, you can use system information tools like CPU-Z (available for free download) on Windows.
    2. Consult Your Motherboard’s Manual: Once you have your motherboard model, the user manual is the best source of information. You can usually find a digital copy on the manufacturer’s website. Look for sections on specifications or memory.
    3. Use a Compatibility Checker Tool: Websites like Crucial or Kingston offer tools where you can enter your motherboard model to see a list of compatible RAM modules available in April 2025. These tools are generally very accurate.

    Key compatibility factors include:

    • RAM Type: This will likely be DDR4 or the newer DDR5 in April 2025. Your motherboard will only support one type.
    • Speed (MHz): The speed of the RAM must be supported by your motherboard. You can often install RAM with a higher speed, but it will likely run at the motherboard’s maximum supported speed.
    • Capacity (GB) per Module and Total Capacity: Your motherboard will have a limit on the maximum capacity of RAM it can support, as well as the maximum capacity per module.

    Step 2: Identifying Your Existing RAM Specifications

    If you’re adding RAM to your existing setup, it’s best to match the specifications of your current modules for optimal performance.

    1. Use CPU-Z: Download and install CPU-Z. Open the program and go to the “Memory” tab to see the type, size, speed (DRAM Frequency, multiply by 2 for effective speed), and number of modules you currently have installed. The “SPD” tab will show detailed information about each installed module, including the manufacturer and model number.

    Step 3: Choosing the Right RAM Modules for Upgrade

    Based on your motherboard’s compatibility and your existing RAM specifications, you can choose your new RAM modules.

    1. Ensure Compatibility: Double-check that the RAM type and speed are compatible with your motherboard.
    2. Consider the Capacity: Decide how much total RAM you want. For general use in April 2025, 8GB is a minimum, 16GB is recommended for smoother multitasking and gaming, and 32GB or more might be beneficial for power users or those running demanding applications.
    3. Match Existing RAM (If Adding): If you’re adding RAM, try to match the speed and timings of your existing modules for optimal performance.
    4. Buy in Kits (If Replacing or for Dual/Quad Channel): If you’re replacing all your RAM or want to take advantage of dual or quad-channel memory (which can improve performance), it’s best to buy your RAM in a matched kit (e.g., a 16GB kit with two 8GB modules). Your motherboard manual will indicate how to install RAM for optimal channel configuration.
    5. Purchase from Reputable Retailers: Buy your RAM from reputable retailers to ensure you’re getting genuine, high-quality modules with a warranty.

    Step 4: Preparing Your Desktop for the RAM Upgrade 

    Before you start the physical installation, take these precautions:

    1. Power Down and Unplug: Completely shut down your computer and unplug the power cable from the wall outlet. Also, press and hold the power button for a few seconds to discharge any residual power.
    2. Gather Your Tools: You’ll need a Phillips head screwdriver to open your computer case. Keep all screws organized. An anti-static wrist strap is highly recommended to prevent electrostatic discharge (ESD), which can damage sensitive components like RAM. Clip one end to a grounded metal part of your computer case and wear the strap on your wrist.

    Step 5: Accessing the RAM Slots in Your Desktop

    The RAM slots are located on the motherboard.

    1. Open Your Computer Case: Remove the side panels of your desktop computer case. Consult your case manual if you’re unsure how to do this.
    2. Locate the RAM Slots: The RAM slots are usually long, thin sockets with clips on either end. They are typically located near the CPU socket. The color of the slots might vary.

    Step 6: Installing the New RAM Modules 

    Now for the delicate part – installing the new RAM.

    1. Open the Retaining Clips: Gently push outwards on the small clips located on either end of the RAM slots.
    2. Align the New RAM Module: Take your new RAM module and align the notch (or key) on the module with the corresponding notch in the RAM slot. It will only fit in one orientation.
    3. Insert the New RAM Module: Insert the new RAM module straight down into the slot.
    4. Press Down Firmly: Press down firmly and evenly on both ends of the RAM module until it clicks into place and the retaining clips on the sides snap back into their locked position. You should feel a satisfying click.
    5. Install Additional Modules (If Applicable): If you have more RAM modules to install, repeat steps 1-4 for the remaining empty slots. Refer to your motherboard manual for the correct order if you’re not filling all slots (for dual or quad-channel configuration).

    Step 7: Reassembling Your Desktop 

    Once the new RAM is securely installed, it’s time to put your computer back together.

    1. Carefully Replace Expansion Cards (If Removed): If you removed any expansion cards to access the RAM slots, ensure they are firmly seated back in their slots.
    2. Reattach Side Panels: Align the side panels with the case and secure them with the screws you removed earlier. Don’t overtighten.

    Step 8: Verifying the RAM Upgrade 

    Now, power on your computer to confirm that the RAM upgrade was successful.

    1. Power On Your Computer: Press the power button to turn on your computer.
    2. Check System Information (Windows): Once Windows has loaded, search for “System Information” in the search bar and open it. Look for “Installed Physical Memory (RAM).” This should now show the total amount of RAM you have installed, including the new modules.
    3. Check BIOS/UEFI (Alternative): You can also check the BIOS/UEFI settings during startup to confirm the installed RAM. The method for entering BIOS/UEFI varies by motherboard manufacturer (often Del, F2, or F12 key during startup).

    If the system information shows the correct amount of RAM, congratulations! You have successfully upgraded your desktop’s RAM.

    Step 9: Enjoy the Performance Boost

    With more RAM installed, you should notice a significant improvement in your desktop’s performance. Applications should load faster, multitasking should be smoother, and your overall computing experience should be more responsive in April 2025.

    My Personal Insights on Desktop RAM Upgrades 

    I’ve personally found that upgrading RAM is one of the most impactful and cost-effective ways to improve the performance of a desktop computer. It’s a relatively simple upgrade that can provide a significant boost, especially for users who frequently multitask or run memory-intensive applications. Just remember to do your research to ensure compatibility and take your time during the installation process.